IT tutorials
 
Office
 

Security Features in Microsoft OneNote 2010 : Keeping Private Notes Private (part 2) - Unlocking a Protected Section, Locking All Protected Sections in a Notebook

- Free product key for windows 10
- Free Product Key for Microsoft office 365
- Product Key Free : Microsoft Office 2019 – Serial Number
3/4/2015 11:25:54 PM

Unlocking a Protected Section

When a section in your notebook was protected with a password, you must enter this password all the times that you want to turn over to this section still to look at his pages.

To unlock a section, do the following:

1.
Click the tab of the password-protected section that you want to view.
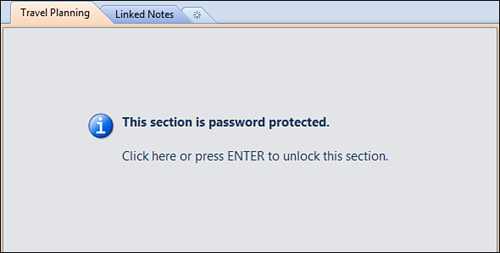
2.
When you see the password protection screen (see Figure 4), click the screen or press Enter.

Figure 4. Whenever you navigate to a protected section in your notebook, you can click the screen or press the Enter key to display the dialog box that unlocks the section with the correct password.

3.
In the Protected Section dialog box that appears, type the password for the section, and then click OK. Remember that passwords in OneNote are case sensitive. Upper- and lowercase characters must be entered exactly as you typed them when you first created the password for the current section.

If you enter the wrong password or you typed the right password incorrectly, OneNote displays a “Password is incorrect” warning in the Protected Section dialog box and clears the Enter Password field so you can try again.

When you type the correct password, OneNote unlocks the section and displays all of its pages.

The resolved and not protected sections are two different things. A not protected section does not have any password generated with it and can be looked by no matter whom with the access to the notebook in which it is stored, while a resolved section always has a password generated with it.

By default, a password-protected OneNote section stays unlocked for up to 10 minutes of inactivity after you have entered its correct password. After this time, the section will automatically lock itself again. This timeout can provide an additional layer of security, for example, if you’re called away from your computer while viewing a protected section, especially if that computer has no password-protected screensaver.


Locking All Protected Sections in a Notebook

If you’ve applied passwords to multiple sections in your notebook and you want to lock them all again after viewing them, you can do so with a simple command.

With one or more of your protected sections unlocked, do either of the following:

  • If the Password Protection task pane is visible near the right side of the OneNote program window, click the Lock All button under the All Protected Sections heading (see Figure 5).

    Figure 5. If you have multiple protected sections open and you want to immediately lock them all, you can either press the Lock All button in the Password Protection task pane or use the Ctrl+Alt+L keyboard shortcut.

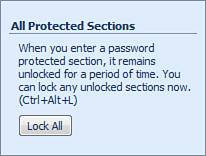
  • On your keyboard, press Ctrl+Alt+L to lock all protected sections.


Others
 
- Security Features in Microsoft OneNote 2010 : Keeping Private Notes Private (part 1) - Locking a Notebook Section with a Password
- Microsoft PowerPoint 2010 : Formatting Text (part 2) - Change Text Size, Apply Effects to Text
- Microsoft PowerPoint 2010 : Formatting Text (part 1) - Change Text Color
- Microsoft PowerPoint 2010 : Applying Fonts - Select a Font
- Microsoft Project 2010 : Capturing Project Progress (part 4) - Assessing the Impacts of Updates
- Microsoft Project 2010 : Capturing Project Progress (part 3) - Gathering Status Updates from Resources - Actual Work Per Day, Remaining Work, Expected Finish Date
- Microsoft Project 2010 : Capturing Project Progress (part 2) - Gathering Status Updates from Resources - Actual Start, Percent Work Complete, Remaining Work
- Microsoft Project 2010 : Capturing Project Progress (part 1) - Baselining Your Project
- Microsoft Access 2010 : Create Custom Forms (part 4) - Using E-Mail Forms to Collect Data
- Microsoft Access 2010 : Create Custom Forms (part 3) - Adding Subforms
 
 
Top 10
 
- Microsoft Visio 2013 : Adding Structure to Your Diagrams - Finding containers and lists in Visio (part 2) - Wireframes,Legends
- Microsoft Visio 2013 : Adding Structure to Your Diagrams - Finding containers and lists in Visio (part 1) - Swimlanes
- Microsoft Visio 2013 : Adding Structure to Your Diagrams - Formatting and sizing lists
- Microsoft Visio 2013 : Adding Structure to Your Diagrams - Adding shapes to lists
- Microsoft Visio 2013 : Adding Structure to Your Diagrams - Sizing containers
- Microsoft Access 2010 : Control Properties and Why to Use Them (part 3) - The Other Properties of a Control
- Microsoft Access 2010 : Control Properties and Why to Use Them (part 2) - The Data Properties of a Control
- Microsoft Access 2010 : Control Properties and Why to Use Them (part 1) - The Format Properties of a Control
- Microsoft Access 2010 : Form Properties and Why Should You Use Them - Working with the Properties Window
- Microsoft Visio 2013 : Using the Organization Chart Wizard with new data
Technology FAQ
- Is possible to just to use a wireless router to extend wireless access to wireless access points?
- Ruby - Insert Struct to MySql
- how to find my Symantec pcAnywhere serial number
- About direct X / Open GL issue
- How to determine eclipse version?
- What SAN cert Exchange 2010 for UM, OA?
- How do I populate a SQL Express table from Excel file?
- code for express check out with Paypal.
- Problem with Templated User Control
- ShellExecute SW_HIDE
programming4us programming4us