1. Planning the Domain Structure
Once you have verified the technical configuration
of your server for Active Directory, it's time to verify the Active
Directory configuration for your organization.
The DNS name of the domain
The
computer name or the NetBIOS name of the server (which will be used by
previous versions of Windows to access server resources)
Which domain function level the domain will operate in
Whether or not other DNS servers are available on the network
What type of and how many DNS servers are available on the network
However, if you will be installing additional domain
controllers in your environment or will be attaching to an existing
Active Directory structure, you should also have the following
information:
If this domain controller will join an
existing domain, you should know the name of that domain. You will also
either require a password for a member of the Enterprise Administrators
group for that domain or have someone with those permissions create a
domain account before promotion.
You should know whether the new domain will join an existing tree and, if so, the name of the tree it will join.
You should know the name of a forest to which this domain will connect (if applicable).
2. Installing Active Directory
Installing Active Directory is an easy and
straightforward process as long as you planned adequately and made the
necessary decisions beforehand. In this section, you'll look at the
actual steps required to install the first domain controller in a given
environment.
With early versions of the Windows NT operating
system, you had to determine during installation the role of your
server as it related to the domain controller or member server. Choices
included making the machine a primary domain controller (PDC), a backup
domain controller (BDC), or a member server. This was an extremely
important decision because, even though you could promote a BDC to a
PDC, you had to completely reinstall the operating system to make any
changes to the server's role between a domain controller and a member
server.
Instead of forcing you to choose during setup
whether or not the machine will participate as a domain controller,
Windows Server 2008 allows you to promote servers after you install
Active Directory. Therefore, at the end of the setup process, all
Windows Server 2008 computers are configured as either member servers
(if they are joined to a domain) or stand-alone servers (if they are
part of a workgroup). The process of converting a member server to a
domain controller is known as promotion.
Through the use of a simple and intuitive wizard, systems
administrators can quickly configure servers to be domain controllers
after installation.
Later in this section, you'll follow the steps you
need to take to install Active Directory by promoting the first domain
controller in the domain. These steps are performed using the Active
Directory Installation Wizard (DCPROMO).
This tool is designed to be used after a server has been installed in
the environment. As part of the promotion process, the server creates
or receives information related to Active Directory configuration.
The first step in installing Active Directory is
promoting a Windows Server 2008 computer to a domain controller. The
first domain controller in an environment serves as the starting point
for the forest, trees, domains, and the Operations Master roles.
Exercise 1
shows the steps you need to follow to promote an existing Windows
Server 2008 to a domain controller. In order to complete the steps in
this exercise, you must have already installed and configured a Windows
Server 2003 or 2008 computer. You also need a DNS server that supports
SRV records. If you do not have a DNS server available, the Active
Directory Installation Wizard automatically configures one for you.
Start the Active Directory Installation Wizard by clicking Start => Run and typing dcpromo.
When the Welcome screen appears, check the box that says "Use Advanced Mode Installation" and then click Next
The
"Choose a Deployment Configuration" box appears. Choose the second
option, "Create a new domain in a new forest". Then click Next.

A
warning box may appear stating that the local administrator account
will become the domain administrator account. If this box appears,
click Yes.
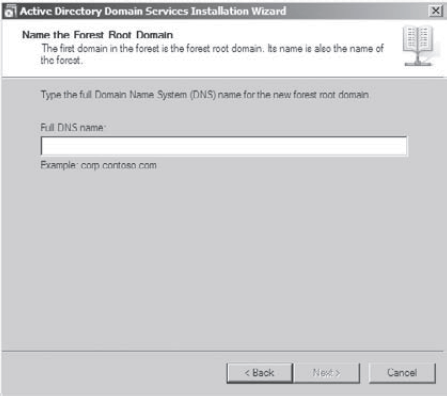
The
Name the Forest Root Domain box appears, asking you to enter the full
DNS name of your domain. Enter your domain's DNS name and click Next.
(Use mycompany.com if you do not have a domain name.)
After the DNS name gets verified, a NetBIOS name box appears with your default NetBIOS name (for example, mycompany). Leave the default and click Next.
A
NetBIOS name can be up to 15 characters. To make it easier to remember
and type the name, you should limit yourself to the English alphabet
characters and numbers.
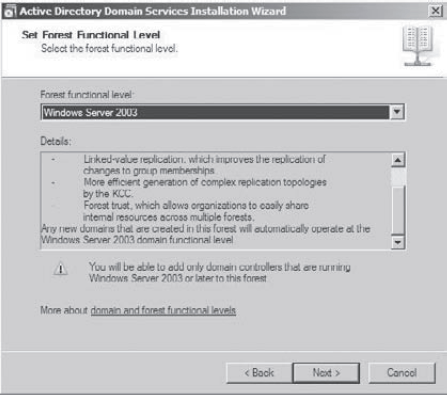
The
"Set Forest Functional Level" box appears. Use the pull down menu and
choose Windows Server 2003 or Windows Server 2008 and then click Next.
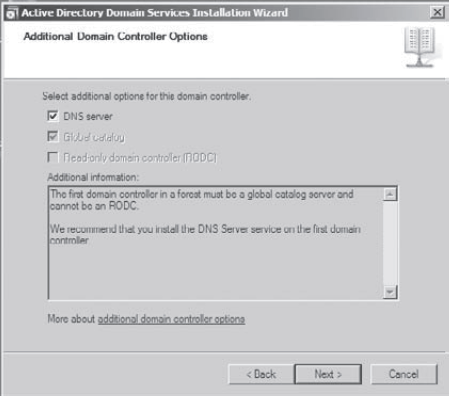
When
the Additional Domain Controller Options page appears, make sure DNS
Server is checked (if you need to install DNS). Also notice the option
labeled "Read-Only Domain Controller (RODC)." This is where you will
create your RODC . Since this is the first domain controller
in your new domain, the RODC option is grayed out. Click Next.
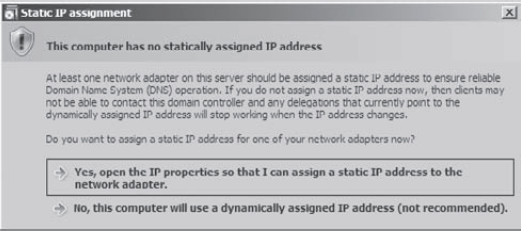
A
Static IP Assignment box may appear. If it does, choose the Yes option
and configure a static IP address for your computer. If this box does
not appear, go on to the next step.
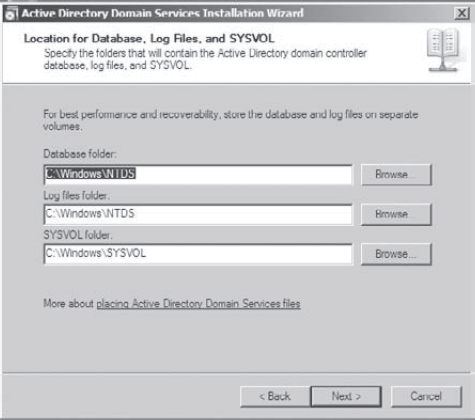
In
the Location for Database, Log Files, and Sysvol page, specify the
filesystem locations for the Active Directory database and log files.
Microsoft recommends that these files reside on separate physical
devices in order to improve performance and to provide for
recoverability. The default filesystem location is in a directory
called NTDS located within the system root. However, you can choose any
folder located on a FAT32 or NTFS partition (Sysvol requires NTFS).
After you've specified the filesystem locations (you can leave the
defaults if you like), click Next.
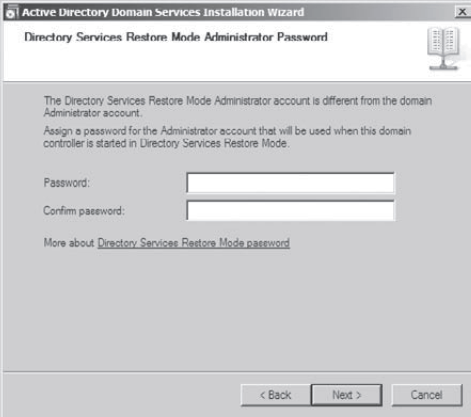
On
the Directory Services Restore Mode Administrator Password page,
provide a password to be used to restore Active Directory in the event
of its loss or corruption. Note that this password does not have to
correspond with passwords set for any other account. For this exercise,
use the following password:
P@ssw0rd
After confirming the password, click Next.
Based
on the installation options you've selected, the wizard presents a
summary of your choices. It is a good idea to copy and paste this
information into a text file to refer to later. Verify the options, and
then click Next to begin the Active Directory installation process.
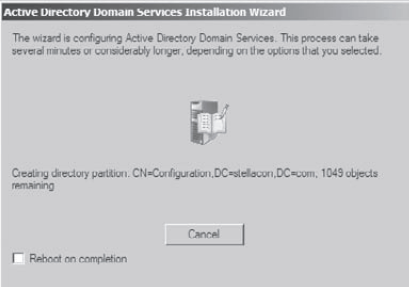
Once
Active Directory has been installed, you are prompted to reboot the
system. After the reboot, you can access the administrative tools that
are related to the configuration and management of Active Directory.