Active Directory Rights Management Services
(AD RMS), included with Microsoft Windows Server 2008, allows
administrators or users to determine what access (open, read, modify,
etc.) they give to other users in an organization. Access restrictions
can improve security for email messages, internal websites, and
documents.
NOTE
To secure documents, Microsoft Office 2003
Professional (Word, Excel, PowerPoint, and Outlook) or Microsoft Office
2007 Enterprise, Professional Plus, or Ultimate is required.
You can apply AD RMS usage policy templates directly to confidential information.
You can install AD RMS easily using Server Manager,
and you can administer it through the MMC snap-in. These three new
administrative roles allow for delegation of AD RMS responsibilities:
AD RMS is integrated with AD FS, which means that
two organizations can share information without needing AD RMS
installed in both organizations. Some other advantages of using AD RMS
include the following:
Self enrollment
AD RMS server enrollment allows for the creation
and signing of a server licensor certificate (SLC). This SLC gives the
AD RMS server the right to issue certificates and licenses whenever
they are needed.
Active Directory Metadirectory Service (AD MDS)
Microsoft uses an identity management product
called Active Directory Metadirectory Service (AD MDS). AD MDS gives
systems the tools they need to get identity data from directories and
then expose that data through a directory service interface such as
LDAP.
|
AD RMS requires an AD RMS–enabled client. Windows
Vista includes the AD RMS client by default. If you are not using
Windows Vista or Windows Server 2008, you can download the AD RMS
client for previous versions of Windows from Microsoft's Download
Center.
|
|
Now that you have a basic understanding of what AD RMS does, let's take the next step and install AD RMS. In Exercise 1, we will install AD RMS by using the Server Manager MMC.
Open the Server Manager MMC by selecting Start => Administrative Tools => Server Manager.
In the left pane, click Roles. In the Roles Summary section of the right pane, click Add Roles.
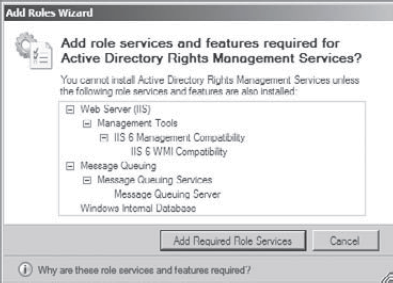
At
the Select Server Roles screen, click the Active Directory Rights
Management Services check box. A dialog box will appear stating that
additional services need to be installed. Click the Add Required Role
Services button. Then click Next.
On the Introduction To AD RMS screen, click Next.
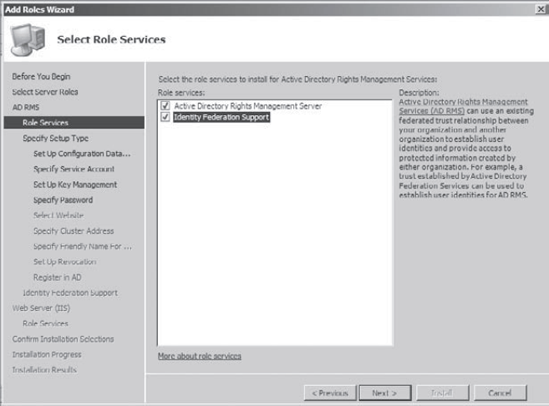
On
the Select Role Services screen, make sure both check boxes (Active
Directory Rights Management Server and Identity Federation Support) are
checked. Identity Federation Support allows AD RMS to work with AD FS.
Click Next.
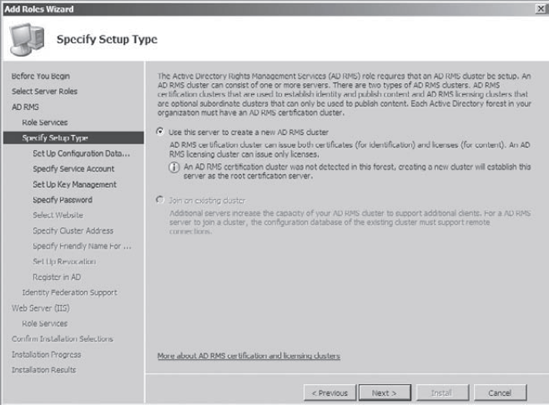
On
the Specify Setup Type screen, choose Use This Server To Create A New
AD RMS Cluster. (The other choice will not be available because we are
installing the first AD RMS server and must start the cluster.) Click
Next.
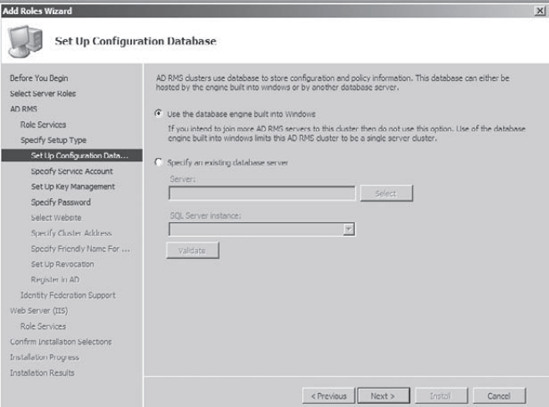
AD
RMS uses a database to store configuration and policy information. At
the Set Up Configuration Database screen, choose Use The Database
Engine Built Into Windows. (The other option you have is to use a
third-party database engine.) Click Next.
On
the Specify Service Account screen, you need to choose which service
account the AD RMS will use. Chose Network Service Account and click
Next. (An AD RMS account will be created to run the services.)
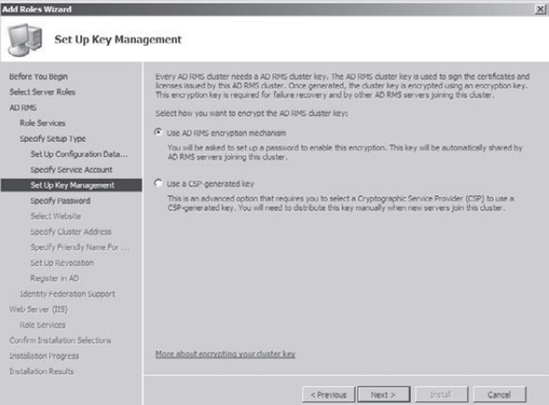
At
the Set Up Key Management screen, you decide which type of encryption
you will use. Choose Use AD RMS Encryption Mechanism and click Next.
Next
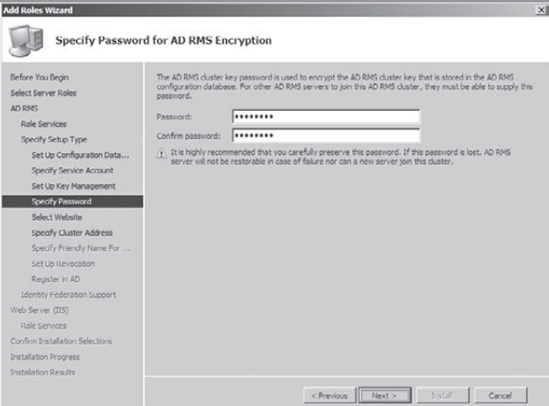
you will be asked to enter a password for AD RMS encryption. The AD RMS
cluster key password is used to encrypt the AD RMS cluster key that is
stored in the AD RMS database. Type P@ssw0rd, confirm it, and the click Next.
On
the Select Website screen, leave the default and click Next. AD RMS
needs to be hosted in IIS. This will set up a default website for AD
RMS.
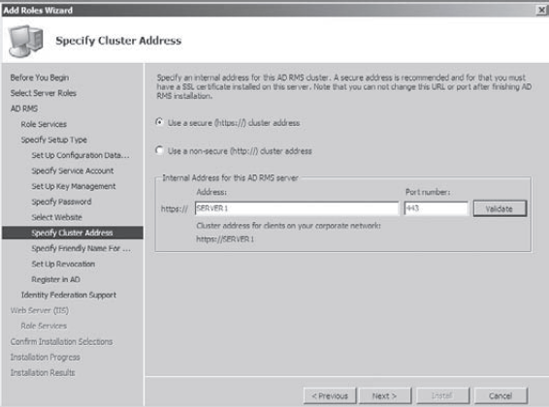
In
the Specify Cluster Address screen, you choose whether to use a secure
or a non-secure website. Choose Use A Secure (https://) Cluster Address
and click the Validate button. After the address is verified, click
Next.
A
dialog box appears asking you to put in a friendly name (a name you can
use to access the server without knowing the entire UNC path). Leave
the default and click Next.
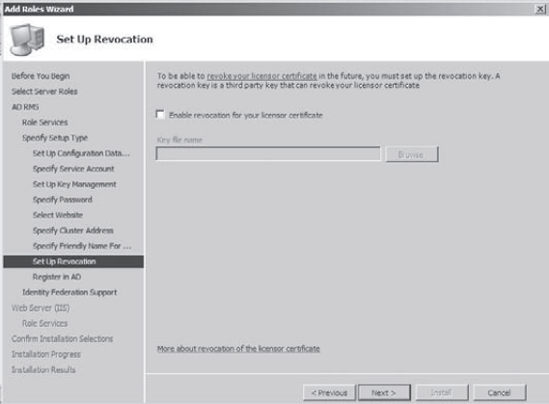
In
the Set Up Revocation screen, you can enable a revocation key, a
third-party key that you can use to revoke licenses. For this exercise
we are not going to use any third-party keys. Click Next.
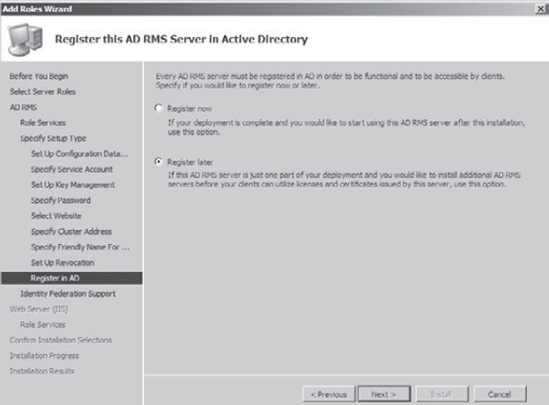
Next,
you have the option to register AD RMS now or later. If you register
the server now, AD RMS will take effect immediately. If you register
the server later, AD RMS will not work until you register. We will not
register during this exercise. Choose Register Later and click Next.
At
the Configure Identity Federation Support screen, you specify the name
of the web server that Identity Federation will use. Enter the friendly
name from step 13 and click the Validate button. The Next button will
become available after the server is validated. Click Next.

At the Introduction To IIS screen, click Next.
At the Select Roles Services screen, click Next. This will install all the necessary components for IIS.
At the Confirm Installation Selections screen, verify all your settings and click Install.
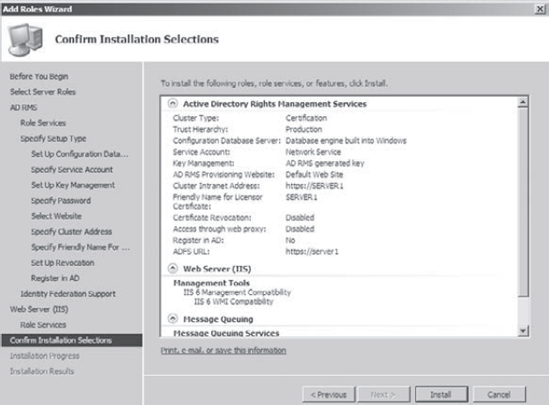
The install progress screen will appear. After the install is complete, click Close.
Close the Server Manager MMC.