The simplest way to install Exchange Server
2010 is to use the graphical user interface (GUI). The GUI will be
sufficient for most Exchange Server installations. We recommend first
copying the Exchange Server 2010 installation files to the local hard
disk or using a locally attached CD/DVD from which to run the Exchange
installation. Copying the Exchange binaries to the local hard disk will
speed up the installation time.
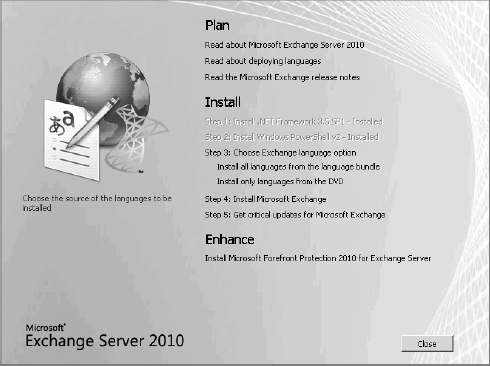
From the Exchange Server installation folder, run Setup.exe to see the main setup screen (shown in Figure 1).
The main setup screen will show you some of the components that are
missing, such as the PowerShell v2 or the .NET Framework v3.5 SP1 (if
you are running Windows Server 2008 SP2 instead of R2).
If you meet the prerequisites for installation, the
next step is to select which languages you are going to install. Your
selection will depend on whether you have downloaded the entire
language bundle or only want to use the specific language(s) included
with the installer.
You can usually just click Step 3: Choose Exchange
Language Option and then click Install Only Languages from the DVD.
Once you have selected the correct language option, proceed to Step 4:
Install Microsoft Exchange. This will launch the Exchange Server
installer wizard.
The first page of the Exchange Server 2010 Setup
wizard is simply the Introduction page. You can click Next to proceed.
On the next page, you will see the license agreement screen. Select the
I Accept The Terms In The License Agreement radio button and then click
Next.
The third page of the setup wizard is the Error
Reporting screen. Here you can specify whether or not you want to send
reports of problems or errors automatically to Microsoft. The server
will send information back to Microsoft via HTTPS; this information may
prove valuable for Microsoft in identifying errors in their software.
Passing along this information also provides you (the customer) with
good value because it means that Microsoft can more quickly identifying
bugs and software issues. The report sent back to Microsoft does not
usually contain any information specific to your organization or to
your server, but some organization's Information Security departments
will want you to block this anyway. If you are concerned about this,
select No. You can read more about the Microsoft Online Crash Analysis
program at http://oca.microsoft.com/en/dcp20.asp
and read about Microsoft's privacy statement and what information might
be collected. When you have made your choice, click Next.
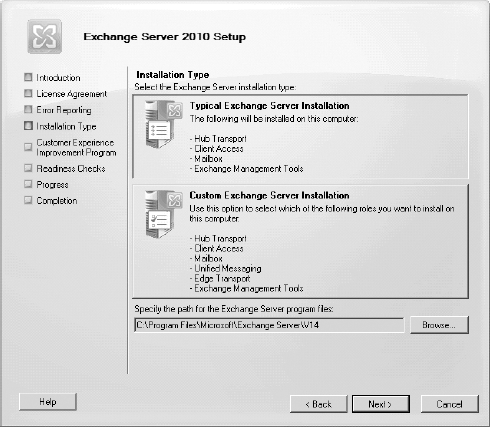
The next page on the wizard is the Installation Type screen and the path for the Exchange program files, as shown in Figure 2.
On this screen, you can select a typical installation or a custom
installation, or change the path for the Exchange program files.
When specifying a path for the Exchange program
files, remember that by default this is where all Exchange databases
and log files will be stored. Most of these you can (and should) move
after the installation, but you want to make sure that the disk on
which the Exchange program files are stored has at least 5 GB of free
space.
If you are deploying a single Exchange 2010 server
and you are not using unified messaging, you can choose the Typical
Exchange Server Installation selection and click Next. The Typical
Exchange Server Installation will install the Mailbox, Client Access,
and Hub Transport server roles as well as the Exchange management tools.
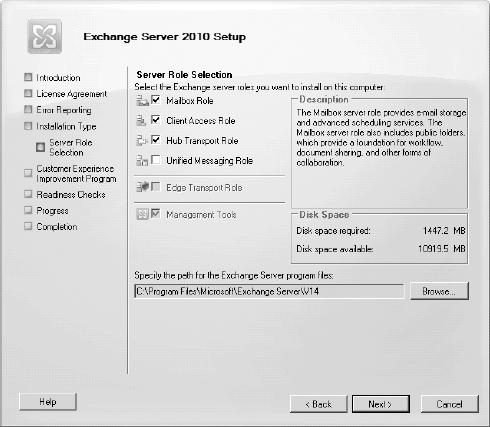
However, as the old joke goes, real computer geeks always pick Custom; this allows you to specify which Exchange server roles are installed. Figure 3 shows the Server Role Selection page of the Exchange setup wizard.
Once you click Next, if you have selected the
Mailbox role and this is a newly created Exchange organization, you
will be asked if you want to maintain compatibility with Outlook 2003
and earlier clients. You should select this option as doing so will
create a MAPI public folder tree and a public folder database on this
server. All subsequent Exchange 2010 Mailbox servers will not ask you
this question since there is already an Exchange Mailbox server that
holds a MAPI public tree in the organization.
If you have selected the Hub Transport server role
and this is the first Hub Transport server in an organization with only
Exchange 2003 servers, you must specify an Exchange 2003 server to use
as a bridgehead server for routing mail between Exchange 2003 and
Exchange 2010. This step will not be required if you have Exchange 2007
servers.
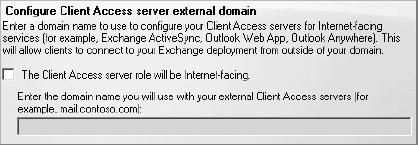
If you have selected the Client Access server role,
you will be asked if this Client Access server is Internet facing and
what the external URL will be that will be used by clients connecting
to this server. This setting is optional and can be configured later.
The next page of the wizard is the Customer
Experience Improvement Program; on this screen you can specify that you
want to join the Microsoft Exchange Customer Experience Improvement
Program (CEIP)—well, actually, not "you" specifically, but this server.
Periodically, the server will upload usage and configuration data that
helps Microsoft when designing future versions of Exchange Server. The
program is completely anonymous and will not be used to gather
information about your organization. We recommend selecting Join The
Exchange Customer Experience Improvement Program (CEIP), but this is
entirely a decision that each person installing Exchange must make. For
more information on the CEIP, visit www.microsoft.com/products/ceip/en-us/default.mspx.
Once you have clicked Next on the CEIP page, the
Setup program launches the Readiness Check to make sure that all the
server features and roles, hotfixes, and other services are available.

If you find anything about the configuration that should be changed, you must resolve before continuing.
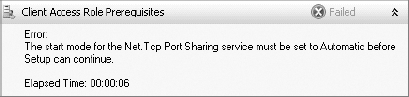
One of the nice things about the Exchange Server
2010 Setup wizard is that if it detects a missing component or
something that must be done prior to starting the Exchange setup, you
can fix the issue and then click the Retry button. The Setup program
will recheck the prerequisites and pick up where it left off.
Once the prerequisites have all been met
and the Readiness Check is complete, you must then click the Install
button to initiate the installation.