In the recipe Reducing posting steps with better Printing Control,
we touched on the edge of the Named Printers functionality by turning
off the System Print Dialog. However, there is much more than that to
named printers. The idea behind named printers is to allow the
assignment of different printers to different functions in Dynamics GP.
For example, check printing could be directed to a dedicated check
printer or invoices could be automatically sent to a high-speed printer.
Even better, these settings are by workstation so there is a
geographical component to the setup. Users in one building can point
checks to a check printer in their building without interfering with a
different set of users in another building. In this recipe, we'll look
at setting up Named Printers.
Getting ready
Prior to setting up Named Printers, there is some setup required:
1. Select Administration from the Navigation Pane. Then select Named Printers from the Area Page under Setup. Enter the system password if prompted.
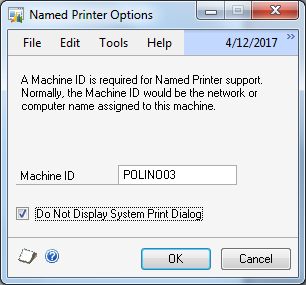
2. Select the checkbox marked Do Not Display System Print Dialog and click on OK twice:

3. Select a default printer for Dynamics GP and click on OK.
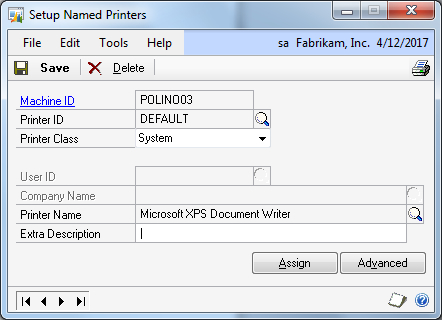
4. Click on Save to assign the default printer to Named Printers:

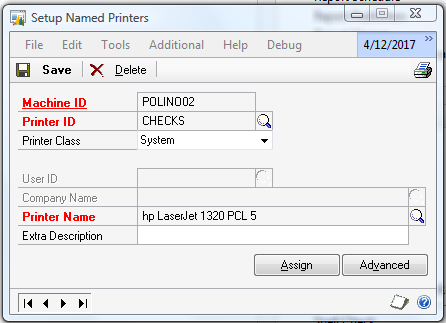
5. Create a new Printer ID named CHECKS. Use the lookup button (indicated by a magnifying glass) to select a printer for checks. Click on Save and close the window:

How to do it...
To set up Named Printers:
1. Select Administration from the Navigation Pane. Then select Named Printers from the Area Page under Setup.
2. Notice that printers for this Machine ID can be set for a specific user and company. For now, we'll leave these alone. Change the Task Series to Purchasing.
3. Click on the blue Printer ID hyperlink to add another printer.
4. In the Task Description field find Payables Computer Checks/Cheques Printer. Change Printer Class to System.
5. Select the printer named CHECKS in the Named Printers window that opens.
6. Click on OK to complete the assignment of a check printer to the check printing function:

When checks are printed via the Computer Checks
function in Purchasing, from this computer and by this user, the checks
will print to the designated check printer. Any other printer request
combination will be sent to the default printer.
How it works...
Named Printers provides fine-grain control over
printing functions in Dynamics GP. It provides the ability to control
printing by the user, computer, and printer. This ability to control
printing provides additional security as well as it can be used to
control which reports print to shared printers in the organization. The
Named Printers feature can provide huge time saving and cost benefits by
preventing printing to less efficient or erroneous printers.
There's more...
Even more control is available via Printer Classes.
Printer Classes
When setting up printers in Named Printers, the
option exists to select a Printer Class. Printer Classes are preset
options controlling which users can select to print to a printer. For
example, an expensive color printer might be limited to only certain
users to prevent accidental printing to that printer. The available
Printer Classes are:
System: These printer IDs are available to all users and companies
User: This printer ID is only available to a single user for all companies
Company: All users of this company can access this Printer ID
User & Company: Printer ID use is restricted to a single user and company
Any Printer ID: Any printer available on the workstation can be used
Manual Selection: Printer is selected by the user at the time of printing
None: Default printer is used