You’ve seen how versatile and convenient
text animation presets can be. You’ll use another type of text animation
preset to animate the words directed by
along a motion path. After Effects includes several animation presets
that animate text along a prebuilt path. These presets also provide
placeholder text with formatting when you apply them, so in this
exercise, you will enter and format your text after you apply the animation preset.
1. | Select the Road_Trip_Title_Sequence tab in the Timeline panel.
|
2. | Deselect all layers, and then go to 5:00.
|
3. | Press Ctrl+Alt+Shift+O (Windows) or Command+Option+Shift+O (Mac OS) to jump to Adobe Bridge.
|
4. | Navigate to the Presets/Text/Paths folder.
|
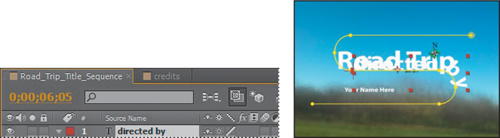
5. | Double-click
the Pipes animation preset. Adobe Bridge returns you to After Effects,
where the preset automatically creates a new layer, pipes, with a
predefined path that zigzags across the composition. The text on the
path is obscured by the movie title. You’ll fix that soon.
|
Customizing the preset path
First, you need to change the placeholder word pipes to directed by. Then you’ll adjust the path itself.
1. | In the Timeline panel, go to 6:05, when the word pipes is visible—and horizontal—onscreen.
|
2. | Double-click the pipes layer in the Timeline panel. After Effects switches to the Horizontal Type tool ( ) and selects the word pipes in the Composition panel. ) and selects the word pipes in the Composition panel.
|
3. | Type directed by to replace the word pipes.
Press Enter on the numeric keypad or select the layer name when you’re
done. After Effects updates the Timeline panel with the new layer name.
 |
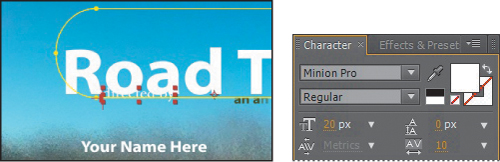
4. | In the Character panel, do the following:
- Set the Font Family to Minion Pro or another serif typeface.
- Set the Font Style to Regular.
- Set the Font Size to 20 pixels.
- Leave all other settings at their defaults.
 |
5. | Drag the current-time indicator across the time ruler between 5:00 and 8:00 to see how the words directed by
move onscreen—and then offscreen. You’ll fix the text so that it stays
onscreen, but now is a good time to adjust the position of the path in
the composition so that it doesn’t interfere with the movie title.
|
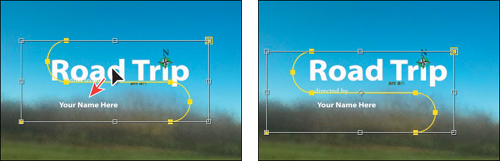
6. | Using the Selection tool ( ), double-click the yellow motion path in the Composition panel. ), double-click the yellow motion path in the Composition panel.
|
7. | Drag the path down and slightly to the left, until the words Road Trip are centered in the top curve and Your Name Here is within the lower curve. You may find it easiest to use the arrow keys.
 |
8. | Press Enter or Return to accept the change.
|
Later in the lesson, you’ll attach a car graphic to
the path so it appears to be pulling the text. But first, you’ll finish
animating the credits.
9. | Select the directed by layer in the Timeline panel and hide its properties. Then choose File > Save to save your work. |