|
The reusable assets that you add to a project are organized into one of four groups in the Library panel.
Images are bitmap (raster) files (PNG, GIF, JPG, JPE, JPEG) and SWF content.
Media refers to video and sound files (FLV/F4V files, mp3).
Components are the
building blocks of your project. Examples of components include
buttons, scroll bars, sliders, check boxes, panels, and scrolling lists.
Optimized graphics
are added to the Library panel when you choose Optimize Vector Graphics
in the Heads-Up Display (HUD). This is true when you optimize an image
that you’ve imported and when you optimize an object that you’ve drawn
using the Flash Catalyst drawing tools.
How do assets get into the Library panel?
Assets get into the Library panel in the following ways:
When you import a design document, the bitmap
images in the document are grouped together in a folder within the
Images category of the Library panel. If the design document includes
Illustrator symbols, the symbols are converted to optimized graphics and
stored in the Optimized Graphics category. When
you import or copy and paste a single bitmap image, SWF file, or video
file, the file is added to the artboard and to the Library panel. When you import multiple assets at the same time, the assets are added to the Library panel, but not the artboard. When you import a sound file, it’s added to the Library panel. When
you import a Flash Catalyst Library Package (FXPL) that was exported
from another project, the entire collection of assets is added to the
Library panel. When you optimize an image in the artboard, an optimized copy of the image is added to the Library panel. If you compress an image in the Library panel or in the artboard, a compressed copy of the image is added to the Library panel. When
you convert vector drawings into a component, optimized graphic, raster
image, or compressed image, an object is added to the Library panel. If you add a wireframe component to the artboard and then modify it, the modified component is added to the Library panel.
Add assets to the Library panel
In
this exercise, you will add a few more assets to the Library panel.
When you import a single bitmap image, it’s added to the artboard and
the Library panel. But when you import a series of bitmaps or media
files (sound and video), they’re added directly to the Library panel,
but not the artboard.
1. | Start Flash Catalyst.
| 2. | In
the Welcome screen, choose Open Project.
Note
At first, the Library panel only displays categories
for the types of assets that exist in the project. For example, if your
project has no media, the Media category does not exist. After adding
media, such as a video file, the Media category appears. Once added, the
category remains in the Library panel, even after deleting all its
contents.
| 3. | Select the Library panel to bring it into view.
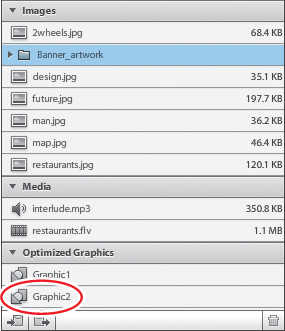
Library assets are divided into categories, such as Components, Images,
Media, and Optimized Graphics. These categories can be expanded or
collapsed by clicking the small triangle to the left of the category
name.
The Images category includes bitmap images that were imported to the
project. This includes images that were imported individually or as part
of a design document (AI, PSD, FXG). This also includes Adobe Flash
movies (SWF files), if there are any.
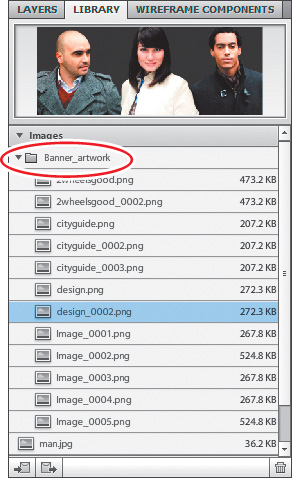
When you import a design document, its images are grouped together in a
subfolder. The folder inherits the name of the original design document.
| 4. | Expand the Banner_artwork folder.
| 5. | Collapse the Banner_artwork folder.
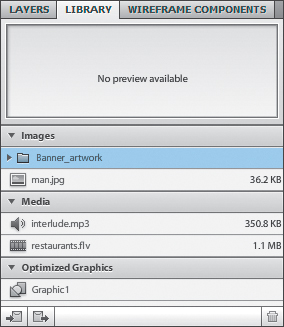
| 6. | Choose File > Import > Video/Sound File.
| 7. | Browse to the Lesson03 folder, Shift-click to select the interlude.mp3 and restaurants.flv files, and click Open.
The sound and video files are added to the Media category in the Library
panel. This project now includes three types of assets: Images, Media,
and Optimized graphics.
| 8. | Choose File > Import > Image.
| 9. | Browse
to the Lesson03 folder, Shift-click to select the 2wheels.jpg,
design.jpg, future.jpg, map.jpg, and restaurants.jpg files. Click Open.
The images are added to the Library panel, but not the artboard.
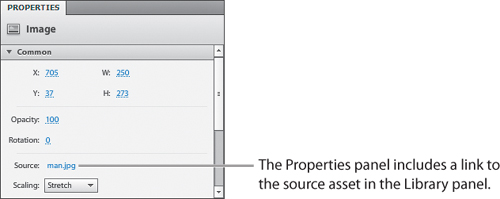
| 10. | Click to select the picture of the man in the lower-right corner of the artboard (you may need to scroll).
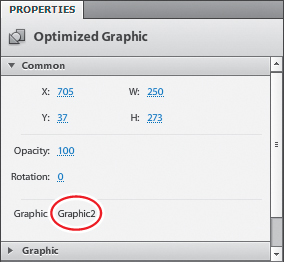
In the Common category of the Properties panel, notice that the source
of this image is man.jpg. There is a direct link between instances in
the artboard and the source assets in the library.
 | 11. | In the HUD, open the Optimize Artwork menu, and choose Optimize Vector Graphics.
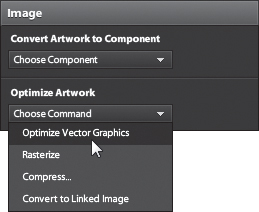
The source in the Properties panel (below) changes to Graphic2.
Note
Vector shapes that you draw in Flash Catalyst or
import from Adobe Illustrator are not added to the Library panel until
you convert this artwork to an optimized graphic, raster image,
compressed file, or component.
|
|