To cap off this project, you’ll use a mask
from a text layer to animate a nontext layer. Specifically, you’ll use
the mask shape for the directed by path
to create a motion path for a car graphic so that it appears to be
pulling the text. First, you’ll import the car graphic and add it to
your composition.
1. | Double-click an empty area in the Project panel to open the Import File dialog box.
|
2. | choose Composition – Retain Layer Sizes from the Import As menu, and
then click Open.
|
3. | Drag the car composition from the Project panel to the top of the layer stack in the Road_Trip_Title_Sequence Timeline panel.
|
Copying the mask shape
Now you’re ready to copy the mask shape from the path of the directed by layer to the car layer.
1. | Go to 5:00.
|
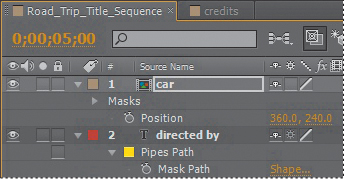
2. | Select the directed by layer in the Timeline panel, and press M to display its Mask Path property.
|
3. | Click the Mask Path property name to select it, and then choose Edit > Copy.
|
4. | Select the car layer, and then press P to display its Position property.
|
5. | Click the Position property name to select it, and then choose Edit > Paste.

|
After Effects copies the Position keyframes from the directed by layer to the car layer.
Orienting the object
Unfortunately, the car is flying backward, but that’s easy to fix.
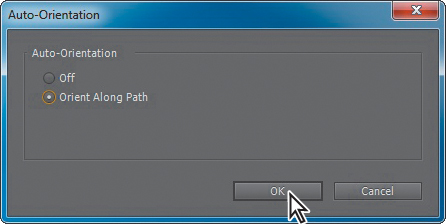
1. | With the car layer selected in the Timeline panel, choose Layer > Transform > Auto-Orient.

|
2. | In the Auto-Orientation dialog box, select Orient Along Path, and then click OK.
|
Now the car is facing forward as it flies.
3. | Select the car layer in the Timeline panel, and press P to hide its Position property.
|
Coordinating the text and object timing
Next, you need to coordinate the timing of the car’s motion with the words directed by so that the words correctly trail behind the car.
1. | Select the directed by layer, and press U to display its Path Options in the Timeline panel.
|
2. | Go to 5:18, and change the First Margin value to 373. After Effects adds a keyframe, and the text moves behind the car.
|
3. | Go to 5:25, and change the First Margin value to 559.
|
4. | Go to 4:24, and drag the first First Margin keyframe (the left-pointing arrow) to that position.
 |
5. | Manually
preview the corrected path animation by dragging the current-time
indicator across the time ruler from about 4:20 to 7:10. The words
follow the car and come to rest above your name, while the car continues
to fly along the path and off the screen.
|
6. | Hide
the properties for the directed by layer, and then press the Home key
or move the current-time indicator to the beginning of the time ruler. |