Currently, the words directed by
fade in and out as they wind along the Pipes path preset. You’ll modify
the text properties so that the words are opaque for the entire
animation and come to a rest just above your name.
1. | With the directed by layer selected in the Timeline panel, press U to display the animated properties for the layer.

|
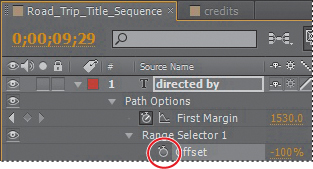
2. | Click the stopwatch icon ( ) for the Range Selector 1 Offset property to delete all of its keyframes. ) for the Range Selector 1 Offset property to delete all of its keyframes.
|
3. | Depending
on where the current-time indicator is located in the time ruler, the
resulting value for Range Selector 1 Offset may or may not be set to 0%.
Set it to 0% if it is not. Now, directed by will be visible throughout the composition.
|
Next, you’ll modify the First Margin property to make the text stop animating above your name.
4. | Select
and delete the last keyframe for the First Margin property in the
Timeline panel. Because the middle keyframe (now the last keyframe) is
set to Easy Ease, the words directed by come gently to rest above your name.

|
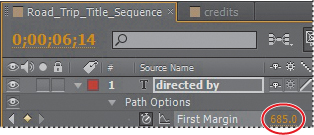
5. | Go to 6:14, and change the First Margin value to 685.

|
You also need to adjust the path shape so that it starts and ends off the screen.
6. | Using the Selection tool ( )
in the Composition panel, Shift-drag the control point at the top of
the S-shaped curve to the right and off the screen. Drag it well off the
screen so the car won’t be visible. )
in the Composition panel, Shift-drag the control point at the top of
the S-shaped curve to the right and off the screen. Drag it well off the
screen so the car won’t be visible.
|
7. | Click
the control point at the end of the S-shaped curve, and Shift-drag the
control point off the left side of the screen, so that the car won’t be
visible.
 |
8. | Preview the animation from about 5:00 to 9:00 to see the corrected path.
|
9. | If the text doesn’t stop directly above your name, adjust the First Margin value of the final keyframe.
|
10. | Hide the properties for the directed by layer in the Timeline panel, and then choose File > Save.
Note
Depending on how far you move the beginning
and ending control points of the path, you may need to change the First
Margin value again to reposition the text.
|