6. Content-Aware Scaling
The
Content-Aware scaling feature is a way to intelligently scale an image
that allows for certain details to be preserved while others are
distorted. It can be used to recompose an image. When used correctly,
the image will automatically adapt to preserve vital areas during the
scale.
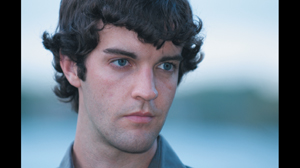
1. | Open the image Ch04_Content_Aware_Scale.psd.
|
2. | Select the layer called Headshot. The photo is not big enough to fill the entire canvas and needs to be resized.
|
3. | Choose Edit > Content-Aware Scale.
|
4. | In
the Options bar, click the Protect Skin Tones button to tell Photoshop
to attempt to preserve regions that contain skin tones.
 |
5. | Drag
a resize handle on the bounding box to scale the image. Hold down the
Shift key to scale proportionately. You can also hold down the Option
(Alt) key to scale from the center of the image.
|
6. | Size
the image so it fits the width of the canvas. Notice that the face
shows little to no distortion, but the background has been changed
significantly.

|
7. | Click the Commit button or press the Return (Enter) key to apply the change.
|
7. Puppet Warp
The
Puppet Warp command is similar to the Free Transform command in that it
allows for selective warping of a layer. The technology works by
creating a geometric mesh that lets you dramatically warp specific
regions of an image. The command takes a little getting used to in order
to create natural results, but it can be quite useful because the image
will automatically adapt so vital areas are preserved during scaling.
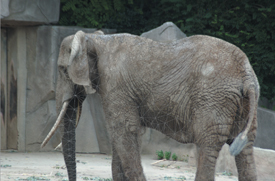
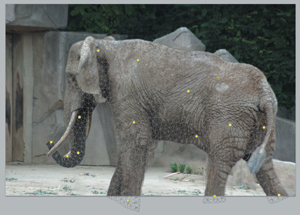
1. | Open the image Ch04_Puppet.psd.
This image has already been masked to isolate the elephant to its own layer.
|
2. | Select the layer named Elephant.
|
3. | Choose Edit > Puppet Warp. Photoshop draws a polygonal mesh to allow the object to be distorted.
|
4. | In the Options bar, adjust the mesh settings to create a refined mesh:

Mode. Photoshop offers three levels of elasticity for the mesh. Normal is fine for this image.
Density.
Choose More Points to increase the precision of the warp (it will take more computer processing time).
Expansion.
If needed, you can contract or expand the mesh. The default value is usually best.
Show Mesh.
At times you may want to deselect this to see the image without the visible mesh applied.
|
5. | Click on the image to add control pins. Add pins to areas you want to transform as well as points you want to anchor in place.
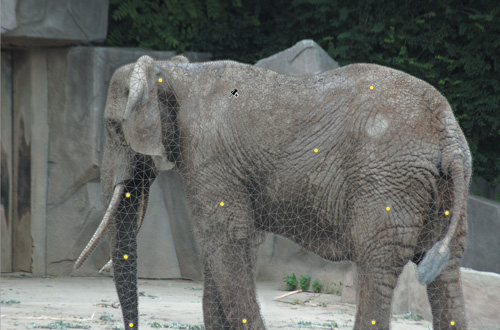
Use the figure for guidance. Add pins to the trunk and in a few places
on the elephant’s body. Add additional points as needed as you
manipulate the figure.
|
6. | Experiment with dragging pins to warp the elephant. Try to curve her trunk and reposition her legs:
- Drag pins to warp the mesh.
- Try adding pins to keep nearby areas intact.
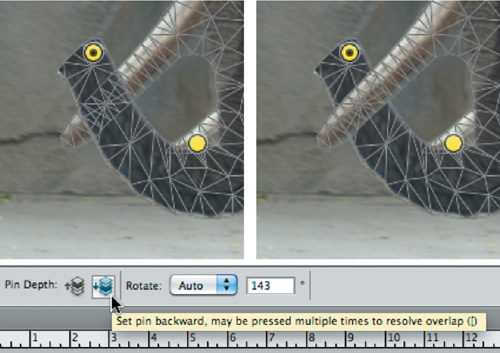
- If an area doesn’t overlap properly, you can click the Pin
Depth buttons in the Options bar. These can be used to control how much
something overlaps.
- To remove a pin, right-click on it and choose Delete Pin.
- If unwanted warping occurs with a pin, select it, and then hold down the Option (Alt) key and drag.
|
7. | When you’re satisfied with your transformation, press Return (Enter) or click the Commit button in the Options bar.
|
8. Using Smart Objects Before Transforming
Smart Objects are a bit of “under the hood” Photoshop
magic. Essentially, this powerful command allows you to embed raster or
vector data into a layer. The layer can then be transformed
indefinitely because the embedded data remains editable and scalable.
You can convert one or more layers into a new Smart Object or choose to
add new content as a Smart Object.
Tip: Another Path to a Smart Object
Besides using the Place command to create a Smart
Object, you can select one or more objects in the Layers panel and
choose Layer > Smart Objects > Group into New Smart Object.
A Smart Object is simply one file embedded inside
another. This can be very useful because Smart Objects allow greater
flexibility than simply applying the Free Transform command to a regular
layer. With a Smart Object, you can perform multiple nondestructive
transforms with no loss in quality (as long as you don’t exceed the
pixel dimensions of the original raster object).
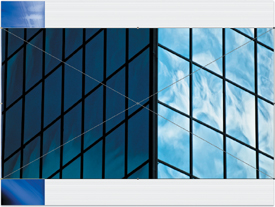
1. | Open the file Ch04_Smart_Object_BG.psd . A background design for a multimedia presentation opens. Let’s add a photo layer.
|
2. | Choose File > Place to add a new document as a layer. Select the file Ch04_Smart_Object.tif .
|
3. | Size
the image using the control handles. The controls are identical to
those you used with the Free Transform command. Scale down the image to a
very small size. Apply the transformation by clicking the Commit
button.
|
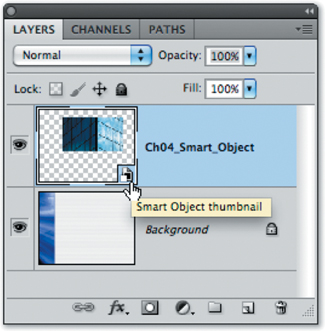
4. | Now,
let’s try scaling the image larger. Invoke the Free Transform command
for the selected layer by pressing Command+T (Ctrl+T). Scale up the
image to its original size. Apply the transformation. Notice that the
image remains sharp. This is because the Smart Object contains a full
resolution copy of the image embedded in the layer.
|