The View-Based Application adds the concept of a navigator, which is
a built-in navigation framework built specifically for use within mobile
applications. The navigator will manage the screens within your
application. Creating a new View-Based Application within Flash Builder
4.5 results in the generation of two files. These files are the main
application file as well as the default view that will be shown within
your application. Unlike the Blank Application, where the main application
file was created with the <s:Application> as the parent, a
View-Based Application uses the new <s:ViewNavigatorApplication> as its parent, as shown
in the following code.<?xml version="1.0" encoding="utf-8"?>
<s:ViewNavigatorApplication xmlns:fx="http://ns.adobe.com/mxml/2009"
xmlns:s="library://ns.adobe.com/flex/spark" firstView="views.ViewBasedHomeView">
<fx:Declarations>
<!-- Place non-visual elements (e.g., services, value objects) here -->
</fx:Declarations>
</s:ViewNavigatorApplication>
The second file that is created is the default view, which is
automatically placed in a package named Views. In this case, it is named
ViewBasedHomeView and is automatically set as the
firstView property of the ViewNavigatorApplication. The
auto-generated code for this file is shown in the following code.
<?xml version="1.0" encoding="utf-8"?>
<s:View xmlns:fx="http://ns.adobe.com/mxml/2009"
          xmlns:s="library://ns.adobe.com/flex/spark" title="HomeView">
     <fx:Declarations>
          <!-- Place non-visual elements (e.g., services, value objects) here -->
     </fx:Declarations>
</s:View>
Figure 1 shows the View-Based
Application after adding a Label to
the ViewBasedHomeView. As you can
see, the navigation framework automatically provides a header and places
the title of the current view in that header.
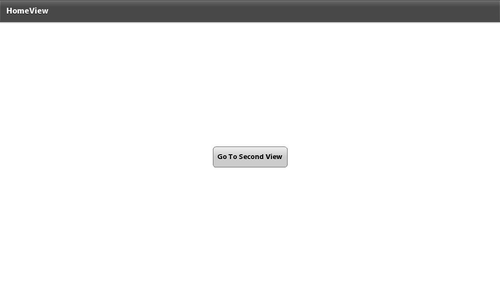
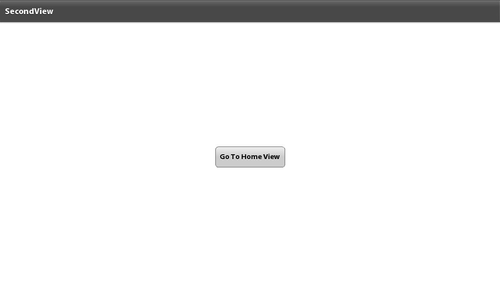
Now let’s explore the navigator a bit. I have created a second view
for my application named SecondView. I updated the ViewBasedHomeView to
have a Button and also added a
Button to the SecondView as shown in
the following code. As you can see, each view contains a
Button with a similar clickHandler.
The clickHandler simply calls the
pushView function on the navigator and passes in the
view you want the user to navigate to. The Home View will navigate to the
Second View and the Second View will navigate to the Home View. Between
each view, a transition is automatically played, and the title of the view
is reflected in the navigation bar. This can be seen in Figure 2 and Figure 3.
<?xml version="1.0" encoding="utf-8"?>
<s:View xmlns:fx="http://ns.adobe.com/mxml/2009"
          xmlns:s="library://ns.adobe.com/flex/spark" title="HomeView">

     <fx:Script>
          <![CDATA[
               protected function button1_clickHandler(event:MouseEvent):void
               {
                    navigator.pushView(views.SecondView);
               }
          ]]>
     </fx:Script>

     <fx:Declarations>
          <!-- Place non-visual elements (e.g., services, value objects) here -->
     </fx:Declarations>

     <s:Button label="Go To Second View"
                 horizontalCenter="0" verticalCenter="0"
                 click="button1_clickHandler(event)"/>
</s:View>
<?xml version="1.0" encoding="utf-8"?>
<s:View xmlns:fx="http://ns.adobe.com/mxml/2009"
          xmlns:s="library://ns.adobe.com/flex/spark" title="SecondView">

     <fx:Script>
          <![CDATA[
               protected function button1_clickHandler(event:MouseEvent):void
               {
                    navigator.pushView(views.ViewBasedHomeView);
               }
          ]]>
     </fx:Script>

     <fx:Declarations>
          <!-- Place non-visual elements (e.g., services, value objects) here -->
     </fx:Declarations>

     <s:Button label="Go To Home View"
                 horizontalCenter="0" verticalCenter="0"
                 click="button1_clickHandler(event)"/>
</s:View>
The navigator has additional methods for moving between views within
your application. They are as follows:
navigator.popAll()
Removes all the views from the navigator stack. This method
changes the display to a blank screen.
navigator.popToFirstView()
Removes all views except the bottom view from the navigation
stack. The bottom view is the one that was first pushed onto the
stack.
navigator.popView()
Pops the current view off the navigation stack. The current
view is represented by the top view on the stack. The previous view
on the stack becomes the current view.
navigator.pushView()
Pushes a new view onto the top of the navigation stack. The
view pushed onto the stack becomes the current view.
Each of the methods described above allow for a transition to be
passed in. By default, they will use a wipe transition. All pop actions
will wipe from left to right, while a push action will wipe from right to
left.
Another important item to note on the
navigator.pushView() is the ability to pass an object
into the method call. I have updated the following sample to demonstrate
how to use this within your applications.
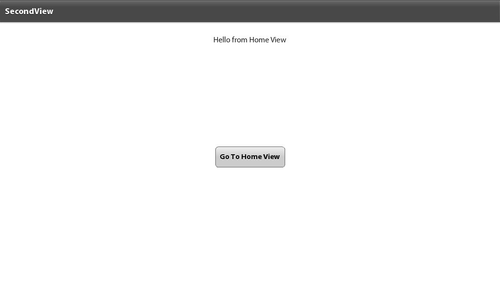
The ViewBasedHomeView shown next now includes a
piece of String data—“Hello from Home View”—within the
pushView() method. The SecondView
has also been updated to include a new Label, which is
bound to the data object. This data object will hold the value of the
object passed in through the pushView() method. Figure 4 shows the how the
SecondView is created with the Label
showing our new message.
<?xml version="1.0" encoding="utf-8"?>
<s:View xmlns:fx="http://ns.adobe.com/mxml/2009"
          xmlns:s="library://ns.adobe.com/flex/spark" title="HomeView">

     <fx:Script>
          <![CDATA[
               protected function button1_clickHandler(event:MouseEvent):void
               {
                    navigator.pushView(views.SecondView, "Hello from Home View");
               }
          ]]>
     </fx:Script>

     <fx:Declarations>
          <!-- Place non-visual elements (e.g., services, value objects) here -->
     </fx:Declarations>
     <s:Button label="Go To Second View"
                 horizontalCenter="0" verticalCenter="0"
                 click="button1_clickHandler(event)"/>
</s:View>

<?xml version="1.0" encoding="utf-8"?>
<s:View xmlns:fx="http://ns.adobe.com/mxml/2009"
          xmlns:s="library://ns.adobe.com/flex/spark" title="SecondView">

     <fx:Script>
          <![CDATA[
               protected function button1_clickHandler(event:MouseEvent):void
               {
                    navigator.pushView(views.ViewBasedHomeView);
               }
          ]]>
     </fx:Script>

     <fx:Declarations>
          <!-- Place non-visual elements (e.g., services, value objects) here -->
     </fx:Declarations>
     <s:Label text="{data}" horizontalCenter="0" top="30"/>
     <s:Button label="Go To Home View"
                 horizontalCenter="0" verticalCenter="0"
                 click="button1_clickHandler(event)"/>
</s:View>
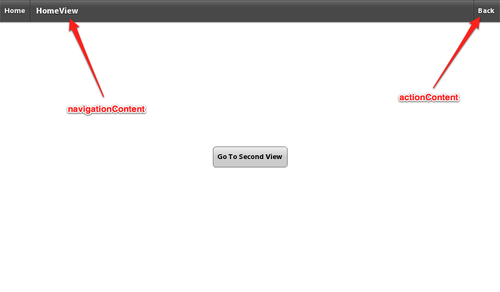
The navigation bar at the top of a View-Based Application allows you
to set specific elements. These are the
navigationContent and the
actionContent. By setting these elements, your
application can include a common navigation throughout. The code that
follows shows an example of the View-Based Application’s main file updated
with these new elements. You will notice that the
navigationContent and actionContent
and Spark components are defined in MXML. Within each,
I have included a Button. Each
Button has a clickHandler that
includes a call to one of the navigator methods. The
Button that has the label “Home” has a
clickHandler that includes a call to the
popToFirstView() method, which will always send the
user back to the view that is defined in the firstView
property of the ViewNavigationApplication. The
Button that has the label “Back” has a
clickHandler that includes a call to the
popView() method, which will always send the user back
to previous view in the stack. Note that, when using
popView(), you will need to make sure your application
is aware of where it is in the stack, as a call to
popView() when the user is already on the
firstView will send the user to a blank screen. Figure 5 shows the application,
which now includes the new navigation elements within the navigation
bar.
Note:
Although this example utilizes a Button component to demonstrate view
navigation, best practices when developing mobile applications dictate
that your application should rely on the device’s native back button
navigation.
<?xml version="1.0" encoding="utf-8"?>
<s:ViewNavigatorApplication xmlns:fx="http://ns.adobe.com/mxml/2009"
                                   xmlns:s="library://ns.adobe.com/flex/spark"
firstView="views.ViewBasedHomeView">

     <fx:Script>
          <![CDATA[
               protected function homeButton_clickHandler(event:MouseEvent):void
               {
                    navigator.popToFirstView();
               }

               protected function backButton_clickHandler(event:MouseEvent):void
               {
                    navigator.popView();
               }

          ]]>
     </fx:Script>

     <fx:Declarations>
          <!-- Place non-visual elements (e.g., services, value objects) here -->
     </fx:Declarations>

     <s:navigationContent>

          <s:Button id="homeButton" click="homeButton_clickHandler(event)"
                      label="Home"/>

     </s:navigationContent>

     <s:actionContent>
          <s:Button id="backButton" click="backButton_clickHandler(event)"
                      label="Back"/>
     </s:actionContent>
</s:ViewNavigatorApplication>
1. View Life Cycle
The View class includes some new life cycle events specifically
added for mobile applications.
These events are important for application memory conservation.
FlexEvent.VIEW_ACTIVATE is dispatched when
the view has been activated.
viewActivate="view1_viewActivateHandler(event)"
FlexEvent.VIEW_DEACTIVATE is dispatched
when the view has been deactivated.
viewDeactivate="view1_viewDeactivateHandler(event)"
FlexEvent.REMOVING is dispatched right
before FlexEvent.VIEW_DEACTIVATE is dispatched
when the view is about to be deactivated. Calling
preventDefault() will cancel the screen
change.
Although this life cycle is great for keeping the application’s
memory usage to a minimum, the default behavior to deactivate a view
also destroys any data associated with that view. To preserve data so
that it will be available if the user returns to that view, you can save
the data to the View.data property.
If you would like to prevent a view from ever being
deactivated, you can set the destructionPolicy
attribute of the view to be never; it usually defaults to auto.
destructionPolicy="never"