1. Showing Your Contacts Addresses on the Map
One of the great things about the iPad is its
integration with Google Maps. This is very evident in the Contacts app.
Let's say you want to map the home or work address of any contact in
your address book. In the old days (pre-iPad), you'd have to use Google
or MapQuest or some other program and laboriously retype or copy and
paste the address information. Very time-consuming—but you don't have to
do this on the iPad.
Simply open the contact as you did earlier. This time, touch the address at the bottom of the contact information.
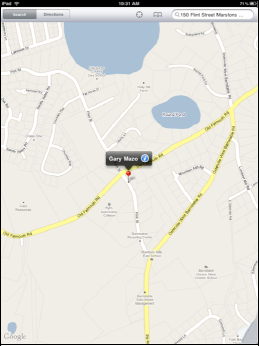
Your Maps app
(which is powered by Google Maps) immediately loads and drops a push-pin
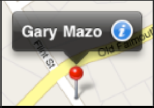
at the exact location of the contact. The contact name will appear in
above the push-pin.

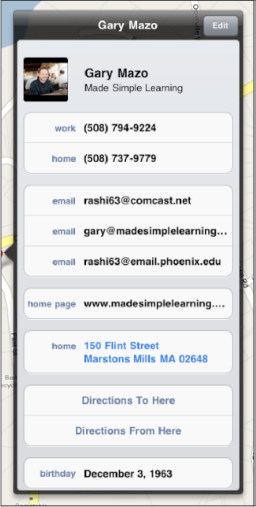
 Touch the tab on the top of the push-pin to get to the info screen.
Now you can select Directions To Here or Directions From Here.
Then type the correct start or end address and touch
the Route button in the lower right corner. If you decide you don't want
the directions, just tap the Clear button in the top left.
What if you had just typed the address in your Maps
app, not clicked from your contact list? In that case, you might want to
touch Add to Contacts to add this address.

|
To return to your contact information, tap the Home button and then tap Contacts. |
2. Changing your Contact Sort Order and Display Order
Like other settings, the Contacts options are accessible via the Settings icon.
Touch the Settings icon and scroll down to Mail, Contacts, Calendars and touch the tab.
Scroll down and you'll see Contacts, with two options underneath. To change the sort order, touch the Sort Order tab and select whether you want your contacts sorted first by first name or last name.
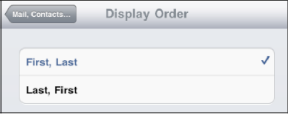
You may want to change how your contacts are displayed. Here's where you get it done; you can choose First, Last or Last, First. Tap the Display Order tab and choose whether you want your contact displayed in first-name or last-name order. Tap the Mail, Contacts... button in the upper left corner to save your settings changes.
2.1. Searching for Global Address List (GAL) Contacts
Open your Contacts app as you normally would and touch the Groups button in the top left corner. Look for the group that has Global
next to it in your Group list and touch it. This gives you access to
your Global Address List if you are connected to your organization's
server.
3. Contact Troubleshooting
Sometimes, your Contacts app might not work the way you expect. Make sure you have selected All Groups in the settings in iTunes.
|
If you are syncing with another contact application, such as Contacts in Gmail, make sure you select the option closest to All Contacts rather than a subset like a particular group.
|
|
3.1. When Global Address List Contacts Don't Show up (For Microsoft Exchange Users)
First, make sure you are connected to a Wi-Fi or 3G cellular data network.
Next, check your Exchange settings and verify you have the correct server and login information. To do so, tap the Settings button, then scroll to and touch Mail, Contacts and Calendar.
Find your Exchange account on the list and touch it to look at the
settings. You may need to contact technical support at your organization
to make sure your Exchange settings are correct.