Aligning Objects to One Another
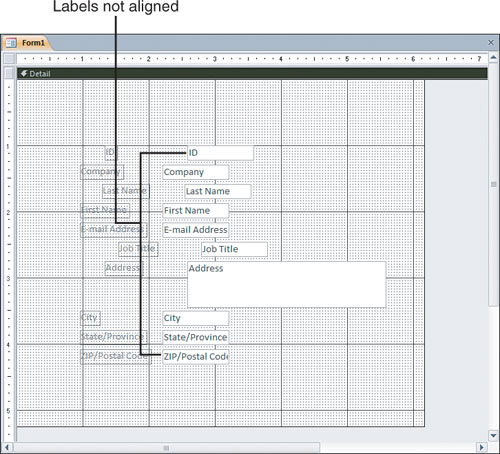
Access makes it easy to align objects. Figure 6
shows several objects that aren’t aligned. Notice that the attached
labels of three of the objects are selected. If you align the attached
labels, the controls (in this case, text boxes) remain in their
original positions. If you also select the text boxes, the text boxes
try to align with the attached labels. Because Access doesn’t allow the
objects to overlap, the text boxes end up immediately next to their
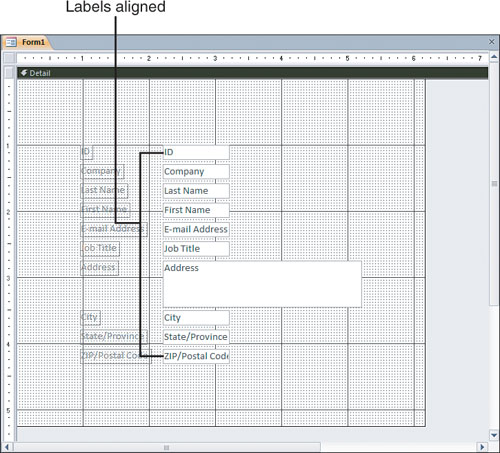
attached labels. To left-align any objects (even objects of different
types), you select the objects you want to align and then choose Left
from the Align drop-down in the Sizing & Ordering group on the
Arrange tab of the Ribbon. Access aligns the selected objects (see Figure 7). You can align the left, right, top, or bottom edges of any objects on a form.
|
You shouldn’t confuse the Align feature on the
Arrange tab of the Ribbon with the Align tools (that is, Align Left,
Center, and Align Right) on the Home tab of the Ribbon. Whereas the
Align feature on the Arrange tab of the Ribbon aligns objects one to
the other, the Align tools on the Home tab of the Ribbon justify the
text inside an object.
|
Sizing Your Controls
Just
as there are several ways to move objects, you have several options for
sizing objects. When you select an object, you can use each handle,
except for the handle in the upper-left corner of the object, to size
the object. The handles at the top and bottom of the object enable you
to change the object’s height, and the handles at the left and right of
the object let you change the object’s width. You can use the handles
in the upper-right, lower-right, and lower-left corners of the object
to change the width and height of the object simultaneously. To size an
object, you place the mouse pointer over a sizing handle, click, and
drag. You can select several objects and size them all simultaneously.
Each of the selected objects increases or decreases in size by the same
percentage; their relative sizes stay intact. You use the upper-left
handle to move an object independent of its attached label. This means,
for example, that you can place the label associated with a text box
above the text box, rather than to its left.
Access offers several powerful methods of sizing
multiple objects, which you access by selecting Size/Space from the
Sizing & Ordering group on the Arrange tab of the Ribbon:
To Fit— Sizes the selected objects to fit the text within them
To Grid— Sizes the selected objects to the nearest gridlines
To Tallest— Sizes the selected objects to the height of the tallest object in the selection
To Shortest— Sizes the selected objects to the height of the shortest object in the selection
To Widest— Sizes the selected objects to the width of the widest object in the selection
To Narrowest— Sizes the selected objects to the width of the narrowest object in the selection
Probably the most confusing of the options is To
Fit. This option is somewhat deceiving because it doesn’t perfectly
size text boxes to the text within them. In today’s world of
proportional fonts, it isn’t possible to perfectly size a text box to
the largest possible entry it contains. Generally, however, you can
visually size text boxes to a sensible height and width. You use a
field’s Size property to limit what’s typed in the text box. If the
entry is too large to fit in the allocated space, the user can scroll
to view the additional text. As the following tip indicates, the To Fit
option is much more appropriate for labels than it is for text boxes.
|
To
quickly size a label to fit the text within it, you can select the
label and then double-click any of its sizing handles, except the
sizing handle in the upper-left corner of the label.
|