Printing in Portrait or Landscape Orientation
Not
all Excel reports are the same. Some reports have just a few columns,
while others are very wide with many columns. Depending on your report,
you will either print in Portrait or Landscape orientation. The default
orientation in Excel is Portrait, meaning the report can fit vertically
on one page without the sides being cut off. Landscape orientation means
that your page is printed horizontally (on its side) so that you get
that extra room on the sides for more columns to fit.
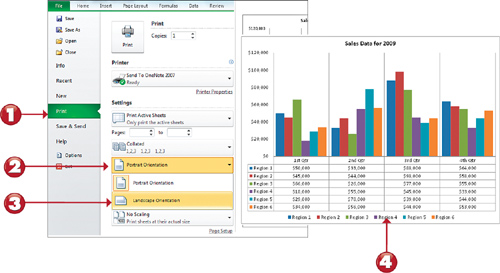
1. Go the File tab and click Print.
2. Click the Orientation drop-down.
3. Select the Landscape Orientation option.
4. Your report is now in Landscape orientation.
Centering a Worksheet on a Page
If
you want a cleaner, more professional looking printout for a
presentation, you might want to center your worksheet data on the page
before you print it. This is a particularly good idea if you plan to
print your worksheet on one page.
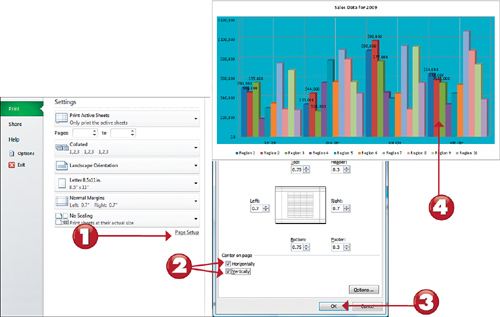
1. Go to the Print pane in the Backstage View and click the Page Setup link.
2. On the Margins tab, click the Horizontally and/or Vertically check boxes in the Center on page area.
3. Click OK.
4. Your worksheet appears in Print Preview mode, centered.
Tip: Centering Vertically or Horizontally
You
don’t have to center your data both vertically and horizontally. You
can choose one or the other, depending on how you want your printed
worksheet to look. |
Printing Gridlines and Row/Column Headers
By
default, Excel doesn’t print worksheet gridlines or row/column headers.
You can, however, instruct Excel to print them. Gridlines help you read
information in a printed worksheet, keeping rows and columns of data
visually organized. Row and column headers can help you quickly find
data in your worksheet.
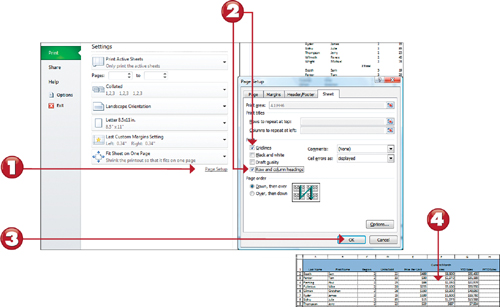
1. Go to the Print pane in the Backstage View and click the Page Setup link.
2. On the Sheet tab, click the Gridlines and Row and column headings check boxes in the Print area to select them.
3. Click OK.
4. Your worksheet appears in Print Preview mode with gridlines and row/column headers visible.
Note: Repeating Titles
Displaying
row and column headers is not the same as printing repeating titles.
Repeating titles are column headers and row headers that you have
assigned in your worksheet.
|