Whereas text formatting changes the
appearance of the typed characters in your notes, paragraph formatting
lets you modify the alignment, spacing, and ordering of lines of text in
your notes.
Like many other basic formatting tasks, these options
are nearly the same in OneNote 2010 as they are in some of the other
Office 2010 programs you might already be familiar with. Still, let’s
take a few moments to have a closer look at these features.
1. Creating a Bulleted List
Bulleted lists are useful for arranging several
pieces of written information on a page without the need to keep them in
any particular order.
You can create a bulleted list in your notes by following these steps:
1. | Place the insertion point on a new line where you want the bulleted list to start.
|
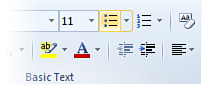
2. | On the Home tab, in the Basic Text group, click the Bullets button (see Figure 1).
|
3. | When
the first bullet appears, type the first item, and then press Enter.
OneNote will keep creating bullets each time you press Enter.
|
4. | To finish the bulleted list, press Enter twice in a row.
|
|
To
change the symbol that OneNote should use for bulleted lists that you
create, click the small arrow next to the Bullets button on the ribbon,
and then click a different style of bullet from the Bullet Library that
appears.
|
2. Creating a Numbered List
Numbered lists are useful for arranging several
pieces of written information on a page in a specific, numeric
order.
You can create a numbered list in your notes by following these steps:
1. | Place the insertion point on a new line where you want the numbered list to start.
|
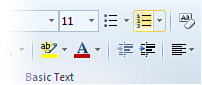
2. | On the Home tab, in the Basic Text group, click the Numbering button (see Figure 2).
|
3. | When
the first number appears, type the first item and then press Enter.
OneNote will keep creating numbered items each time you press Enter.
|
4. | To finish the numbered list, press Enter twice in a row.
|
|
To change the style of numbering that OneNote should
use for numbered lists that you create, click the small arrow next to
the Numbering button on the ribbon and then click a different style of
numbering format from the Numbering Library that appears.
|
3. Aligning Text on a Page
Text alignment options in OneNote let you quickly
move text to a specific location within its note container. You can
choose to center text, flush it to the left, or flush it to the right.
To align text on a page, follow these steps:
1. | Click anywhere within the line of text that you want to align.
|
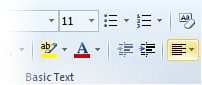
2. | On the Home tab, in the Basic Text group, click Paragraph Alignment (see Figure 3).
|
3. | On the pop-up menu that appears, select the alignment you want—Align Left, Center, or Align Right.
|
Unlike a word processor, which typically uses the
full dimensions of the current page, OneNote uses the dimensions of the
note container containing the text that you want to align.
|
To change the alignment of text you have already
aligned in a certain way, simply repeat the previous procedure and then
make a different selection in step 3.
|
4. Changing Paragraph Spacing
By default, OneNote will use the default font or the
font with which you formatted the text on a page to determine how much
space to keep between the lines of text in a paragraph.
You can easily change the spacing of any paragraph by following these steps:
1. | Click anywhere within the paragraph whose line spacing you want to change.
|
2. | On the Home tab, in the Basic Text group, click Paragraph Alignment.
|
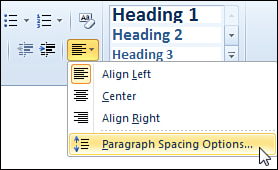
3. | At the bottom of the pop-up menu that appears, click Paragraph Spacing Options (see Figure 4).
|
4. | In
the Paragraph Spacing Options dialog box that appears, enter the amount
of space (in points) that you want OneNote to apply before or after a
line of text. You can also set a minimum line spacing value in the last
field (also in points).
|
5. | Click OK to apply your preferences to the current paragraph.
|
If the values you enter in the Paragraph
Spacing dialog box don’t seem to change anything, try to significantly
increase the values. You will start seeing a change in the line spacing
as soon as you enter a value that’s larger than the font size of the
current line of text. For example, if the font size of the current text
is 11, you could enter a 12 or a higher value for the Before or After
values to see an increase in the spacing. OneNote thinks of the combined
value (the font size and the increment you add) as the overall line
height. For this reason, if you enter values that are equal or smaller
to the current font size, the paragraph spacing will remain unaffected.