Not surprisingly, probably the best way to experience
any Microsoft Office mobile app is on Microsoft’s own smartphone
platform, called Windows Phone 7. Although the individual devices that
support this operating system vary with different North American cell
phone providers, the complete version of Office Mobile—including OneNote
Mobile—is included for free on all Windows Phone 7 devices.
The following procedures outline the basic tasks for getting started with this version of OneNote Mobile.
Starting OneNote Mobile on Windows Phone 7
On your Windows Phone 7 device, do the following:
1. | Near
the upper right on your phone’s Start screen, click the circled arrow
pointing to the right. Alternately, you can swipe your finger across the
screen from the right side to the left.
|
2. | In the list of installed apps that appears, swipe your finger upward to scroll down to the app named Office.
|
3. | With
your finger, tap the Office app. The Microsoft Office hub appears,
giving you access to OneNote Mobile, Excel Mobile, Word Mobile, and
PowerPoint Mobile.
|
You
might notice that the Office hub displays OneNote right on its home
screen. This allows fast access to all of your notes, making capturing
and accessing your information on the go less cumbersome.
Exploring the OneNote Mobile Guide
The square, orange tiles on
the Office home screen represent individual notes that you’ve created or
opened in OneNote Mobile. To open a note, tap its orange tile.
If you don’t have any of your
own notes there yet, take a moment to read the short OneNote Mobile
Guide, which is included as a OneNote note. It briefly outlines the
features that are available in OneNote Mobile on Windows Phone 7.
To explore the OneNote Mobile Guide, do the following:
1. | On
the Office Mobile home screen, tap the orange tile labeled “Explore
OneNote.” This is how you open any of your OneNote Mobile notes for
viewing or editing.
|
2. | When
the note opens, read the information provided. Swipe your finger upward
across the screen to scroll down and display the rest of the page.
|
3. | To return to the Office Mobile hub, tap the Back button at the bottom of your phone or device.
|
Creating a New Note
To create your first note in OneNote Mobile on your Windows Phone 7, follow these steps:
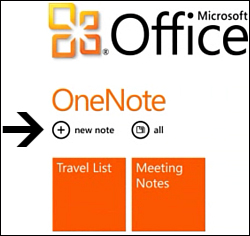
1. | On the Office home screen, under the OneNote app heading, tap the New Note button (see Figure 1).
|
2. | When the note opens and the onscreen keyboard appears, tap the words Enter title at the top of the screen.
|
3. | Type
a page title to describe the note. This page title will appear on the
note’s orange tile on the home screen and it will also be used as the
page title when you view the note in the OneNote Web App or in the full
version of OneNote 2010 on your computer.
|
4. | Tap below the line that appears under the page title and then use the onscreen keyboard to type notes.
|
As with the full version of
OneNote 2010, you don’t need to explicitly save your work when you’re
done taking notes in OneNote Mobile. It will save your notes as soon as
you’ve written them, which means you can tap the Back button or the
Start (Windows logo) button at the bottom of your phone or device at any
time to quit your session of OneNote Mobile. The next time you return
to the Office hub, you’ll see your note on the OneNote home page.
|
OneNote Mobile on
Windows Phone 7 supports landscape mode, allowing you to use a wider
onscreen keyboard and see more of your notes horizontally. To use
landscape mode, tilt your phone 90 degrees to the left until the user
interface changes to a widescreen layout. You can change back to
portrait mode at any time by tilting your phone back into its normal
upright position.
|
Correcting Text in a Note
If you’re using any
Microsoft Office program on your computer, you’re already familiar with
the convenient spell-checking feature, which underlines potentially
misspelled or unknown words with a red squiggly line. In OneNote Mobile,
this feature works, too. Given that the onscreen keyboards on cell
phones are much more error-prone
than using a real, physical keyboard, this is a welcome and useful
feature, allowing you to make corrections easily, especially if you’ll
be sharing your mobile notes with others.
To check spelling in a mobile note, do the following:
1. | Open or create a new note.
|
2. | Look for text that is underlined with a red, squiggly line.
|
3. | Tap
the questionable word once with your finger to select it and then
inspect the word list that’s displayed just above the onscreen keyboard.
|
4. | To
substitute a misspelled word with a word that appears in the list, tap
to select the correct word. To substitute a misspelled word with a new
word that doesn’t appear in the word list, type the correct word.
|
|
Although misspelled text in
the page header won’t appear marked with a red, squiggly underline, the
word replacement feature works the same here as for normal text. Tap a
misspelled word once in your page header to select it, and then tap the
correct word when it appears in the word list above the onscreen
keyboard.
|
Formatting Text in a Note
Excluding the page
title, OneNote Mobile on Windows Phone 7 supports basic text formatting
that you might already be used to from any of the programs in the full
version of Microsoft Office on your computer.
You can format any part of your notes text in any of the following styles:
Bold text
Italic text
Underline text
Strikethrough text
Yellow highlighted text
To apply text formatting to any part of your notes, do the following:
1. | Open or create a note whose text you want to format.
|
2. | Tap
the text you want to format to select it. If you want to extend the
selection, tap and hold either of the two small arrows that appear
underneath the selection highlight and then drag them to include all of
the text you want to format. If you make a mistake, either start over or
format the remaining text separately.
|
3. | At the bottom of the screen, to the right of the round command icons, tap the More (...) icon to display the action menu.
|
4. | At the bottom of the menu that appears, tap Format.
|
5. | In
the Format menu, tap the formatting style you want. Because the text
will stay selected, you can easily apply any additional formatting style
to the selected word or paragraph. To do so, repeat steps 3–5 in this
procedure to apply the additional formatting.
|
To remove any formatting
style that you’ve applied, reselect the text in your notes and then
apply the same formatting style again. Doing so removes that style from
the selected text.