In this exercise, you will explore several options for previewing and printing your document.
Note:
You need the HR Process Map for Chapter08_start drawing located in the Chapter08 practice file folder to complete this exercise. Open the drawing in Visio and save it as HR Process Map for Chapter08.
On the File tab, click Print to display the Print page of the Backstage view.

Tip:
Though you won’t use it in this
exercise, note that the Quick Print button prints the entire current
document to the default printer.
Print Preview

On the Print page, click Print Preview.
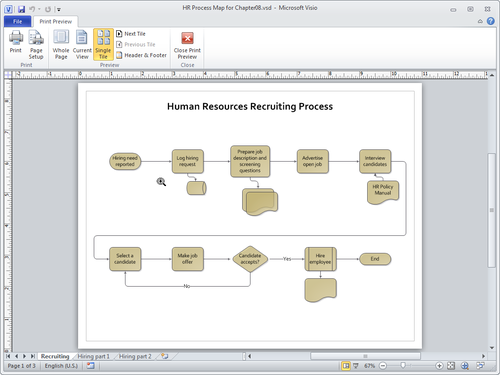
If you like what you see in the preview window, click the Print button in the Print group.
Tip:
Notice that the cursor, located between Hiring need reported and Log hiring request,
has turned into a magnifying glass with a plus sign, indicating that
when you click anywhere on the preview page, Visio will zoom in. After
zooming in, the magnifying glass will contain a minus sign, indicating
that the next click will zoom out.
Next Tile

In the Preview group, click the Next Tile button to view the next page of the drawing in preview mode.
Tip:
The use of the word tile in this context will become clearer in Step 9.
You can also move among pages by clicking the page name tabs at the bottom of the print preview window.
Header & Footer

In the Preview group, click the Header & Footer button to open the Header and Footer dialog box, which allows you to set a three-part header or footer for this document.
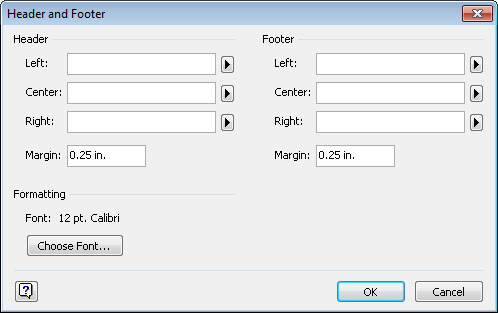
You
can type text into any of the Header and Footer fields, or you can
click the right arrow next to each field to select a predefined value
from the list.
Tip:
Headers and footers
print information on the top and bottom of each printer page and are
independent of the drawing page. Consequently, headers and footers can
be useful for Visio diagrams in which the drawing page is spread across
multiple printer pages. They are used infrequently for the majority of
Visio documents where each drawing page prints on a single printer page.
In those cases, including header or footer information on background
pages is a more common technique.
If you added header or footer information, click OK; otherwise click Cancel.
Close Print Preview

On the Print Preview tab, in the Close group, click the Close Print Preview button.
Note:
You can also close the print preview by pressing the Esc key.
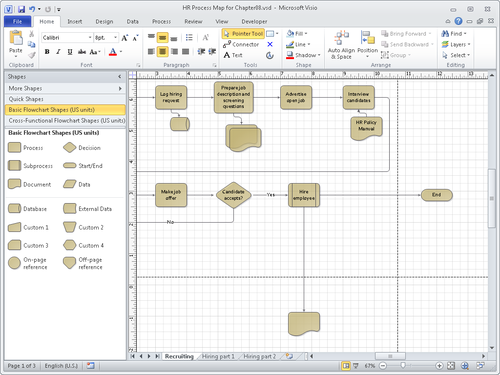
Click the End shape and drag it off the page to the right, causing Visio to create a new page.
Warning:
Important
Performing the actions in this
step and the next one creates a Visio diagram that is larger than one
printer page so you can see the effect this has on print preview and
printing.
Click the document shape below the Hire employee shape and drag it off the bottom of the page. Visio expands the drawing page to accommodate the new location.
On the File tab, click Print, and then click Print Preview.
Note:
You can also open the print preview window by typing either Alt+F, P, V (File, Print, Preview) or Alt+F, F.
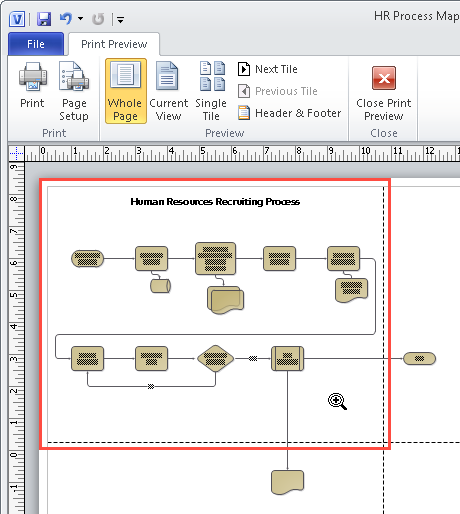
The default view shows the full drawing page divided into printer page–sized tiles. As you move the cursor over any print tile, Visio highlights it with a red border.
Tip:
Depending
on the ratio between drawing page size and printer page size, you will
see either multiple tiles per drawing page (as in the previous graphic)
or a single tile per page (as shown in the graphic in [click here]).
You can adjust what you see in the preview window by using several buttons on the ribbon:
Single Tile

Click the Single Tile button in the Preview group to view just one print tile. Click the Next Tile or Previous Tile button to move forward or backward in the collection of print tiles.
Current View

Click the Current View button in the Preview group to change the print preview to reflect the location and zoom setting of the active page in the Visio drawing.
Whole Page

Click the Whole Page button to see all tiles for a single drawing page.
On the Print Preview tab, in the Close group, click the Close Print Preview button.
Print

On the File tab, click Print, and then click the Print button to open a standard print dialog box. Click OK to print or click Cancel to close the dialog box without printing.
Note:
Leave the HR Process Map for Chapter08 drawing open if you are continuing with the next exercise. It is not necessary to save changes.
|