Manual page breaks can come in particularly handy for
long documents, for example, when you want to move a heading or picture
to the top of the next page. You can use additional page-oriented
features to add necessary or decorative information to any document,
long or short. This section shows you what some of those features are
and how to use them in Word.
Creating a Cover Page
Most formal documents like reports and proposals do not launch right into the text. Instead they include a title page or cover page
that provides basic information about the document. The information
contained on a cover page can include the document title, a subtitle, a
brief summary of the document (called an abstract),
the year or date it was created, the author’s name, a company name and
address, or even an image that illustrates the document’s contents.
Word 2010’s Building Blocks
Organizer offers 19 preformatted cover pages that you can add to any
document. Each cover page has preformatted placeholders that prompt you
to add applicable text. The more simple cover page designs include
design elements like rules and blocks of color, while the more advanced
designs include other graphic elements like photos and drawn objects.
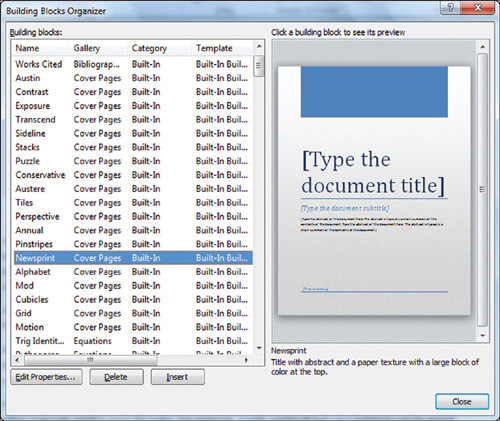
To add a cover page to the
current document, choose Insert > Text > Quick Parts > Building
Blocks Organizer. In the Building Blocks Organizer dialog box, scroll
down the Building Blocks list and click one of the choices with Cover
Pages in the Gallery column. As shown in Figure 1,
a preview of the selected cover page appears at the right side of the
dialog box. When you’ve found the cover page you like, click Insert.
Word inserts the cover page
as the first page in the document. You can go there and replace the
placeholder information in the square brackets. Of course, you can
substitute information other than that suggested by a placeholder. You
also can delete a placeholder by clicking it, then clicking the tab that
appears, and then pressing Delete to remove it.
Tip
Clicking a date placeholder displays a drop-down list arrow. Click it to open a calendar from which you can select a date.
Displaying a Watermark
Paper
with a watermark has a semi-transparent imprint that’s visible only
when you hold the document up to the light. For some types of documents,
such as checks, the watermark provides a way to verify a document’s
legitimacy. In Word 2010, a watermark is a lightly printed background
image, often used to signal a document’s status, such as CONFIDENTIAL or
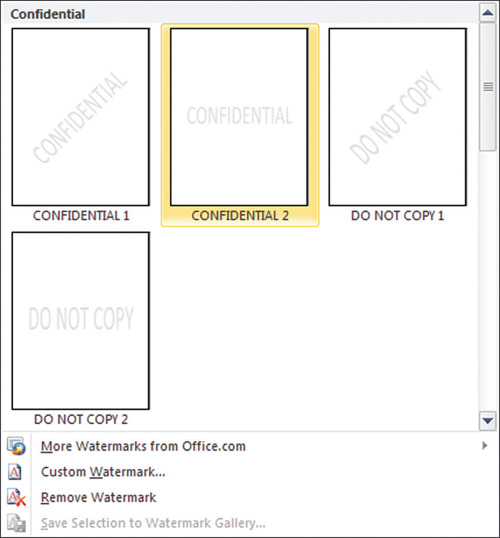
COPY. Word includes a few predefined watermarks that you can add to a
document by choosing Page Layout > Page Background > Watermark,
and then clicking one of the choices at the top of the menu that
appears, shown in Figure 2.
However,
Word doesn’t limit you to using its watermarks. You can create a
picture watermark, such as if you want to include a logo behind the text
on every page. Choose Page Layout > Page Background > Watermark
> Custom Watermark. In the Printed Watermark dialog box, click the
Picture Watermark option button, and then click the Select Picture
button. Select the desired picture in the Insert Picture dialog box,
click Insert, and then click OK.
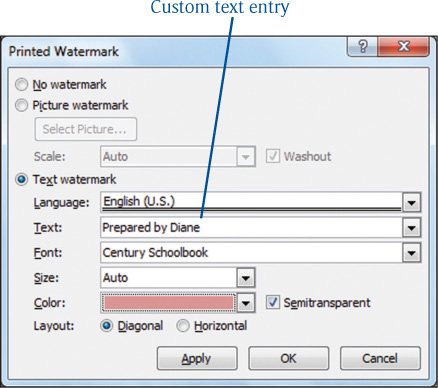
You also can create your own
text watermark that uses the word or phrase that you want and formatting
that you specify. Choose Page Layout > Page Background >
Watermark > Custom Watermark, and this time click the Text Watermark
option button. You choose one of the predefined words from the Text
drop-down list in the Printed Watermark dialog box, or type your own
word or phrase into the text box, as shown in Figure 3.
If needed, you can choose an alternate Font, Size, and Color in the
dialog box, and change the layout between Diagonal and Horizontal. You
also can use the Semitransparent check box to control the watermark’s
opacity. When you finish making your choices, click OK.
To remove a watermark, choose Page Layout > Page Background > Watermark > Remove Watermark.
Changing Page Color
If you plan to publish a
document as a Web page or a document’s recipient will be viewing it
onscreen, you can add a page background to all the pages in the
document. (By default, page backgrounds do not print.) You can see the
page background when you view the document in Print Layout, Full Screen
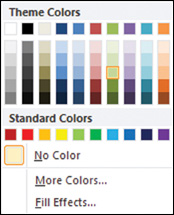
Reading, and Web Layout views. To apply one of the current theme colors
or a standard color as the page background, choose Page Layout > Page
Background > Page Color, and then click a color in the gallery that
appears, as shown in Figure 4. The No Color choice removes any previously applied page background.
Tip
To
print your Page background, choose File > Options. From the Display
section (under Printing options), check Print Background Colors and
Images, and then click OK. Many printers do not print to the edge of the
paper, so you may still see a white border around the page.
If a plain color doesn’t
provide the look you want, you can instead fill the page background with
a gradient, texture, pattern, or picture. Choose Page Layout > Page
Background > Page Color, and then click Fill Effects at the bottom of
the gallery. In the Fill Effects dialog box that appears, click the tab
for the type of background you want to create, use the tab’s settings
to select the desired fill (such as gradient colors or a texture), and
then click OK. To remove a page background fill effect, choose Page
Layout > Page Background > Page Color > No Color.
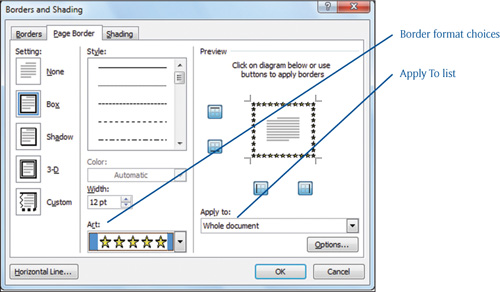
Adding Page Borders
A page border surrounds all of
the text and other contents on a document page. In the Borders and
Shading dialog box, you can select a line style, color, and width for
the border, or even select decorative art to serve as the border. You
also can use the choices in the Apply To drop-down list to control where
the page border appears:
Whole Document: Adds the page border to all pages in the document.
This Section: Adds the page border only to pages in the current section.
This Section – First Page Only: Adds the page border only to the first page in the section.
This Section – All Except First Page: Adds the page border to all pages except the first page in the section.
To add a page border,
choose Page Layout > Page Background > Page Borders. In the
Borders and Shading dialog box (shown in Figure 5),
first choose Style, Color, and Width settings in the center area of the
Page Border tab. Alternately, choose a decorative border style from the
Art drop-down list. Then click one of the Setting choices on the left,
such as Box or Shadow, to apply the border. Finally, make a choice from
the Apply To dropdown list to control which pages in the document show
the border. Then click OK.
Tip
If Word’s predefined cover
pages are too elaborate for you, you can create your own cover page by
adding a border to the first page of the first section of the document
and type the needed information on that page.