HEADERS AND FOOTERS
are features used for placing information at the top or bottom of every
page of a document. As you’d expect, a header prints at the top of
every page, and a footer prints at the bottom. You can place any
information in headers and footers, such as a company logo, the document
title, page numbering, and so forth.
Using Header and Footer Styles
In keeping with the themed concept of Office 2010,
the predefined headers and footers contain elements designed to make
your document more visually appealing. Choose Insert > Header &
Footer > Headers (or Footers) which displays a gallery of 27 unique
header (or footer) styles, as shown in Figure 1. If you were not already in Print Layout view, Word automatically switches you to it.
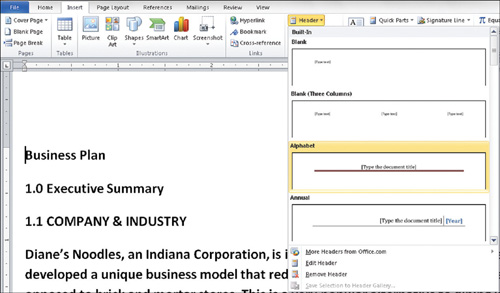
From the Header or Footer gallery, select the style
you want. The document header area becomes visible, the body of the
document fades, and Word displays one or more additional tabs on the
ribbon. You can now use the Header & Footer Tools > Design tab
for creating your personalized header or footer.
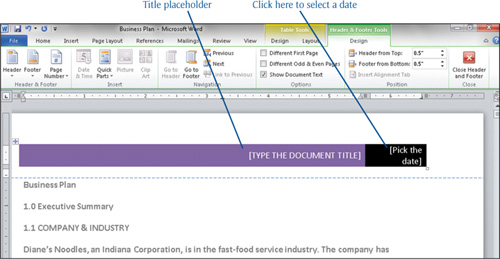
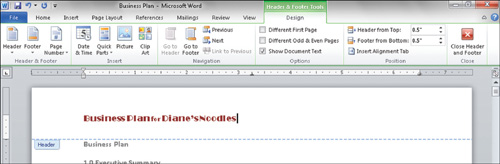
In the header example shown in Figure 2,
Word inserts a placeholder for the document title. Click the
placeholder and enter the desired text. Also in the same figure, you see
a placeholder that says Pick the Date. If you click the down arrow,
Word displays a calendar from which you can select the date you want in
the header. Optionally, you can just type a date in the date field. The
actual choices you see depend on which header or footer style you
select.
Tip
If you don’t want the predefined placeholder, click the small tab above the placeholder and press the Delete key.
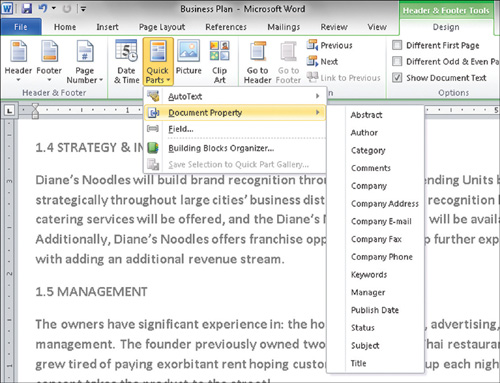
Now take a brief look at some of the tool groups on the Header & Footer Tools > Design tab, as shown in Figure 3.

Header & Footer: Use this group to change the header or footer style, or to insert the page number in the header or footer.
Insert:
From this group you can insert the current date or time, a picture, or a
piece of clip art. You can also select from Quick Parts and choose one
of the document properties shown in Figure 4.
Navigation: Use the tools in this group to move between the document headers and footers.
Options:
The Options group allows you to choose whether the first page of your
document should have a different header or footer from the rest of the
document. You can also choose different headers for the odd or even
numbered pages.
Position:
This group contains settings for exact header and footer placement in
relation to the top or bottom of the document paper edges.
Close:
Use this button to close the header or footer and return to the
document body. You can also double-click anywhere in the document body
to close the header or footer.
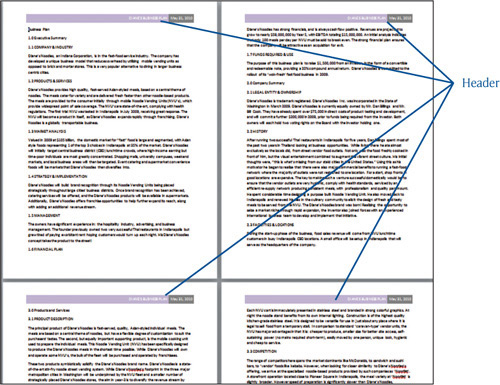
Every page of the document displays the header and/or footer you created (see Figure 5). Remember, however, that documents displayed in Outline or Draft view do not reveal any headers or footers.
|
If you don’t like the header or footer you selected,
double-click the header or footer, and then from the Header & Footer
Tools > Design tab, click the Header or Footer button and choose a
different header or footer.
|
Tip
To
further edit the header or footer, either double-click in the header or
footer area, or choose Insert > Header & Footer > Header (or
Footer) > Edit Header (or Footer). To remove the header or footer,
choose Remove Header (or Footer) from the same menu.
Creating a Custom Header or Footer
If
none of the predefined headers or footers suits your needs, you can
certainly create your own. You can add text, fields (such as date, time,
or author), or page numbers, and you can add graphics (such as logos,
lines, and other art). Just follow these steps:
Choose View > Document Views > Print Layout.
Tip
If you want to work on the footer instead of the header, click Go To Footer to jump to the footer area.
Double-click in any desired header or footer section and type the text you want for the header (or footer). As you see in Figure 6, you can format the header and footer text just as you would any cell data.
Insert any other options from the Header & Footer Tools > Design tab:
Page Number: Insert a code that indicates the page number.
Date & Time: Insert the print date or time of day.
Picture: Insert a graphic image such as a company logo.
Clip Art: Insert a clip art image.
Click in the document body, outside of the header (or footer) area, to close the header or footer.
Adding Page Numbering
Although Word automatically numbers your pages as you
type them, it doesn’t print the page numbers; it simply displays them
in the screen status bar. You can easily tell Word you want to print
them. Typically, the page numbers appear in the header or footer area,
but they don’t have to. You can place them wherever you want. What you
do need to remember, though, is to use the Page Number feature provided
by Word—don’t try to type the page numbering yourself. If you type Page 1
of 6 in the footer, every page will say Page 1 of 6. If you use one of
Word’s Page Number features, the page numbering will change as needed,
such as Page 2 of 6 or Page 3 of 6.
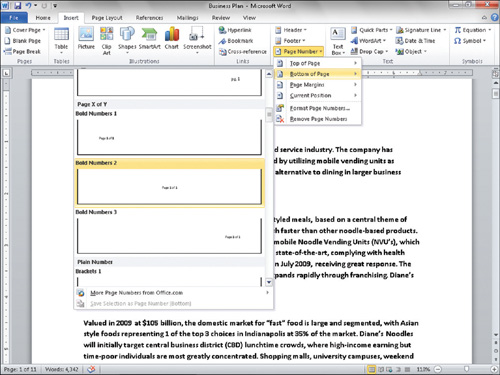
To insert a page number, choose Insert > Header
& Footer > Page Number. A menu of placement options appears. You
can put the page number at the top of the page in the header, at the
bottom of the page in the footer, in the page margins outside of the
header or footer, in the margin area, or you can put the page numbering
at the current document position of your cursor.
Choose the position you want, and then a gallery of prefabricated page number styles appears (see Figure 7). Select the page numbering style you want to use. Word adds the page numbering to your document, as shown in Figure 8.