The default Exchange Server configuration is set up when you run
the initial pass of the Set Up Your Internet Address Wizard and the Configure A Smart Host
For Internet E-Mail Wizard.
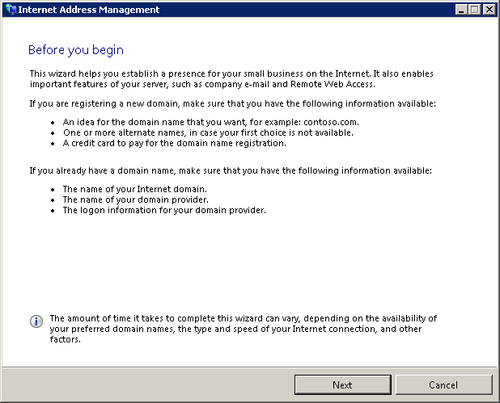
Before you can run the Set Up Your Internet Address Wizard,
shown in Figure 1,
you need to either have your Internet domain name registered or have a
good idea of the one you want to register, along with a couple of
alternatives in case the one you want isn’t available. If you already
have a domain, you’ll need to know whether you want to manage the DNS
settings for it yourself or have SBS manage it for you. Personally, we
prefer managing it ourselves, using a service such as ZoneEdit.com as
our DNS provider, but for many small businesses it’s just as easy to
have SBS manage the domain for you.
1. Configuring Internet Mail
There are two basic methods for sending email from SBS: direct
delivery and forwarding. Direct delivery uses DNS to route email directly to the server that the DNS
records point to for the recipient’s email domain. Email doesn’t
“pass through” any other Simple Mail Transfer Protocol (SMTP) servers along the way, and is shown as being
directly sent from your SBS Internet domain.
The second method forwards all your mail to another SMTP
server that is configured to both accept incoming email for
forwarding and to understand how to find the correct destination for
the email. Most Internet service providers (ISPs) provide this kind
of forwarding server, known as a Smart Host, as do a variety of email filtering and
protection services that you can use, such as ExchangeDefender (http://www.exchangedefender.com), our preferred
spam-filtering service.
|
Choosing forwarding (Smart Host) as your email delivery mechanism has
some drawbacks, not the least of which is that all email from your
Windows Small Business Server will show that it has been forwarded
from your ISP. This used to be a significant problem, but as the
attempts to control unsolicited commercial email (UCE, or more
commonly, spam) have matured, many ISPs don’t give you a choice.
If you’re on their network, you have to use their SMTP server or they simply block your outgoing
email. This is especially true if you have a dynamic IP address,
because home computers that have malware installed on them are a
common source of spam. In an attempt to prevent propagation of
that spam, many ISPs are deliberately blocking TCP port 25 (the
default port used by SMTP).
Unfortunately, some very fussy email domains refuse to
accept mail that has passed through a mail forwarder, and even
those who are not that absolute can end up blocking your email
when your ISP gets on their blacklist—something you have no
control over.
The solution is to have a fixed IP address on a
business-class account with your ISP. This ensures that your IP
address is a block of addresses that your ISP won’t block and that
other servers on the Internet will recognize as fixed addresses.
This kind of account is usually a good deal more expensive than a
basic floating IP address account designed for a home user. But
you’re not a home user, and you’ll have far
fewer problems if you use a business-class account.
The default configuration for Exchange Server is to deliver
email to recipients directly, not through a Smart Host. Use that configuration by preference,
and use a Smart Host only if you experience problems sending email
or if you’re using a service such as ExchangeDefender that acts as
both an inbound filter and an outbound verifier.
|
1.1. Enabling a Smart Host
If you need to use a Smart Host, SBS has a wizard to help
configure it for you. Hardly a surprise—SBS has a lot of wizards.
Usually, you will have configured this by running the Configure A
Smart Host For Internet E-Mail Wizard when you did the initial
setup of SBS, but circumstances can change, so you can always run
this later as well.
To configure SBS to use a Smart Host for Internet E-mail,
follow these steps:
Open the Windows SBS Console if it isn’t already
open.
Click Network on the top navigation bar, and then click
the Connectivity tab to open the Connectivity page, shown in
Figure 2.
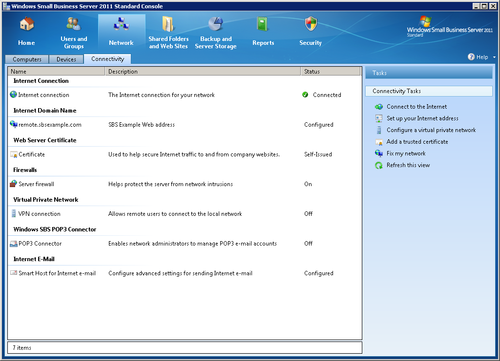
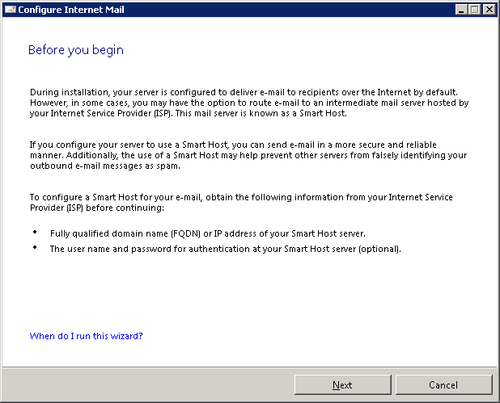
Click Smart Host For Internet E-mail, and then click
View Outbound Internet E-mail Properties in the Tasks pane to
open the Configure Internet Mail Wizard shown in Figure 3.
Click Next to open the Specify Settings For Outbound
Internet Mail page shown in Figure 4.
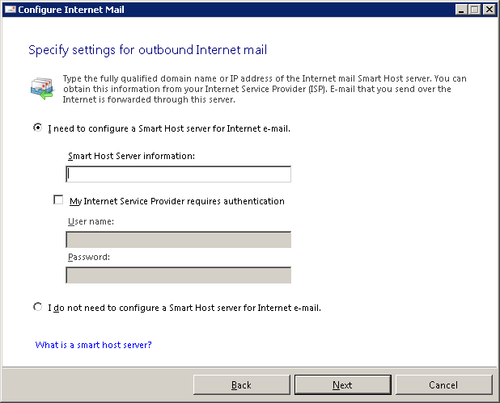
Enter the information provided by your ISP for
connecting to their Smart Host. Some ISPs require you to provide
authentication to connect. This information is usually
available on the support pages of your ISP.
Click Next to begin the configuration, and then click
Finish to close the wizard.
1.2. Enabling DNS Email Sending
By default, Exchange Server in SBS uses DNS to determine
where to send an email. If you haven’t configured a Smart
Host, you don’t need to do anything at all to use
DNS email sending. But if you’ve configured for
Smart Host and need to change back to using DNS, you
run the same wizard as when you configured for Smart Host. Follow
these steps:
Open the Windows SBS Console if it isn’t already
open.
Click Network on the top navigation bar, and then click
the Connectivity tab to open the Connectivity page shown
earlier in Figure 2.
Click Smart Host For Internet E-mail, and then click
View Outbound Internet E-mail Properties in the Tasks pane to
open the Configure Internet Mail Wizard.
Click Next to open the Specify Settings For Outbound
Internet Mail page shown in Figure 5.
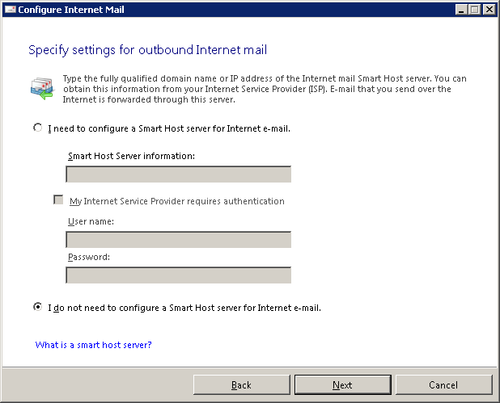
Select I Do Not Need To Configure A Smart Host Server
For Internet E-Mail.
Click Next to begin the configuration, and then click
Finish to close the wizard.