Searching your computer in Windows XP wasn’t
a terrible experience, but no one raved about it, either. First, there
was Microsoft’s inexplicable decision to ship XP with the Indexing
service turned off by default. Without the Indexing service, the search
function was next-to-useless in XP, but turning it on required several
relatively obscure clicks in the Search Companion. Even with the
Indexing service running, searches that included entire partitions could
take a frustratingly long time to complete.
Microsoft’s goal in Vista is to make
search a truly useful tool that provides complete results quickly. Did
it succeed? For the most part, yes. The Windows Search Engine (WSE)
service starts by default, which all by itself is a big improvement over
XP. On the downside, it can still take Vista an absurdly long time to
search, say, all of drive C:. However, that’s because the Windows Search
Engine does not index the entire drive. Instead, it just indexes your documents, your offline files (local copies of network files; ), and your email messages. If you’re searching for one of these types of files, Vista searches are lightning quick.
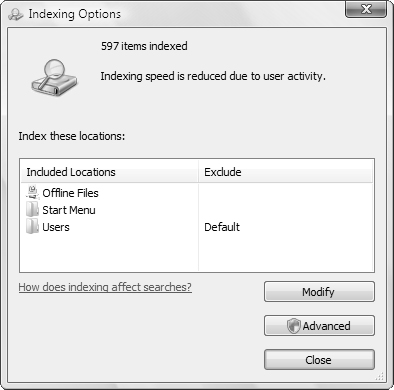
Note that you can control what WSE indexes and
force a rebuild of the index by selecting Start, Control Panel, System
and Maintenance, Indexing Options. This displays the dialog box shown in
Figure 1. To customize the search engine, you have two choices:
Modify—
Click this button to display the Indexed Locations dialog box, which
enables you to change the locations included in the index. Activate the
check box for each drive or folder you want to include.
Advanced—
Click this button to display the Advanced Options dialog box, which
enables you to index encrypted files, change the index location, specify
the file types (extensions) that you want include in or exclude from
the index. You can also click Rebuild to re-create the index.
Caution
The Windows Search Engine takes a long
time to index even a relatively small amount of data. If you’re asking
WSE to index dozens of gigabytes of data, wait until you’re done working
for the day and let the indexer run all night.
As-You-Type Searches with Instant Search
Vista’s
searching interface is also radically different from XP’s simple but
forgettable Search Companion. The most obvious—and, for simple searches,
certainly the most useful—innovation is the Instant Search box on the
Vista Start menu. As shown in Figure 2,
as you type characters in the Instant Search box, the Start menu
replaces the list of pinned and recently used programs with a new list
that displays the following search links:
A list of programs with names that include the typed characters
A list of files (documents) with content or metadata that include the typed characters
Other
data—such as Contacts, email messages, and sites from Internet
Explorer’s Favorites and History lists—with content or metadata that
include the typed characters
A See All Results link
A Search the Internet link
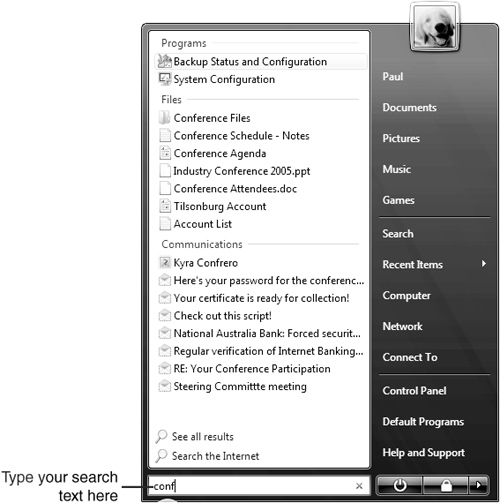
If
you see the program or file you want, click it to open it. Otherwise,
you can click Search the Computer to see the complete list of matches
from the files in your user profile. If you prefer to search the Web for
your text, click the Search the Internet link instead.
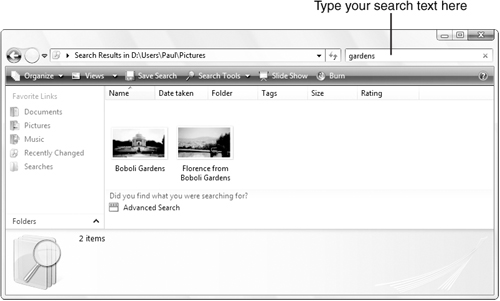
You can also perform these as-you-type searches
in any folder by using the Instant Search box that appears in every
Explorer window. As you type, Explorer displays those files in the
current folder with names or metadata that matches your search text, as
shown in Figure 3.
Tip
In a folder window, you can access the Instant Search box via the keyboard by pressing Ctrl+E.
Advanced Searches
As-you-type searches are handy and fast, but
they tend to return too many results because they look for your search
text in documents’ metadata and contents. However, to find what you’re
looking for in a hard disk with dozens or even hundreds of gigabytes of
data and many thousands of files, you need a more sophisticated
approach. Windows Vista can help here, too.
Run an as-you-type search and then click the
Advanced Search link. (Alternatively, select Search Tools, Search Pane
to add the Search pane, and then click Advanced Search.) Vista displays
the search controls shown in Figure 4.
Vista assumes that you
want to search by file type, so click one of the displayed types: All
(matches any file type), E-mail, Document, Picture, Music, or Other.
To modify where Vista searches, pull down the
Location list and click a location (for example, click Indexed Locations
to search in all the folders included in the Search index). You can
also click Choose Search Locations to display the Choose Search
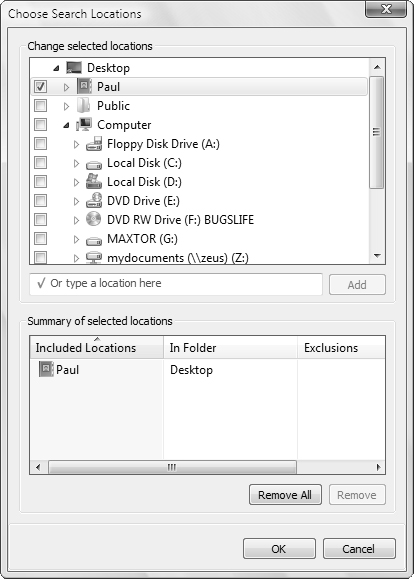
Locations dialog box, shown in Figure 5.
The bottom part of the dialog box tells you the locations that are
included in the search. You have three ways to modify these locations:
To add a folder, activate the check box beside the folder in the Change Selected Locations list.
To add any path, type it in the Or Type a Location Here text box, and then click Add.
To
remove a folder, either deactivate the check box beside the folder in
the Change Selected Locations list, or click the folder in the Summary
of Selected Locations and then click Remove.
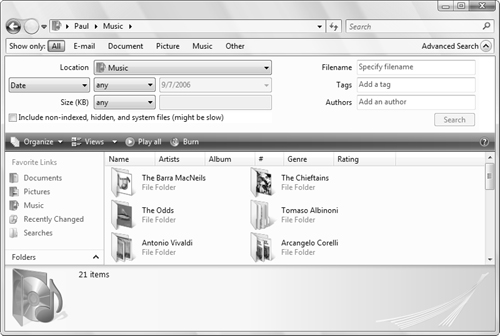
Finally, you can add metadata filters that
specify the properties in which you want Vista to look and how you want
it to look there. In the Advanced Search pane, use some or all of the
Date, Size, Filename, Tags, and Authors controls to enter your criteria.
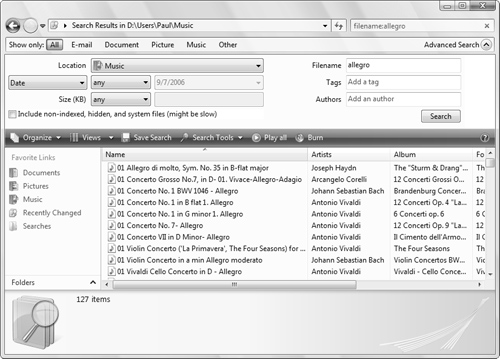
With your search criteria set up, you can run the search by clicking the Search button or by pressing the Enter key. Figure 6 shows some example results.
Saving Searches
After
taking all that time to get a search just right, it would be a real
pain if you had to repeat the entire procedure to run the same search
later. Fortunately, Windows Vista takes pity on searchers by enabling
you to save your searches and rerun them anytime you like. After you run
a search, you save it by clicking the Save Search button in the task
pane. In the Save As dialog box that appears, type a name for the search
and click Save.
Vista saves your searches in the
Searches folder, appropriately enough. To rerun a search, click the
Searches folder in the Navigation pane and then double-click the search.