You can now connect to the RemoteApp from
another computer. To do so, you will need to connect to the RemoteApp
via the Web interface (discussed later in this section) or a custom
remote desktop file. In this exercise,
we will create a custom remote desktop file to use. You can use the
RemoteApp Manager console to create a custom RDP file that can be
distributed to users to provide connectivity. To create the custom RDP
file, perform the following:
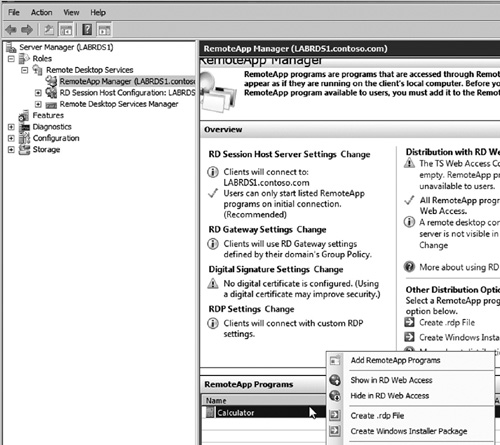
1. | Locate the program in RemoteApp Manager (see Figure 10). Right click the program and choose Create RDP File. This will launch the RemoteApp Wizard. Click Next to begin.

|
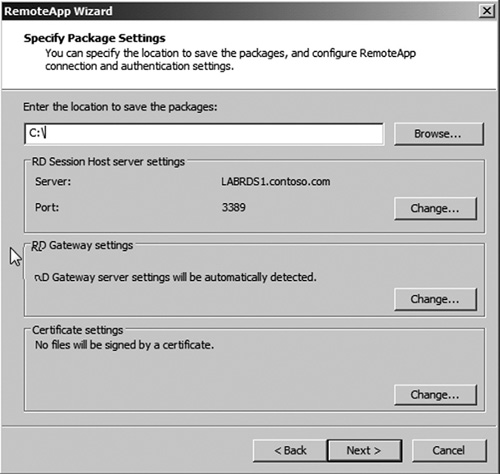
2. | Enter
a path to save the RDP file, and optionally change any configuration
settings such as host, gateway, and certificates. Then click Next (see Figure 11)

|
3. | Verify the settings on the Review Settings page. Then click Finish.
|
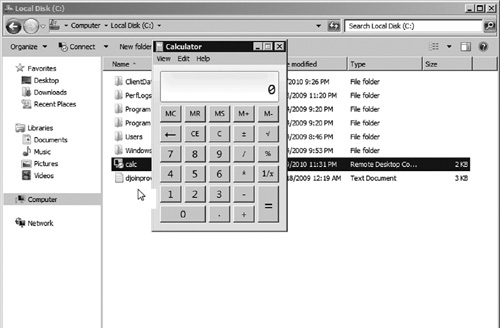
A new remote desktop configuration file should be
saved to the path you specified. You could now distribute this file to
other users or computers within your organization. To access the
RemoteApp, users just doubleclick the custom configuration file and
logon with their Active Directory credentials. If they have been
authorized to access the application, it should launch and appear as if
it were running locally on their workstations as seen in Figure 12.
