To move, scale, rotate, or shear a frame—or apply
any object formatting attributes, such as drop shadow or transparency
effects—you must select the frame first. The same rule also applies
when editing a frame’s path or when working with frame contents, such
as a placed graphic. InDesign includes two tools for making these types
of selections: the Selection tool and the Direct Selection tool.
The selection tools in InDesign behave very much
like the selection tools in Adobe Illustrator. You can use the
Selection tool to select, move, and resize an entire path. The Direct
Selection tool enables you to do so as well; however, it also enables
you to select and move individual points on a path.
Placing Images and Text
Both the Selection and Direct Selection tools can be
used to place images or text using the File, Place command: Cmd-D (Mac)
or Ctrl+D (Win). You can either place an image or a body of text into a
selected frame or click the loaded place icon anywhere on the page.
When you click the loaded graphics cursor, InDesign automatically
creates a frame and fits the image at 100% of its actual size. When you
click the loaded text cursor, InDesign fills the column with the
imported text.
Selecting and Transforming
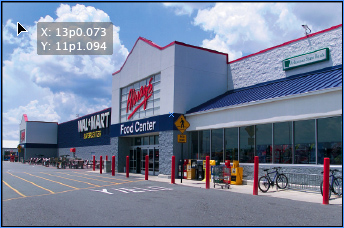
Click any frame (text or graphic) with the Selection tool to select it and its contents (see Figure 1).
To select multiple objects, hold down Shift as you click. You can also
hold down Shift and marquee over an area that includes the objects you
would like to select. You can tell that the objects are selected when
the boundary nodes appear. Shift+click again to deselect.
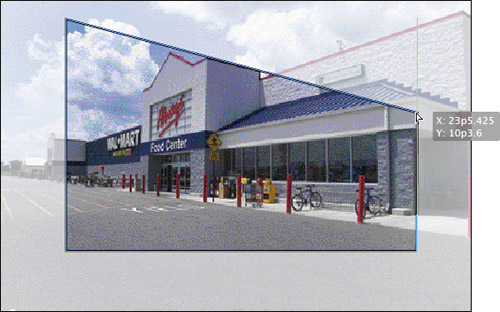
Unlike the Selection tool, the Direct Selection tool
enables you to select a single frame edge or corner node of any text or
graphic frame (see Figure 2).
Doing so enables you to modify the shape of a frame by moving its
selected edge or node. To select all nodes of a frame with the Direct
Selection tool, you must click its center point. Note that doing so
with a graphic frame does not automatically select its contents.
[View full size image]

The Direct Selection tool also enables you to select
the contents of a graphic frame, separate from its container. When you
hover the cursor directly over a placed image, the Direct Selection
tool’s icon changes to display a hand. This indicates that after you
click to select the frame’s contents, you can move the image around
within the confines of the graphic container.
|
To select the contents of a graphic frame without
having to switch from the Selection tool to the Direct Selection tool,
click the Content Grabber (the transparent ring in the center of the
frame).
|
You can select the contents of multiple frames by
Shift+clicking with the Direct Selection tool. By continuing to hold
down Shift as you click, you can also add other objects to a selection,
such as text frames, shapes, and lines.
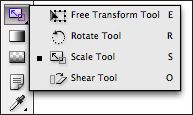
After you select multiple objects (including points
on a path), you can move them simultaneously by dragging the mouse or
pressing the arrow keys. To resize the selected objects, press Cmd
(Mac) or Ctrl (Win) and drag with the Selection tool, or press S to
switch to the Scale tool, then click and drag. You can also use the
Rotate, Shear, and Free Transform tools to edit multiple selected
objects simultaneously, without grouping them first (see Figure 3).
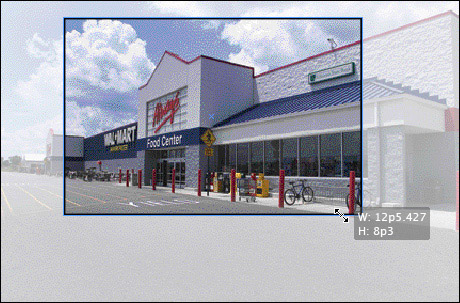
Resizing Frames and Contents
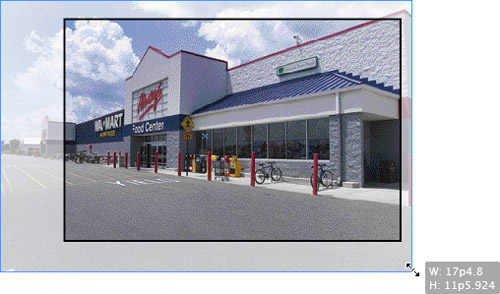
Use the Selection tool to resize the frame (and not the image contents) by clicking and dragging one of the frame nodes (see Figure 4). Hold down the Shift key to constrain proportions of the frame as you drag.
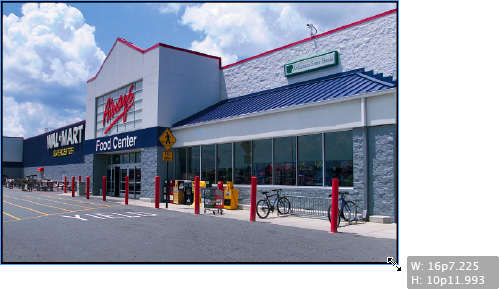
Use the Direct Selection tool to resize the image
inside the frame. Click directly on the image itself and then click and
drag one of the content nodes (see Figure 5). Hold down the Shift key to constrain overall image proportions as you drag.
|
To show and hide the Content Grabber (the
transparent ring in the center of the graphic frame), choose View,
Extras, Show/Hide Content Grabber.
|
Use the Selection tool to resize the frame and image
together by clicking the Auto Fit button in the Control panel and
clicking and dragging one of the frame nodes (see Figure 6).
You can also press Cmd (Mac) or Ctrl (Win) and click and drag one of
the frame nodes without having to enable the Auto Fit option. When
using the latter method, hold down Shift as you drag to constrain
overall image proportions.
Use the Direct Selection tool to select, reposition, or even delete the nodes of a frame (see Figure 7).
Click directly on the frame edge, and then click and drag one of the
nodes to reposition it. Press Delete (Mac) or Delete/Backspace (Win) to
remove a node or edge from the frame and create an open path.