Creating a custom shape is just the
beginning; once you have a vector object on the canvas, you can apply a
variety of fill and stroke effects to it as well. Here, you’re going to
customize the look of your newly created custom shape by adding a
gradient and a stylized stroke effect.
Adding a gradient fill
First you’ll add the gradient, rotating it to match the original object.
1. | If
necessary, select the custom object you just created from the Layers
panel. (Because this object has no fill, it’s easier to select it from
the Layers panel.)
|
2. | Choose Gradient > Linear from the Fill Category menu in the Properties panel. A standard linear gradient appears.
|
3. | Select the Pointer tool. A black control arm appears.
This “arm” controls the location, direction, angle, and length of the
gradient fill. The arm has a circle control point at one end and a
square control point at the other. The circle controls the
position/starting point for the gradient; the square controls the angle
and length. By default, the linear gradient runs from top to bottom, the
full height of the object.
|
4. | Use
the mouse to click and drag the circle point so it rests on the top
edge of the shape. As you drag, the gradient updates live on the canvas.
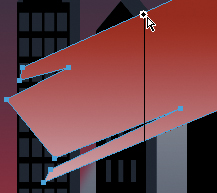
|
5. | Move
the mouse onto the arm itself. A rotation icon appears. Click and drag
the arm so that it is roughly parallel to the angle of the shape.
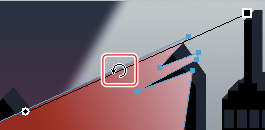
|
6. | Drag the circle point again so it is positioned in the gap of the shape at the lower left.
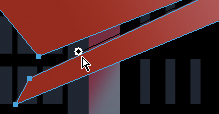
|
7. | Drag the square control point to shorten the gradient and to change its angle.
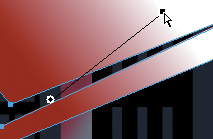
|
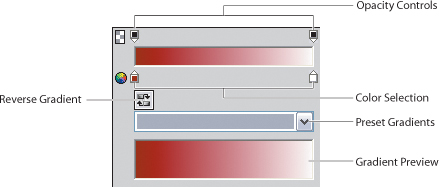
8. | Click the Fill Color box. The Edit Gradient pop-up window opens.
|
9. | Click the left color swatch, and when the color picker appears, type #252A41 in the input field. Then press Enter or Return.
|
10. | Click the right color swatch, input #C3112E, and press Enter or Return.
|
11. | To make the gradient smoother, select the Dither Gradient button (
 ) in the Properties panel.
|
12. | Still
within the Properties panel, click the Add Live Filters button, and
choose Shadow And Glow > Drop Shadow to add a drop shadow to the
object. |