4. Inserting Symbols and Special Characters
Aside from applying styles and changing the
appearance of your notes text with different fonts and font sizes, you
might need to generate any variety of foreign language characters,
currency symbols, diacritical marks, and other special characters into
your notes. OneNote 2010 has a full repository of these available at
your fingertips.
To quickly apply a simple symbol (such as a trademark symbol or a Euro currency symbol) in your notes, do the following:
1. | In your notes, place the insertion point where you want the symbol to appear.
|
2. | On the Insert tab, in the Symbols group, click Symbol. A pop-up menu appears (see Figure 4).

|
3. | Click
the symbol you want to insert. If the symbol you want is not shown on
the pop-up menu, click More Symbols to open the Symbol dialog box where
you can choose from additional special characters.
|
When you click the More Symbols command on the pop-up
menu that appears after clicking the Symbol button on the ribbon,
OneNote displays the Symbol dialog box, where you have many additional
choices for inserting special characters into your notes (see Figure 5).
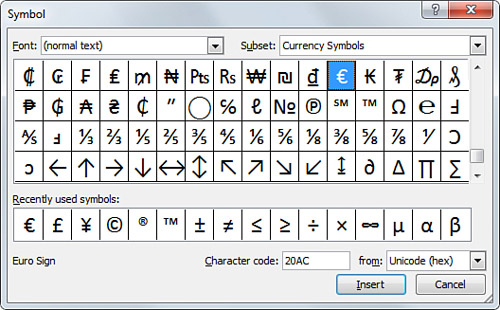
To insert a symbol from the dialog box, click the
symbol you want, and then click Insert. Once you have used a symbol in
this way, it will be added to the row of recently used symbols (see Figure 5) so you can easily find it again the next time you open this dialog box.
|
Aside from symbols and special characters, OneNote
2010 also fully supports the creation of mathematical equations as part
of your notes. To access the hidden Equation Tools tab on the ribbon,
click the Insert tab, and then click the top of the Equation button. If
you’re using OneNote on a Tablet PC or a Multi-Touch PC
that supports handwriting, you can click the Ink Equations button that
appears to enter equations in your own handwriting into your notes.
Because math equations are a bit outside of the realm of OneNote basics,
I won’t cover them here in greater detail, but I encourage you to
search on the Web for more information about these powerful Microsoft
Office 2010 features. To close the Equation Tools tab on the ribbon,
press the Esc key.
|
5. Copying and Applying Formatting with the Format Painter
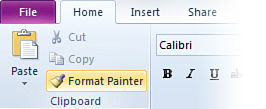
The Format Painter (see Figure 6)
is a useful and time-saving way in many Office programs that lets you
copy the formatting of a selection of text and then apply (“paint”) the
exact same formatting to additional text on a page.
This is most useful when you’re supplementing
existing notes (or notes you’ve received from someone else) with new
information and you want the new notes to be formatted in the same way.
Alternately, if you have a large amount of plain notes and you don’t
want to repeatedly go through multiple steps to apply a combination of
formatting, the Format Painter lets you accomplish the same thing with
just a couple of clicks.
To copy and paint a single occurrence of text formatting, do the following:
1. | Go
to a page that contains text whose formatting you want to copy and then
select any part of that text. Your selection need not be precise
because you are only copying the formatting style of the text you
select, not the text itself.
|
2. | On the Home tab, in the Clipboard group, click Format Painter.
|
3. | The mouse pointer changes to an insertion point with a paintbrush symbol next to it (see Figure 7).

|
4. | Without
clicking anywhere else on the page, navigate to the text to which you
want to apply the formatting you just copied, and then drag the
insertion point over the text to apply the copied formatting.
|
|
While the paint cursor is displayed, take care not to
click anywhere on the page except for the text that you want to format.
If you make a mistake, simply press Ctrl+Z to undo your last action,
and then try again. If you need to navigate to a different page than the
current one, you can safely click the scrollbars, page tabs, and
section tabs to bring the target text into view.
|
The Format Painter in OneNote can be used in an
alternate way to help you save time when formatting multiple words or
paragraphs of text.
By double-clicking the Format Painter button on the
ribbon after you select the text from which you want to copy its
formatting, OneNote will stay in Format Painter mode so you can apply
the copied formatting to multiple selections of text until you turn off
the tool. To do this, follow these steps:
1. | Go to a page that contains text whose formatting you want to copy and then select any part of that text.
|
2. | On
the Home tab, in the Clipboard group, double-click Format Painter.
Whereas single-clicking the button lets you paste a copied formatting
style once, double-clicking the button causes OneNote to remain in
Format Painter mode so you can paste a copied formatting style multiple
times.
|
3. | When the mouse pointer changes to the paint cursor (see Figure 5.24),
navigate to the first occurrence of text to which you want to apply the
formatting, and then drag the insertion point over the text.
|
4. | After
the text adopts the copied formatting, navigate to the next occurrence
of text to which you want to apply the same formatting.
|
5. | Repeat
step 4 as many times as needed until the appearance of all of the
target text on your pages has changed to the copied formatting.
|
6. | When
you’re done applying the copied formatting, click the Format Painter
button on the ribbon (or press the Esc key) to turn off Format Painter
mode.
|
Although the steps in the preceding two procedures
work well with quick little selections of words, phrases, or fairly
short lines of text in your notes, there’s an easier way to apply copied
formatting to entire paragraphs of text with a single mouse click.
To do this, don’t drag the paint cursor over a bunch
of text when you see the paint cursor after clicking the Format Painter
button. Instead, move the paint cursor over the note container of a
paragraph that you want to format, and then click the four-headed arrow
icon that appears just to the left of the note container (see Figure 8).
All of the text will immediately adopt the copied formatting of the
source selection. This method makes formatting large amounts of notes in
a consistent way much less time-consuming.

|
An
easily overlooked time-saver is the Format Painter’s support for
keyboard shortcuts. When using this mode, there is no visual feedback on
the screen like there is when you use the Format Painter button. The
result, however, is the same. First, select some of the text that
contains the formatting you want to copy. On your keyboard, press
Ctrl+Shift+C. You won’t see the paint cursor appear, but don’t worry—the
formatting information has been placed on the Clipboard. Next, select
the text to which you want to apply the formatting, and then press
Ctrl+Shift+V to paint it. If you want, you can now keep using
Ctrl+Shift+V to paint any additional target text with the copied
formatting. Keep going for as long as you want.
|
6. Clearing All Formatting from Text
Now that you know several different ways how to add
formatting to the text in your notes, you’re probably wondering if it’s
just as easy to get rid of text formatting. The answer is yes.
Removing all text formatting is especially useful
when you’re working with various notes that you’ve received from other
people and you want a fresh start before applying your own formatting
choices. Or, you simply might not need the emphasis of certain
formatting anymore. No matter what the reason, the following steps let
you change your text back to the basics:
1. | Select the text whose formatting you want to clear.
|
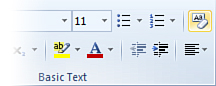
2. | On the Home tab, in the Basic Text group, click Clear Formatting (see Figure 9).
|
The
Clear Formatting button is also available in the Styles gallery, either
when you expand the list of styles on the ribbon, or when you click the
Quick Styles button on the Mini toolbar that appears when you select
text on a page.