|
Compared to
previous versions, the Exchange Server 2007 Installation Wizard offers
administrators significant improvements to the installation process.
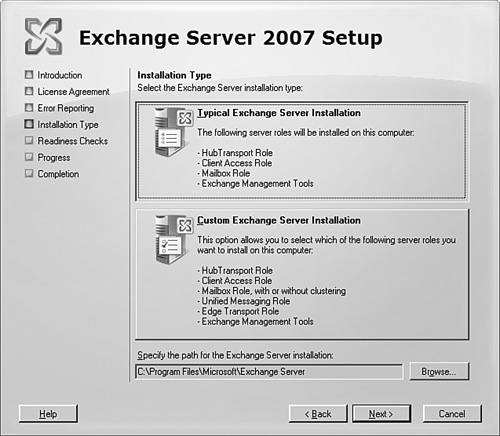
For example, administrators have the flexibility to deploy a Typical or
Custom installation. The Typical Exchange Server installation option is
best used for a single-server deployment and installs the following
roles: Bridgehead role, Client Access role, Mailbox role, and Exchange
Management Console. With the Custom Exchange Server Installation, the
administrator has the flexibility to install desired Exchange roles.
To
install the first Exchange server in an organization using the
interactive installation process of Exchange Server 2007, use the
following steps:
1. | Insert the Exchange Server 2007 CD or DVD (Standard or Enterprise).
| 2. | AutoRun
should launch a splash screen with options for installing the
prerequisites and application. (If AutoRun does not execute, select
Start, Run. Then type [CDDrive]:\setup.exe, and click OK.)
| 3. | On the Start page, click Install Microsoft Exchange.
Note
Before
Microsoft Exchange Server 2007 can be installed, the Setup Installation
Wizard verifies if the necessary prerequisites have been fulfilled. If
the prerequisites have not been met, configure the prerequisites
manually based on the previous steps, and then proceed with the
installation again.
| 4. | Setup.exe copies the setup files locally to the server on which Exchange Server 2007 is being installed.
| 5. | In the Microsoft Exchange Server Installation Wizard dialog box, on the Introduction page, click Next.
| 6. | At the License Agreement page, click I Accept the Terms in the License Agreement, and click Next.
| 7. | At
the Customer Feedback page, select whether to participate in the
Customer Experience Improvement Program by sending feedback
automatically to Microsoft, and then click Next.
| 8. | At
the Installation Type page, select the type of Exchange Server 2007
installation, and then click Next. For this example, a Typical Exchange
Server Installation is being utilized, as shown in Figure 1.

Note
If
there is a need to change the installation folder, click Browse before
proceeding and specify a path for the Exchange Server installation.
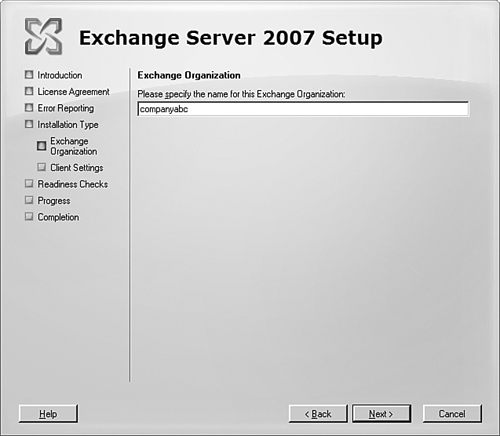
| 9. | At the Exchange Organization page, type the name of the desired organization name, as illustrated in Figure 2, and then click Next.

| 10. | At
the Client Settings page, indicate whether there are Outlook 2003
clients or earlier within the infrastructure, and then click Next.
Note
In
the redesign of both Exchange Server 2007 and Outlook 2007, Microsoft
has tightly integrated the two products together. Therefore, Outlook
2007 is the preferred client for Exchange 2007.
Another
benefit of implementing just Outlook 2007 is that backward
compatibility components in Exchange 2007 do not need to be installed
if the organization does not need to support previous versions of
Outlook. As an example, if client systems are running Outlook 2003 and
earlier, objects such as public folders need to be installed to support
free/busy information.
| 11. | On
the Readiness Checks page, the Installation Wizard is verifying that
the appropriate Exchange Server prerequisites have been installed. View
the status to determine if the organization and server role
prerequisite checks completed successfully, and then click Install to
implement the first Exchange Server 2007 in the organization.
Note
If
errors are returned or prerequites are not met on the Readiness Checks
page, it is necessary to address these issues and retry the setup.
| 12. | To complete the Exchange Server 2007 installation, click Finish on the Completion page.
|
|