For many tasks, even most tasks, you should use the Windows SBS
Console. There’s even an Advanced Mode version that has links to the
native consoles for the most commonly required tasks that don’t have
special SBS wizards. And for all your native consoles in a single
place, use the Windows SBS Native Tools Management console, shown in Figure 1. It doesn’t
matter whether you get to native consoles from the Windows SBS Native Tools Management console,
start them directly, or use Server Manager, the behavior is the
same.

Note:
The title bar of this console says it’s the Advanced
Management console, but you open it from the Windows SBS Native Tools Management link in
the Windows Small Business Server section of the Windows Start
menu.
1. Using the Advanced Mode of the Windows SBS Console
The simplest way to work with the most commonly used native
consoles is to open them from the Advanced Mode of the Windows SBS Console,
shown in Figure 2.

As you can see in the figure, there is an additional option in
the Tasks pane of the Users page—a link to open the Active Directory
Users And Computers snap-in. The Active Directory Users And
Computers (ADUC) console is the native mechanism for managing
users and computers in Windows Server 2008 R2. And there are
definitely tasks that can only be performed easily from the ADUC
console, not from the Windows SBS Console. For example, you can’t
add a contact from the Windows SBS Console—you need to use ADUC for
that.
To use the Advanced Mode of Windows SBS Console to create a
contact, follow these steps:
Click Start, All Programs, Windows Small Business Server,
and then click Windows SBS Console (Advanced Mode) to open the
console. (Be smart—put a link to this on your desktop, or pin it
to the Start menu.)
Click Users And Groups and then click Users if it isn’t in
front.
In the Tasks pane, on the right, click Open Active
Directory Users And Computers Snap-in to open ADUC as shown in
Figure 3.
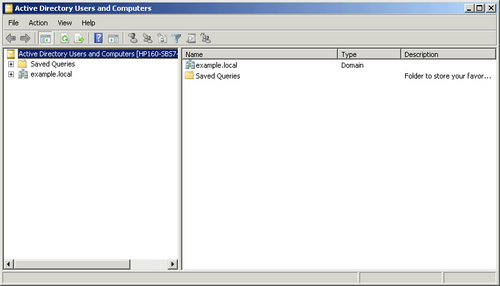
Expand the domain name in the left pane, and navigate to
the MyBusiness organizational unit (OU).
Click MyBusiness, select New, and then select
Organizational Unit from the shortcut menu to open the New
Object – Organizational Unit dialog box shown in Figure 4.
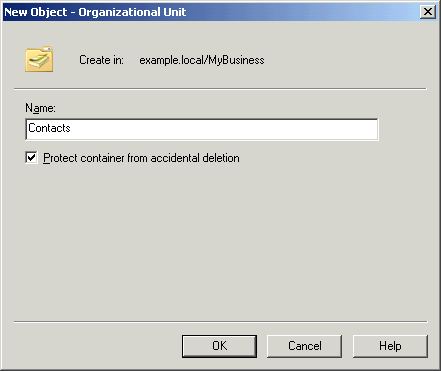
Type in a name for the container, and click OK to create
the OU.
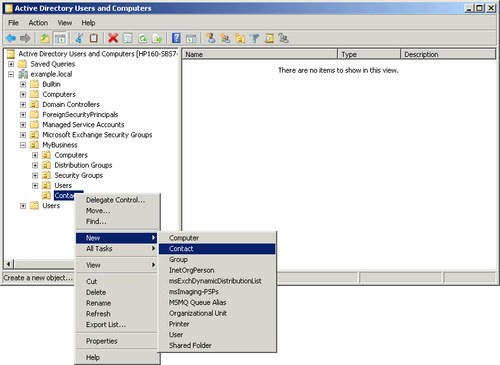
Right-click the OU you just created, select New, and then
select Contact as shown in Figure 5.
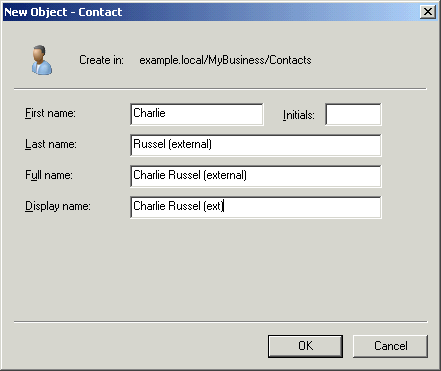
In the New Object – Contact dialog box, shown in Figure 6, fill in
the fields for the new contact. We find it useful to add
(external) to the name field when adding secondary email
addresses for users who will have an account on the SBS
server.
Click OK to create the contact.
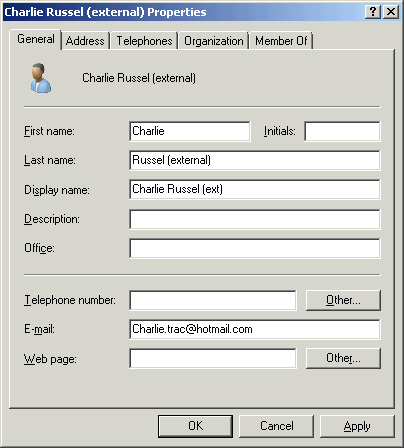
Click Properties on the Action menu to open the Properties
dialog box for the new contact, and enter an email address as
shown in Figure 7.
Click OK to save the changes.