SBS 2011 uses the Windows Server Backup that is included in
Windows Server 2008 R2, but before you can use the backup, you need to
configure it. You can use the SBS Configure Server Backup Wizard to do this, and if you
intend to back up to an external USB, FireWire, or eSATA drive, that’s
exactly what we’d recommend. But if you need to use some of the
additional capabilities included in the R2 release of Windows Server
2008, you’ll need to use the native tools to configure your
backups.
In this section, we’ll walk you through both scenarios—first the
SBS Configure Server Backup Wizard, and then the native Backup
Schedule Wizard. The SBS Configure Server Backup Wizard has the
following requirements:
Backups are performed to dedicated disks, either external or
internal.
Backups must be of the entire server or of entire volumes—no
file-by-file backups.
With the native Windows Server 2008 R2 tool, the Backup Schedule
Wizard, you can configure more backup options:
Full server backups
Custom backups, including file-level backups
Dedicated external or internal disks
Internal volumes that are not dedicated to backups
Network shares
As you can see, the native tools give you a great deal more flexibility, but for
the majority of cases you should use the SBS Configure Server Backup Wizard. It’s fully integrated
into and supported by SBS 2011, and it uses the best backup mechanism
for recovering a failed server.
|
Current users of Ntbackup.exe who switch to the Windows SBS
2011 Backup should consider the following:
Settings for creating backups aren’t upgraded when you
migrate to Windows SBS 2011, so you’ll need to reconfigure your
settings. You need a separate, dedicated disk for running scheduled
backups if you use the SBS Configure Server Backup
Wizard. Only NTFS-formatted volumes on a locally attached disk can
be backed up. Windows Server Backup supports backing up to external and
internal disks. You can no longer back up to tape.
You can’t recover backups created with Ntbackup.exe by using
Windows SBS Backup. However, a version of Ntbackup.exe is available
as a download for users who want to recover data from backups
created using Ntbackup.exe. The downloadable version of Ntbackup.exe
is only for recovering backups for older versions of Windows and
can’t be used to create new backups. To download Ntbackup.exe, see
http://go.microsoft.com/fwlink/?LinkId=82917.
|
1. Windows Server Backup Using SBS Wizards
To start the configuration, open Windows SBS Console, click
Backup And Server Storage, and then follow these steps:
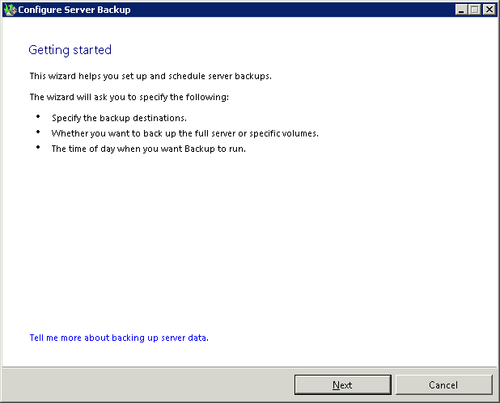
In the Tasks pane, click Configure Server Backup to start
the Configure Server Backup Wizard, as shown in Figure 1.
Click Next to open the Specify The Backup Destination
page, and select one or more drives as destinations for your
backup. If your drive isn’t listed, select the Show All Valid
Internal And External Backup Destinations check box, as shown in
Figure 2.

As detailed in Table 1, the location you
choose for storing the backups also has consequences in terms of what can
be restored.
Warning:
IMPORTANT The drives
you select will be reformatted when backup is configured. Make
sure the drives are empty or have nothing on them that needs
to be saved.
Table 1. Backup locations for SBS backup
| STORAGE LOCATION | WHAT CAN BE RECOVERED | WHAT CANNOT BE RECOVERED | DETAILS |
|---|
| Local hard disk | Files, folders, applications, and
volumes. System state and operating system
if the backup contains all the critical
volumes. | Operating system if the backup is on the
same physical disk as one or more critical
volumes. | The local disk you choose will be dedicated
for storing your scheduled backups and will not be
visible in Windows Explorer. |
| External hard disk | Files, folders, applications, and
volumes. System state and operating system
if the backup used contains all the critical
volumes. | | Backups can be easily moved offsite for
disaster protection. |
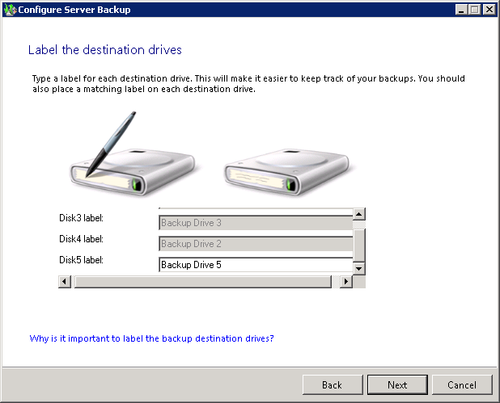
Click Next to open the Label The Destination Drives page.
Type in label information for each backup disk.
Click Next to open the Select Drives To Back Up page.
Select the individual drives, or click Back Up All to include
all drives. If there are critical system or application files on
a volume, you cannot deselect that volume.
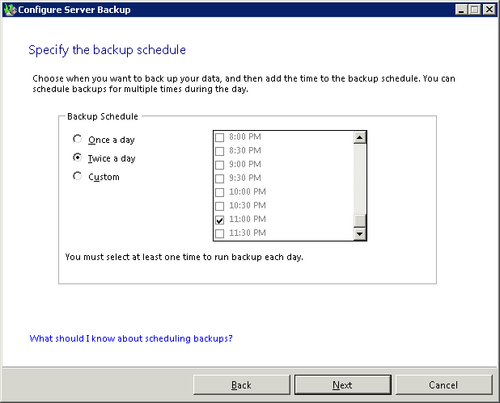
Click Next to specify the backup schedule, as shown in Figure 3. Select the frequency and the
times of day. By default, Configure Server Backup schedules a backup to run daily at
Noon and 11:00 P.M. To adjust the backup schedule, select Custom
and you can schedule multiple backups at times you
choose.
Click Next to confirm the selections you’ve made and then
click Configure. You’ll be warned that the disks being used for
backup will be formatted.
Click Yes to confirm the formatting, and the backup
configuration will complete.
Click Finish when the configuration is complete.
1.1. Changing the Backup Configuration
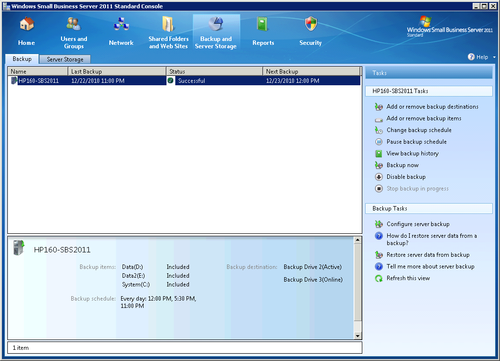
You can change your backup settings in the SBS Console.
Click Backup And Server Storage and then click the Backup tab. When you
select the currently configured backup, the Tasks pane updates to
show the changes you can make as well as providing details about
the current backup configuration, as shown in Figure 4. You can
Add or remove backup destinations
Add or remove backup items (entire volumes only)
Change the backup schedule
Temporarily pause backups (without changing other settings)
Disable the backups (deletes the current configuration
entirely)
1.1.1. Modifying Backup Destinations
In the SBS Console, click Backup And Server Storage,
highlight the server, and click Add Or Remove Backup
Destinations to open the Server Backup Properties dialog box, as
shown in Figure 5.

From the Server Backup Properties box, you can change the
configuration of your existing backup without
destroying already created backups. To change the backup destinations, follow
these steps:
Click Backup Destination in the left pane.
Click Add Or Remove Drives to open the Add Or Remove
Backup Destination Drives page.
The currently configured backup drives will be shown,
along with any other available removable drives. Select the
drives you want to add, and clear the drives you want to no
longer use as backup destinations. If your drive isn’t
listed, select the Show All Valid Internal And External
Backup Destinations check box.
Click Next. If you’ve added a drive, you are asked to
provide a label for it as shown in Figure 6.
On the confirmation page, review your selections and
click Configure.
1.1.2. Changing Items to Be Backed Up
You can change what is backed up in the SBS Server Backup from that same Server Backup
Properties dialog box shown in Figure 5. To change
what is backed up, select Backup Items in the left pane of the
Server Backup Properties dialog box. Select the drives to
include, or clear the check box for any drives you want to
exclude from the backup. Although SBS should not allow you to
clear drives where critical application files, such as Exchange
databases, are stored, this isn’t reliably detected from this
dialog box, so use caution. In general, you should back up all
available drives (volumes) with SBS Server Backup unless you
know that the drive contains only transient or easily
replaceable files.
1.1.3. Modifying the Backup Schedule
You can change when backups begin from the Server Backup
Properties dialog box shown earlier in Figure 5. To change
the backup times and frequency, select Backup Schedule in the
left pane, and then select one of the options for the backup
schedule. The options are
Choose Once A Day and a backup will be performed every
day at 11:00 P.M. local time.
Choose Twice A Day and backups will be performed daily
at noon and 11:00 P.M. local time.
Choose Custom and you can select a backup schedule of
your own devising, so long as it’s at least once a
day.
Warning:
IMPORTANT Store your
external storage drives offsite and regularly rotate them to
protect your data against disaster.
1.1.4. View Backup History
You can view your backup history from the Server Backup
Properties dialog box shown earlier in Figure 5. Just
highlight the server to view in the SBS Console and choose View
Backup History to open the Server Backup Properties dialog
box.