Sharing a folder is an easy process in Windows SBS because, as
usual, there’s a wizard to guide you. Start by opening the Windows SBS
Console and then clicking Shared Folders And Web Sites. In the Tasks
pane, click Add A New Shared Folder, and follow these steps:
Enter the location for the shared folder as shown in Figure 1. If you
don’t know the exact address, click the Browse button. When the
location is specified, click Next.
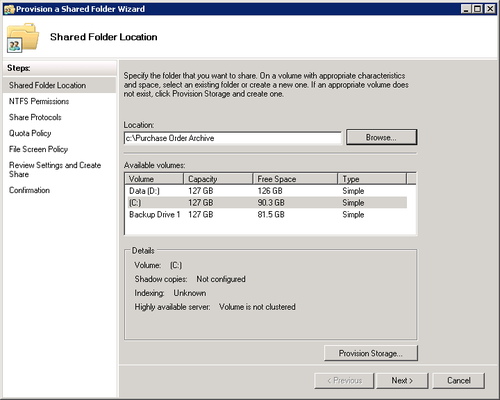
In the lower potion of the dialog box is a button labeled
Provision Storage, and though this sounds like a place to store
your grain for the coming winter, it is in fact a link to set up
storage for the shared folder. Unless you have a
storage area network (SAN), you can safely disregard it. If you do have a
SAN, click the button to specify a storage subsystem.
On the NTFS Permissions page, you can accept the NTFS
permissions or change them. Click Next.
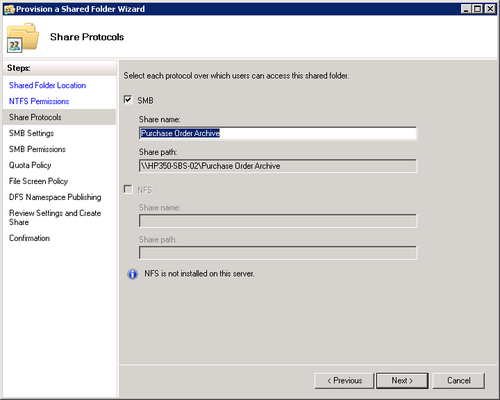
On the Share Protocols page (shown in Figure 2), choose the
protocol that users will use to access the share.
Unless you have NFS (Network File System) installed on the
computer, the default is SMB (Server Message Block), a
native-to-Windows protocol used for shares since Windows NT. Click
Next.
On the SMB Settings page, you can view the User Limit,
Access-Based Enumeration, and Offline Settings for the folder.
Click Advanced to change any of these. Click Next.
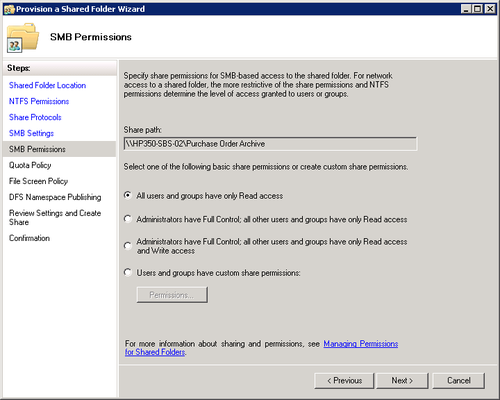
On the SMB Permissions page (shown in Figure 3), select the share
permissions you want and then click Next.
On the Quota Policy page, you can set a quota to limit the
size of the shared folder. Click Next.
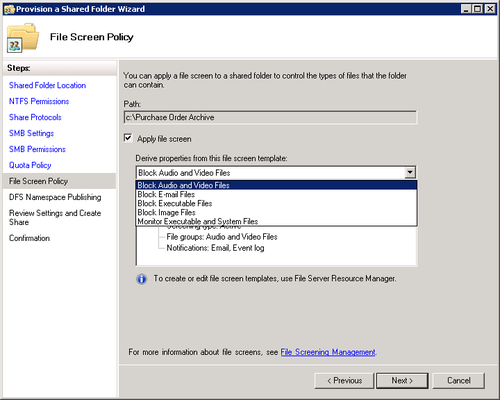
On the File Screen Policy page, you can apply a file screen
to limit the types of files the shared folder can contain. Choose
a template from the drop-down list (as shown in Figure 4) and a
summary of the file screen properties appears. Click Next.
On the DFS Namespace Publishing page, you can choose to publish the share
to a DFS namespace. Click
Next.
On the Review Settings And Create Share page, review the
settings. Click Previous to change settings. If the settings are
correct, click Create.
A Confirmation page opens verifying the creation of the
share.
1. Removing a Shared Folder
To stop sharing a folder, open the Windows SBS Console and
follow these steps:
Click Shared Folders And Web Sites.
Select the folder you want to stop sharing.
In the Tasks pane, click Stop Sharing This Folder.
A warning appears pointing out that if you stop sharing
the folder, users will no longer be able to access it over the
network. Click Yes to confirm.
Warning:
IMPORTANT If you remove a
share when someone is connected to the folder, it will cause a
forced disconnect, which could produce a loss of data. Even if
data is not lost, an unexpected and forced disconnect will surely
produce user annoyance.
2. Changing Share Permissions
Changing the permissions on a shared folder is easily done.
Open Windows SBS Console, select Shared Folders And Web Sites, and
then follow these steps:
Select the share. In the Tasks pane, click Change Folder
Permissions.
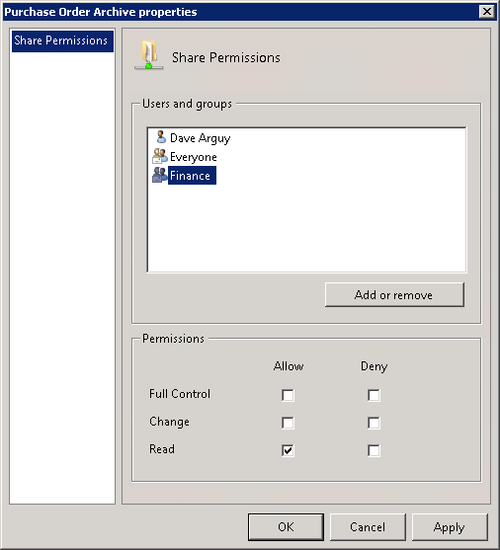
To change the permissions for a user or group listed,
highlight the name as shown in Figure 5 and make
the changes in the Permissions area.
To add or remove users from this share, click Add Or
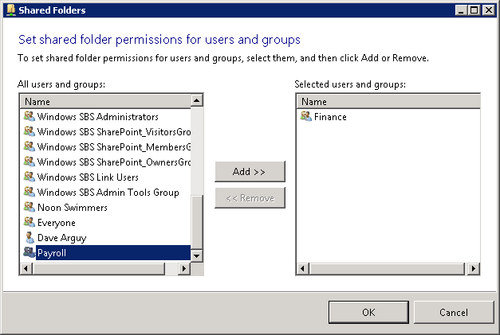
Remove to open the Shared Folders dialog box shown in Figure 6. To add
users or groups, highlight the name in the All Users And Groups
list and then click Add.
To remove users and groups, highlight the name in the
Selected Users And Groups list and click Remove.
