WordPad is a powerful little
word processor that you can use to create documents in a variety of
formats. In most cases, you'll want to create a document with formatting
to achieve a well-designed, professional look. Save the document as you
create it, and print it when you've finished.
1. Create a Document
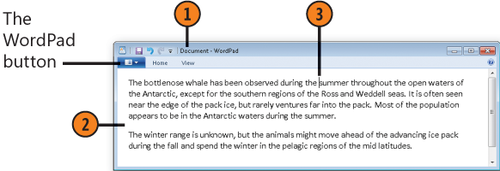
Click the Start button, type wordpad in the Search box of the Start menu, and choose WordPad
from the menu to start the program. If WordPad is already running,
click the WordPad button and choose New from the menu.
Type your text. Press Enter only when you want to start a new paragraph.
To edit the text, click in the document where you want to make the change. An insertion point indicates where your edit will be placed.
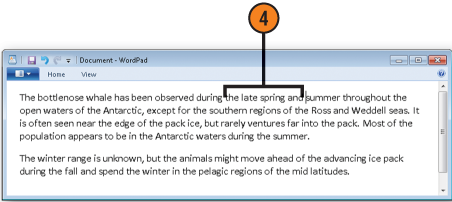
To
insert additional text into a paragraph you've already typed, click
where you want to insert the new text, and type it. If the text you want
to insert is stored on the Clipboard, click the Paste button on the Home tab of the Ribbon (or press Ctrl+V) instead of typing the text.
To delete text, select it, and press Delete. To save the text for later use instead of deleting
it, place it on the Clipboard by clicking the Cut button on the Home
tab of the Ribbon (or pressing Ctrl+X). To replace text with different
text, selected the existing text, and type the new text.
Tip:
The Windows Clipboard is a temporary "holding area" for items you copy or cut; it holds only one item at a time.


2. Format the Document
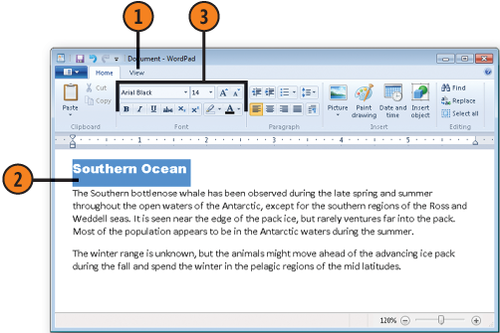
If the ruler isn't displayed, click the View tab on the Ribbon, and select the Ruler check box. If the text wrap isn't set to wrap to the ruler, click Word Wrap, and choose Wrap To Ruler from the drop-down menu.
Select the text to be formatted.
On the Home tab, specify the font and font size. Apply bold, italic, underlined, or color emphasis as desired.
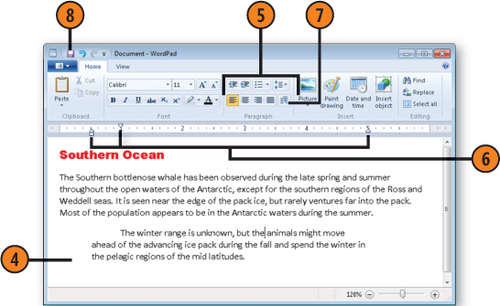
Click in the paragraph you want to format, or select all the paragraphs to which you want to apply the same formatting.
Use any of the buttons or lists in the Paragraph section of the Ribbon to modify the alignment of your text or set the line spacing, or use the Start A List button to create a bulleted or numbered list.
Drag the indent markers to set the left, right, and first-line indents. Click in the ruler to set a tab stop.
Click the Paragraph button to display the Paragraph dialog box if you want to set values for indents, line spacing, and tab positions.
Tip:
The three formats that support formatting are Rich Text Format (RTF), which is the format used in earlier versions of WordPad and Word 97-2003 documents; Office Open XML Document, which is used in Word 2007 and later documents; and OpenDocument Text (ODT), which is used in several open-format programs. If you're planning to save your document as a Text Document, don't apply any formatting to it. If you do, all the formatting will be lost when you save the document.


Note:
Try This!
Select some text. Open the Font list on the Ribbon and point to different fonts.
Note how your text changes. When you see a font you want, click it. Now
open the Font Size list box and point to different font sizes. Click
the size you want.