1. Annotating a Document
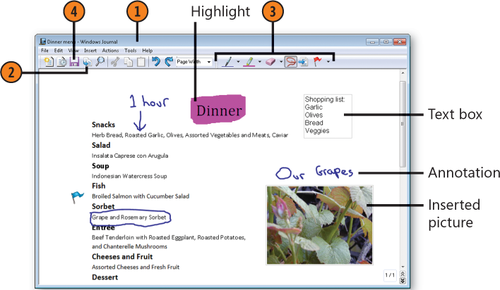
One of the most useful features of the Windows Journal is the ability it gives you to import a document from another program and then annotate the document with written notes,
pictures, and highlights. This feature makes the Journal one of our
favorite tools, whether or not we use a stylus for input. There are two
ways to import a document: Either the Journal automatically opens the
document in its default program and then uses a special printer driver,
or you open the document in its program and then use the printer driver
to send the content of the document to the Journal.
1.1. Make Your Comments
If the Journal isn't already running, click Windows Journal in the Tablet PC folder on the Start menu to start the program.
Click
the Import button, select the file to be used, and click or tap the
Import button in the Import dialog box. If you haven't already installed
the Journal printer driver, do so when requested. If the Journal can't
open the program for the type of file you want, open the file in its
correct program, choose to print it with the Journal Note Printer, and
save the print file as a note.
Use the Journal tools to annotate the document. You can't, however, modify the actual content of the document.
Save the original annotated note.

Tip:
To share your Journal
note using an e-mail client installed on your computer, choose Send To
Mail Recipient from the File menu to e-mail the note as a Journal file, a
Web page, or a tif picture. You can also choose Export As from the File menu to create a Web page or a tif file that you can later distribute using Webmail or another method.
2. Enlarging the Screen Content
When a computer screen is set to a high
resolution, you can fit a lot of things on the screen, but sometimes
some of those items are a bit difficult to see in detail. Windows is
happy to help out with a tool that enlarges the screen content. You can select one of three views, depending on the way you want to work, and you can easily switch between views and even customize them.
2.1. Magnify the Screen
Click the Start menu, type mag in the Search box of the Start menu, and choose Magnifier to start Magnifier.
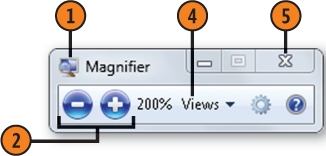
Click the plus button to increase the magnification. Click the minus button to reduce the magnification.
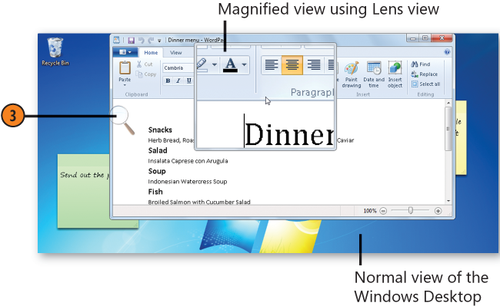
If the Magnifier window changes into a magnifying glass, click the glass to restore the Magnifier window.
Click Views and choose any of the following:
Full Screen to enlarge the entire screen content.
Lens to move an enlarged field around and magnify a section, as you would with a normal magnifying glass.
Docked to use a window at the top of the screen to view the enlarged area.
Preview
Full Screen to see a quick view of the unmagnified screen with the
magnified area highlighted. This setting is available only when you're
using Full Screen view.
Click Close when you've finished.


Tip:
If your computer doesn't support the Aero Glass
feature, or if you're using a basic theme, such as the Widows 7 Basic
theme, your only view option is Docked.