Cells can contain colors or image backgrounds, and
when placing text and graphics, you decide how the information appears
within the table cells; however, there is a priority to how the cells
are formatted. When a property, such as background color or alignment,
is set to one value for the whole table and another value for individual
cells, cell formatting takes precedence over row formatting, which in
turn takes precedence over table formatting. It’s all about priority.
For example, if you set the background color for a single cell to green,
then set the background color of the entire table to blue, the green
cell does not change to blue, since cell formatting takes precedence
over table formatting.
Change Cell, Row, or Column Properties
1. Open the Web page with the table you want to format.
 |
2. Select the cells, rows, or columns you want to change.
|
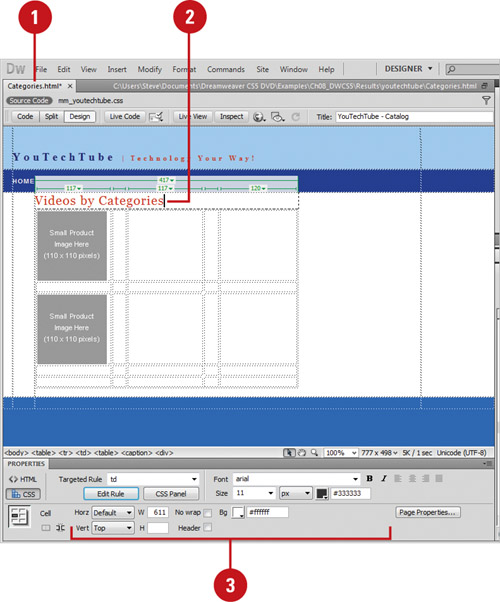
3. In the Properties panel, modify the selection using the following options:
- Horz. Click to change the default (left) horizontal placement of items placed within the cell (Left, Center, Right).
- Vert.
Click to change the default (middle) vertical placement of items placed
within the cell (Default, Top, Middle, Bottom, Baseline).
- W & H.
Enter a value for the width and height of selected cells in pixels, or
as a percentage of the entire table’s width or height. To specify a
percentage, follow the value with a percent symbol (%).
Note
To let the browser
determine the proper width or height based on the contents of the cell
and the widths and heights of the other columns and rows, leave the box
blank (default).
- No Wrap. Select if you do not want text to wrap between the left and right borders of the selected cell.
- Header. Select to format the selected cells as table header cells. The contents of table header cells are bold and centered by default.
- Bi Image. Enter the filename for the background image. You can click the Browse For File or Point To File button to select the file.
- Bi Color. Click to choose a background color for the selected cells (background color is independent of text color).
- Brdr Color. Click to choose a border color for the selected cells.
- Merge Cells. Click to combine selected cells, rows, or columns into one cell.
Note
Merging cells can only be accomplished if they form a rectangular or linear block.
- Split Cells. Click to divide a cell, creating two or more cells. This option is disabled if you have more than one cell selected.

 |
|