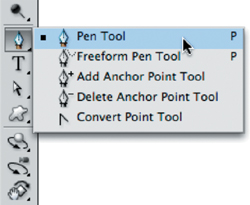
3. Creating a Path with the Pen Tool
You can use the Pen tool to create paths. Many users
swear by the Pen tool, but be warned: It’s not the easiest tool to use.
The Pen tool allows you to click around the image, adding anchor points.
Photoshop then connects those points with vector lines, which can be
adjusted or resized. Those users coming to Photoshop from Adobe
Illustrator generally find the Pen tool relatively easy to use.
Let’s give the Pen tool a try:
1. | Open the file Ch05_Paths.tif .

|
2. | Choose the Pen tool from the Tools panel or press the keyboard shortcut P.
|
3. | Choose the following options from the Options bar:
- Choose Shape Layer from the first three buttons to put a solid
color over your image and make it easier to see if you are accurately
tracing the object.
- Select Auto Add/Delete so anchor
points will automatically be added when you click a line segment.
Likewise, Photoshop will automatically delete a previous anchor point if
you click directly on the anchor point with the Pen tool.
- Click
the inverted arrow next to the shape buttons in the Options bar to
access the submenu. Select the Rubber Band option to make it easier to
preview path segments while drawing.
 |
4. | Position the Pen tool in the lower-left corner of the tower and click. An initial anchor point is added.
|
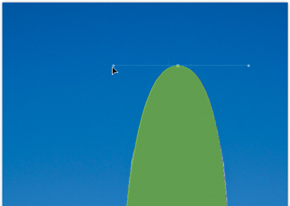
5. | You’ll
now need to draw curved paths. When you click at the top of the tower
to add a new point, keep the mouse button depressed. You can drag to
create the curve: Remember that clicking adds a point, whereas
click-and-drag produces a curve.
- Drag toward the curve for the first point. Drag in the opposite direction for the second point.

- Dragging both direction points in the same direction will create an S-shaped curve.
- Try to minimize the number of anchor points added. Move forward along the object and pull to form the curve.
|
6. | When
you reach the end of your path, click to close the shape. As with the
Polygonal Lasso tool, you must click your starting point to close the
path. The path for this photo can be created with only three points.
|
7. | To end an open path, Command-click (Ctrl-click) away from the path.

|
8. | You
can adjust the path by using the Direct Selection tool (A). This allows
you to click an anchor point, or handle, and adjust the position or
shape.
|
9. | When
satisfied, Command-click (Ctrl-click) on the path’s thumbnail in the
Layers panel. You will see the marching ants, which indicate an active
selection has been made.
|
And
that is how paths work. Either you found that enjoyable (and if so, keep
practicing—it gets easier) or you disliked it. Like many features in
Photoshop, paths are optional and don’t have to be part of your
Photoshop workflow. They are worth learning, though, because they make
it easier to select curved objects.