Customizing the stroke
Much like adding a fill to a vector, styling the
stroke can also add impact and interest to an object. The plain red
stroke we’ve got currently is okay, but to achieve a sense of grittiness
and danger, you will customize the stroke using one of the preset
Stroke categories.
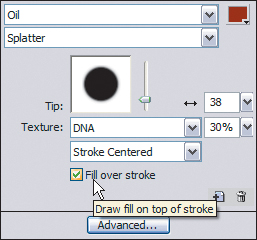
1. | Making sure the object is still selected, set the Tip Size to 38.
|
2. | From the Stroke menu, choose Oil > Splatter.
|
3. | Choose Stroke Options from the Stroke menu.
|
4. | Select
the Fill Over Stroke option, and click away from the Stroke Options
panel to close it. This hides the stroke effect inside the shape.
|
5. | Change the stroke’s edge softness to 19.
|
6. | Choose DNA from the Texture menu, and set the value to 30%.
|
7. | In
the Layers panel, unlock and unhide the detective object, and position
the shape you created below it in the stacking order. This puts the
detective in front of the shape.
|
8. | Save the file.
|
Tip
Dragging layers up and down in the Layers panel moves
them away or toward the front of the canvas, respectively. You can also
choose Modify > Arrange, and then choose one of the four options to
alter the stacking order of selected objects: Bring to Front, Bring
Forward, Send Backward, and Send to Back. If you use this feature
frequently, memorizing the keyboard shortcuts (Ctrl+Up/ Down arrow for
Windows, or Command+Up/Down arrow for Mac) will be a great time-saver.
Next you will import the movie title.
Importing and resizing a vector object
The movie title is a vector object. You’ll import it and then scale it to fit the design.
1. | In the Layers panel, select the custom path shape you created in the previous exercise.
|
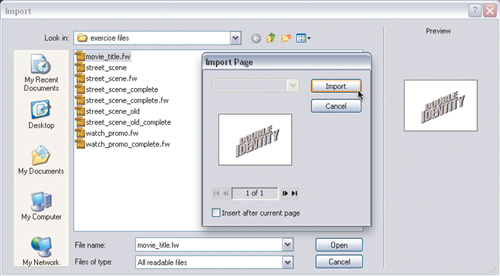
2. | Choose File > Import, and browse to the Lesson05 folder.
|
3. | Select the movie_title.fw.png file, and click Open.
|
4. | Make sure Insert after current page is not
selected and then click Import (Windows) to return to the canvas. On
the Mac, click Open, then click Open again (Mac). The import tool icon
replaces the standard cursor.
Note
When
importing images in Fireworks on the Mac, you may have to click once on
the canvas to make it active, then click a second time to import the
image.
|
5. | Click anywhere on the canvas to import the title at its original size.
|
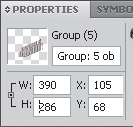
6. | In the Properties panel, lock the proportions of the object.
|
7. | Set the width to 390 pixels.
|
8. | Press the Tab key and the height adjusts automatically, giving you dimensions of 390 × 286 pixels.
|
9. | Use the Pointer tool to position the title so the letter “Y” is near the brim of the detective’s hat. The x and y coordinates should be around 178 × 183.
Note
Did you notice that the movie title’s
overall quality did not change after resizing? That’s because the title
is made up of a group of vectors. And, to ensure that the text style
does not change from designer to designer, the text was converted from
true text to paths.
|