The Magic Wand tool (so named since it looks
like a magic wand) is unique in the fact that you do not drag and
select with this tool; you simply click. The Magic Wand tool creates a
selection based on the shift in brightness ranges within an image. If
there is a definable shift in the brightness of the pixels, it can be a
very powerful tool for the selection of odd-shaped areas. To use the
Magic Wand, click on the Magic Wand Tool button on the Tools panel.
Select Options for the Magic Wand Tool
- 1. Double-click the Magic Wand tool on the Tools panel.
- You can also click the Window menu, and then click Magic Wand to display the panel.

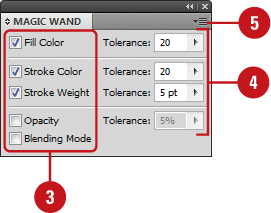
- 2. Click the Options menu, and then select the Show Stroke Options and Show Transparency Options (if necessary) to display them in the Magic Wand panel.
- You can also click the double-arrow next to the Magic Wand title to display options.

- 3. Select the check box for the attributes that you want the Magic Wand to select. The options include: Fill Color, Stroke Color, Stroke Weight, Opacity, or Blending Mode.
- 4. Enter a Tolerance value (0 to 255). The higher the value, the more information the Magic Wand tool selects.
- 5. To select objects on all layers, click the Options menu, and then select Use All Layers to check it. Select it again to select objects only on the current layer.

- 6. To reset all fields in the Magic Wand panel, click the Options menu, and then click Reset.
Use the Magic Wand Tool
- 1. Select the Magic Wand tool on the Tools panel.

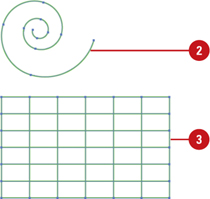
- 2. Click an object area to make a selection.
Depending on the options you selected in the Magic Wand panel, other
objects with the same or similar attributes (fill color, stroke color,
stroke weight, opacity, or blending mode) are selected.
- 3. To add to the selection, hold down the Shift key, and then click another unselected object.
To subtract from the selection, hold down the Alt (Win) or Option (Mac) key, and then click a selected object.

|