IT tutorials
 
Graphics
 

Adobe Illustrator CS5 : Working with Objects - Using the Shape Builder Tool

4/11/2013 3:53:06 AM
- Free product key for windows 10
- Free Product Key for Microsoft office 365
- Malwarebytes Premium 3.7.1 Serial Keys (LifeTime) 2019
The Shape Builder tool (New!) allows you to create complex objects by merging and erasing simpler objects. The Shape Builder tool selects edges and regions of an object, which can be merged or erased to form a new object. An edge is any section of a path that doesn’t intersect the path of other selected objects and a region is a closed area. You can also break overlapping objects to create new ones. The style attributes of an object are adopted after the merge. By default, the Shape Builder tool is in merge mode, however, you can switch to erase mode by using the Option (Mac) or Alt (Win) key. Before you start using the Shape Builder tool, you can set up and customize options, such as coloring source, highlighting, and gap detection, to suit your own preferences.

Create an Object with the Shape Builder Tool

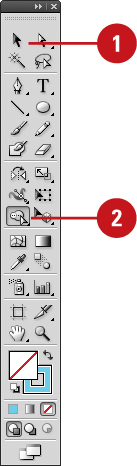
1. Click the Selection tool on the Tools panel, and then select only the paths you want to merge to create a shape.

2. Click the Shape Builder tool on the Tools panel. By default, merge mode is selected.

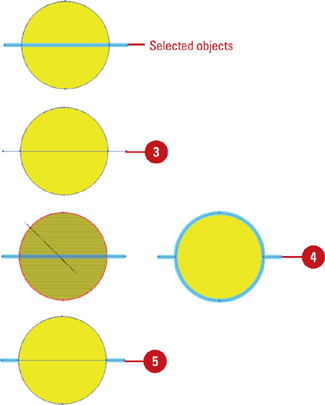
3. To break or extract a region from the shape, click the selected region.

4. To merge paths, drag along the region.

The two regions get merged to form a new shape. The attributes from the region are applied to the merging shapes.

Timesaver

Press Shift as you drag, displays a rectangle marquee for merging multiple paths.

5. To erase paths, press Option (Mac) or Alt (Win) and click the closed region or edge you want to delete.

Set Shape Builder Tool Options

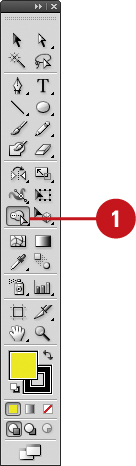
1. Double-click the Shape Builder tool on the Tools panel.

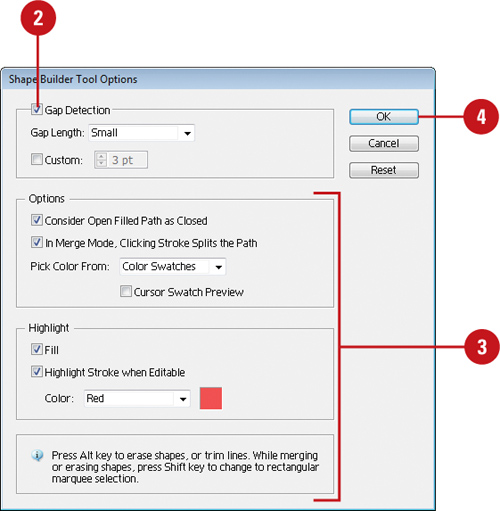
2. To detect and show the gap between objects, select the Gap Detection check box, and then select a Gap Length, either Small (3 points), Medium (6 points), or Large (12 points), or select the Custom check box and specify a point size length.

Important

Make sure the gap length value is close to the actual gap length, otherwise Illustrator may not detect it.

3. Specify the Options and Highlight settings you want:

  • Consider Open Filled Path as Closed. Select to create an invisible edge for an open path to make a region.

  • In Merge Mode. Clicking Stroke Splits the Path. Select to split the parent path into two; the first edge you click specifies the split location.

  • Pick Color From. Select Color Swatches or Artwork as the source for coloring objects. If you select Color Swatches, select the Cursor Swatch Preview check box to preview and select colors.

  • Fill. Select to highlight the merged area in gray or mouse over the selected path.

  • Highlight Stroke When Editable. Select to highlight strokes you can edit in the color you select.

4. Click OK.

 
Others
 
- Adobe Illustrator CS5 : Working with Objects - Creating Grids
- Adobe Photoshop CS5 : Additional Selection Commands
- Adobe Photoshop CS5 : Basic Selection Tools
- Adobe Fireworks CS5 : Fireworks and Dreamweaver (part 3) - Three-slice technique for content containers
- Adobe Fireworks CS5 : Fireworks and Dreamweaver (part 2) - Round-trip editing
- Adobe Fireworks CS5 : Fireworks and Dreamweaver (part 1) - Copying and pasting to Dreamweaver
- Adobe Flash Professional CS5 : Working Within the Flash Environment - Organizing Layers
- Adobe Flash Professional CS5 : Working Within the Flash Environment - Viewing Layers
- Adobe InDesign CS5 : Opening Documents and Templates (part 2) - Converting documents created with other programs
- Adobe InDesign CS5 : Opening Documents and Templates (part 1) - Working with files in the Bridge file system
 
 
Top 10
 
- Microsoft Visio 2013 : Adding Structure to Your Diagrams - Finding containers and lists in Visio (part 2) - Wireframes,Legends
- Microsoft Visio 2013 : Adding Structure to Your Diagrams - Finding containers and lists in Visio (part 1) - Swimlanes
- Microsoft Visio 2013 : Adding Structure to Your Diagrams - Formatting and sizing lists
- Microsoft Visio 2013 : Adding Structure to Your Diagrams - Adding shapes to lists
- Microsoft Visio 2013 : Adding Structure to Your Diagrams - Sizing containers
- Microsoft Access 2010 : Control Properties and Why to Use Them (part 3) - The Other Properties of a Control
- Microsoft Access 2010 : Control Properties and Why to Use Them (part 2) - The Data Properties of a Control
- Microsoft Access 2010 : Control Properties and Why to Use Them (part 1) - The Format Properties of a Control
- Microsoft Access 2010 : Form Properties and Why Should You Use Them - Working with the Properties Window
- Microsoft Visio 2013 : Using the Organization Chart Wizard with new data
Technology FAQ
- Is possible to just to use a wireless router to extend wireless access to wireless access points?
- Ruby - Insert Struct to MySql
- how to find my Symantec pcAnywhere serial number
- About direct X / Open GL issue
- How to determine eclipse version?
- What SAN cert Exchange 2010 for UM, OA?
- How do I populate a SQL Express table from Excel file?
- code for express check out with Paypal.
- Problem with Templated User Control
- ShellExecute SW_HIDE
programming4us programming4us