A few more Selection commands are found on
the Select menu or by choosing Select > Modify. For a sense of
completion, let’s take a quick look:
All. The
All command selects everything on the active layer or in your flattened
document within the edges of the canvas. The keyboard shortcut is
Command+A (Ctrl+A) when the canvas window is selected.
Deselect.
The Deselect command removes the active selection. You may need to do
this when you’re finished altering your selection to avoid accidentally
modifying your image. The keyboard shortcut is Command+D (Ctrl+D) when
the canvas window is selected.
Reselect.
The Reselect command is truly useful because it allows you to
reactivate the last selection in your document. It only works with
selections made since you’ve last opened the document. The keyboard
shortcut is Shift+Command (Ctrl+D) when the canvas window is selected.
Inverse.
The concept of inverse is very important. It is often far easier to
select what you don’t want, and then inverse the selection to get what
you do want. The keyboard shortcut is Shift+Command (Ctrl+I) when the
canvas window is selected.
Grow.
The Grow command selects adjacent pixels that fall within a certain
tolerance range. To modify the range, adjust the Tolerance settings of
the Magic Wand tool.
Similar.
The Similar command also selects pixels based on the Tolerance settings
of the Magic Wand tool. However, the pixels do not need to be adjacent.
Transform Selection.
The Transform Selection command allows you to modify an existing
selection. Invoking it gives you controls similar to the Free Transform
command .
The following commands appear on the Modify submenu:
Border. If
you have an existing selection, you can use the Border command. You can
enter a value between 1 and 200 pixels. A new selection that frames the
existing selection will be created.
Smooth. The Smooth command simplifies the selection by adding more pixels to the selection to make it less jagged.
Expand.
The Expand command allows you to add pixels in an outward fashion to
the selection. The border will get wider based on the number of pixels
you add.
Contract.
The Contract command works the opposite of the Expand command. Specify
the number of pixels that you want the selection to decrease.
Feather.
The Feather command blurs the edge of the selection. While this creates
a loss of detail at the edges, it can be very useful to create a
blending transition (such as when extracting an object with a soft edge,
like fabric or hair). The feather becomes apparent when you move, copy,
or fill the selection. If you feather the edges too much, you might
lose the selection border (marching ants), which is only visible above a
50% threshold. The keyboard shortcut is Shift+F6 when you have an
active selection.
Let’s try out the concept of Inverse, as well as some of the other commands:
1. | Open the file Ch05_Inverse.tif .
|
2. | Select the Magic Wand tool.
|
3. | Set the Tolerance to 32 and select the Anti-alias and Contiguous check boxes.
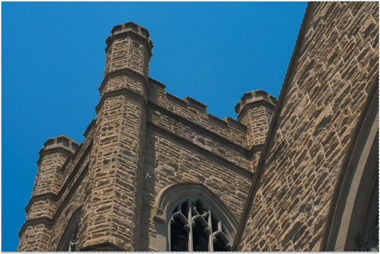
|
4. | Click the sky to make an initial selection.
|
5. | When most of the sky is active, choose Select > Grow. If needed, repeat the command.
|
6. | Choose Select > Inverse to capture the castle. |