IT tutorials
 
Graphics
 

CorelDraw 10 : Converting Documents to Web Pages

12/13/2011 6:03:49 PM
- Free product key for windows 10
- Free Product Key for Microsoft office 365
- Malwarebytes Premium 3.7.1 Serial Keys (LifeTime) 2019
After you've finished designing your Web pages, it's time to convert them into HTML and image files that can be read by Web browsers. Each document page will be converted to a separate Web page, and a folder will be created to store all the images on the pages. As part of the process, the pages are automatically checked for HTML conflicts and errors.

To convert a document to Web pages:

1.
Be sure that your CorelDraw document has been saved normally.

2.
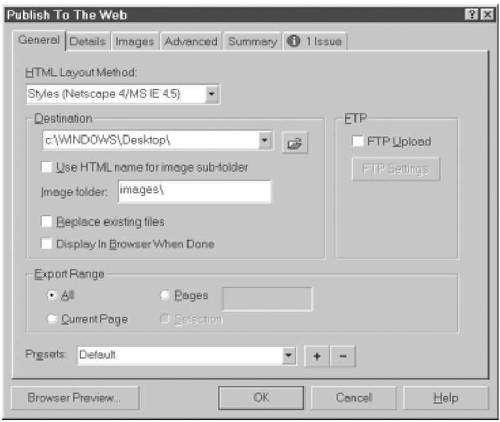
Choose File > Publish To The Web > HTML.

The Publish To The Web dialog box appears, open to the General tab (Figure 1).

Figure 1. Most of the critical settings for HTML output can be found on the General tab.


3.
Check the right-most tab to see if any issues are noted. If so, click the tab to read about them (Figure 2).

Figure 2. If any problems are found, you can read about them on this tab.


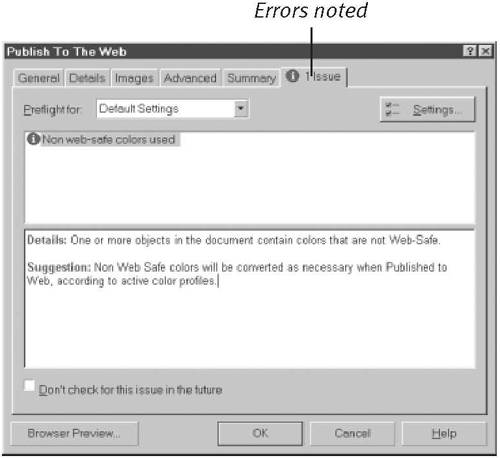
Many issues can be corrected during the conversion process. If you'd rather fix them manually, click the Cancel button, make the necessary corrections, and begin again with Step 1.

4.
On the General tab, choose a layout style from the HTML Layout Method drop-down list.

5.
Enter a folder name for the HTML output in the Destination text box or select a folder by clicking the Browse button.

6.
In the Images text box, enter a name for the subfolder in which the images will be stored or accept the default name.

7.
If you've exported these pages previously and want to retain only the newest copies, click the Replace existing files check box.

8.
To automatically open the new pages in your browser following the conversion, click the Display In Browser When Done check box.

9.
In the Export Range area, indicate whether you want to generate HTML files for all pages in the document, only the current page, or a range of pages.

10.
On the Details tab (Figure 3), you can enter/edit the title and file name for each page. (The title is the text that will appear in a browser's title bar when the page is viewed.)

Figure 3. You can assign or change the display titles for your Web pages on the Details tab.


11.
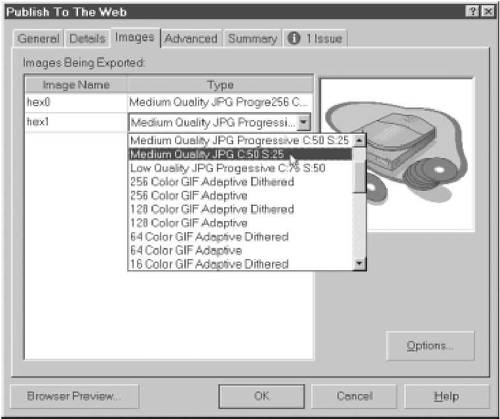
On the Images tab (Figure 4), you can view or alter the file and compression settings for the images on your Web pages.

Figure 4. You can rename or change file type and compression settings for images on the Images tab.


12.
Click OK to export the Web pages and close the dialog box (Figure 5).

Figure 5. The output consists of one or more HTML files and a folder that contains the images.


Tips

  • On the General tab, you may have noticed the FTP (File Transfer Protocol) area. By checking the FTP Upload check box, clicking the FTP Settings button, and entering the necessary log-on information, you can upload your Web pages and images to the server from CorelDraw. Contact the server administrator for the correct settings information.

  • You can view the Web output by double-clicking any of the resulting HTML files. Your browser will launch and display the selected Web page.

 
Others
 
- Adobe Flash Professional CS5 : Manipulating Symbols in 3D Space (part 2) - Transforming symbols with the 3D Rotation tool
- Adobe Flash Professional CS5 : Manipulating Symbols in 3D Space (part 1) - Controlling the camera view: Perspective and vanishing point
- Adobe InDesign CS5 : Working with Clipping Paths
- Adobe InDesign CS5 : Creating a Compound Path
- Adobe Flash Catalyst CS5 : Merging Changes from Catalyst into Flash Builder
- Adobe Flash Catalyst CS5 : Running a Project in Flash Builder
- Adobe Illustrator CS5 : Selecting Layers & Deleting Layers
- Adobe Illustrator CS5 : Creating Layers - Create a New Top Level Layer or Sublayer with Options
- Dreamweaver CS5 : Establishing Optional Regions (part 3) - Template expression examples
- Dreamweaver CS5 : Establishing Optional Regions (part 2) - Evaluating template expressions
 
 
Top 10
 
- Microsoft Visio 2013 : Adding Structure to Your Diagrams - Finding containers and lists in Visio (part 2) - Wireframes,Legends
- Microsoft Visio 2013 : Adding Structure to Your Diagrams - Finding containers and lists in Visio (part 1) - Swimlanes
- Microsoft Visio 2013 : Adding Structure to Your Diagrams - Formatting and sizing lists
- Microsoft Visio 2013 : Adding Structure to Your Diagrams - Adding shapes to lists
- Microsoft Visio 2013 : Adding Structure to Your Diagrams - Sizing containers
- Microsoft Access 2010 : Control Properties and Why to Use Them (part 3) - The Other Properties of a Control
- Microsoft Access 2010 : Control Properties and Why to Use Them (part 2) - The Data Properties of a Control
- Microsoft Access 2010 : Control Properties and Why to Use Them (part 1) - The Format Properties of a Control
- Microsoft Access 2010 : Form Properties and Why Should You Use Them - Working with the Properties Window
- Microsoft Visio 2013 : Using the Organization Chart Wizard with new data
Technology FAQ
- Is possible to just to use a wireless router to extend wireless access to wireless access points?
- Ruby - Insert Struct to MySql
- how to find my Symantec pcAnywhere serial number
- About direct X / Open GL issue
- How to determine eclipse version?
- What SAN cert Exchange 2010 for UM, OA?
- How do I populate a SQL Express table from Excel file?
- code for express check out with Paypal.
- Problem with Templated User Control
- ShellExecute SW_HIDE
programming4us programming4us