So enough downloading; let’s
write a program. A “Hello World!” program is traditional, and we will
start with something similar to demonstrate what you need to do to create,
build, and test an Android application. We won’t explore much of the
Android API for this program—but
here we’ll get a taste for the development environment and the steps you
go through to create an application for Android.
1. Where We’re Going
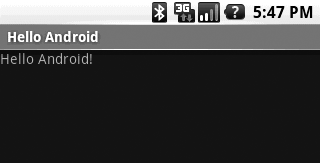
There isn’t much functionality in this program. We just want to
display some text on the Android emulator window that says “Hello
Android!” (see Figure 1).
2. Starting a New Android Application: HelloWorld
Several components are needed to build an Android application.
Fortunately, the Eclipse IDE with the Android plug-in automates a lot of
the work needed to create and maintain these components. We will start
by using the IDE to create a project for our application. Start up
Eclipse and select “File → New → Project...” from the menu bar (be sure
to select “Project...”, not “Java Project”). You’ll see a list of
project types, similar to the menu in Figure 2.
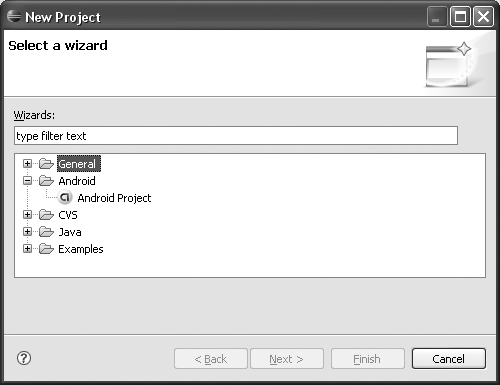
Select “Android Project” and click “Next” to get the “New Android
Project” dialog box (Figure 3).
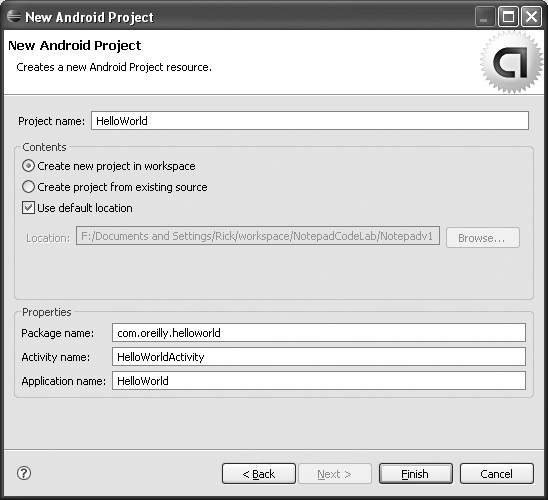
We’ll use “HelloWorld” as the name for both the Project and the
Application. You don’t need to change the button or checkbox selections,
and we’ll use the package name com.oreilly.helloworld as shown.
Every Android application has to have at least one Activity (an
executable that usually has a user interface), so let’s say we’re going
to include an Activity called HelloWorldActivity, as shown in the dialog
box. Click “Finish,” and the Android Software Development Kit does a
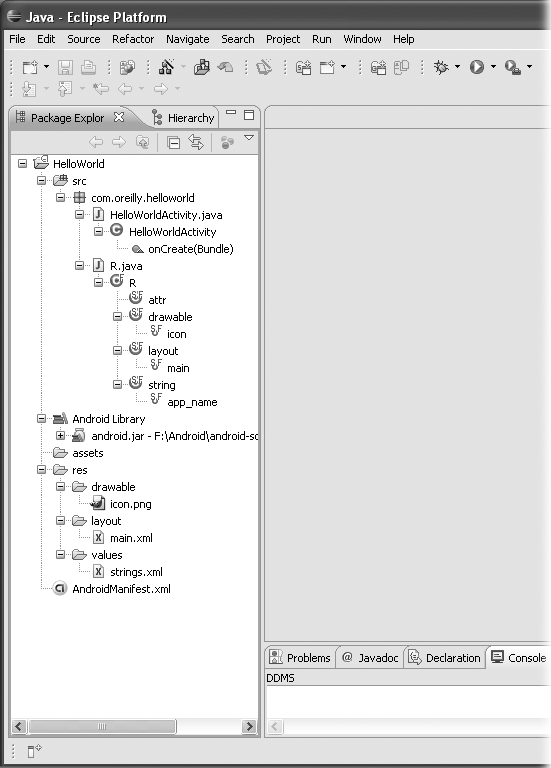
number of things for you, to make your life easier as a developer. In Figure 4, I’ve expanded the tree in
the Package Explorer window to show some of the files and directories
that the Android SDK created.
The Android SDK created a HelloWorld
directory in the default Eclipse workspace for your project. It also created
subdirectories for your source files (.src),
references to the Android Library, assets, resources (.res), and a manifest file (AndroidManifest.xml). In each of the
subdirectories it created another level of subdirectories as
appropriate. Let’s take a quick look at them:
Sources (under src)
Contains a directory structure that corresponds to the
package name you gave for your application: in this case,
com.android.helloworld.
Contains a Java template for the Activity you indicated
was in the application (HelloWorldActivity) and may contain
a directory of resource references (R.java).
R.java is actually generated by the
Android SDK the first time you compile your application; it
contains the Java version of all the resources you define in
the res directory (covered later). We’ll
come back to R.java
later.
Android Library
This is just what it says. If you like, you can expand
the android.jar tree and see
the names of the modules included in the library. This is where
your application will go for Android library references.
assets
Files you want to bundle with your application. We won’t
have any for HelloWorld.
Resources (under res)
Drawable resources are any images, bitmaps, etc., that
you need for your application. For HelloWorld, the Android SDK
has supplied us with the default Android icon, and that’s all
we’ll need.
Layout resources tell Android how to arrange items on
the screen when the application runs. These resources are XML
files that give you quite a bit of freedom in laying out the
screen for different purposes. For HelloWorld, we’ll just use
the defaults generated by the Android SDK.
Values are constants, strings, etc., available for use
by your application. Keeping them outside the sources makes it
easier to customize the application, such as adapting it for
different languages.
Manifest (AndroidManifest.xml)
This is another XML file that tells the Android build
system what it needs to know to build and package your application
so it can be installed on an Android phone or the emulator. This
file has its own specialized editor, which we’ll describe when we
get to more complicated applications.
3. Writing HelloWorld
In the Eclipse Package Explorer window, double-click on HelloWorldActivity.java. This opens the source
file of that name in the center window, ready for editing:
package com.oreilly.helloworld;

import android.app.Activity;
import android.os.Bundle;

public class HelloWorldActivity extends Activity {
    /** Called when the activity is first created. */
    @Override
    public void onCreate(Bundle savedInstanceState) {
        super.onCreate(savedInstanceState);
        setContentView(R.layout.main);
    }
}
Looking quickly at the template code that the Android SDK has
provided for us, we can note several things:
The Android SDK has included the package reference we asked
for, which is consistent with the directory structure it
created.
It has also created a (collapsed) set of imports for the
library references it knows we need.
It created a class definition for the Activity we said we
wanted (HelloWorldActivity),
including a method called OnCreate.
For the moment, don’t worry about the parameter passed into
OnCreate. The savedInstanceState Bundle is a way of passing data between activities and
storing data between instantiations of the same Activity. We won’t
need to use this for HelloWorld.
One special line of code has been included in OnCreate:
setContentView (R.layout.main);
Remember that Android uses layouts to define screen layouts on the target, and that main.xml was the name of the default
layout file that the Android SDK created for us under .res/layout. The R.java file is generated automatically
and contains Java references for each of the resources under
.res. You will never need to
edit the R.java file by hand;
the Android SDK takes care of it as you add, change, or delete
resources.
Again in the Eclipse Package Explorer window, double-click on
main.xml and you will see the
default layout screen in the center window. There are two tabs at the
bottom of the panel that say “Layout” and “main.xml”. Click on the one
that says “main.xml” to bring up the code version:
<?xml version="1.0" encoding="utf-8"?>
<LinearLayout xmlns:android="http://schemas.android.com/apk/res/android"
    android:orientation="vertical"
    android:layout_width="fill_parent"
    android:layout_height="fill_parent"
    >
<TextView
    android:layout_width="fill_parent"
    android:layout_height="wrap_content"
    android:text="@string/hello"
    />
</LinearLayout>
Again, let’s look at the key features of this template
code:
Like any other XML file, this one starts with a reference to the XML version
and encoding used.
LinearLayout is one of the screen layout formats provided by
the Android SDK. There are several others, which can be combined
hierarchically to create very complex screen layouts. For our
purposes, a simple linear layout is fine.
The LinearLayout definition:
xmlns:android="http://schemas.android.com/apk/res/android"
identifies the XML schema being used.
This code:
android:orientation="vertical"
android:layout_width="fill_parent"
android:layout_height="fill_parent"
defines an orientation, width, and height for the entire
scope of the layout.
TextView describes an area where text can be displayed and edited. It
resembles the text boxes you may have encountered when programming
in other graphical environments.
Within the TextView definition:
android:layout_width="fill_parent"
android:layout_height="wrap_content"
define a width and height for the TextView box.
This code:
android:text="@string/hello"
provides some text to display in the TextView. The actual
string is defined in a separate file,
res/values/strings.xml. If we open that
file (again by clicking on it in the Package Explorer), we see a
specialized string editor added by ADT. If you select “hello
(String)” by clicking on it, you’ll see the current value for
that string. By a stroke of luck, the Android SDK has already
included text that is close to what we wanted to display anyway.
Just to show them who’s boss, change the value of the String
hello to say “Hello Android!”, or something else equally
clever.
Save the Project either from the Eclipse File menu (File → Save)
or by clicking on the disk icon in the menu bar.
Believe it or not, we’re done. We don’t have to write a single
line of Java to create this application.
4. Running HelloWorld
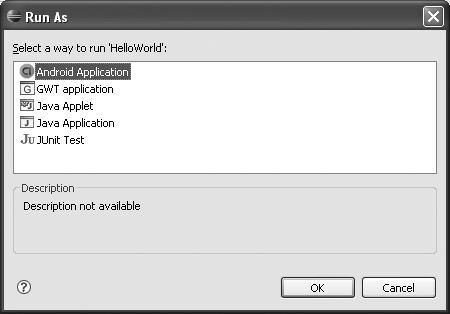
From the Eclipse menu bar, select Run → Run. A “Run As” dialog box
will pop up. Select “Android Application” from the list, which displays
the dialog shown in Figure 5.
A command window will pop up, followed quickly by an emulator
window that looks just like a mobile phone. The emulated phone will then
go through its boot sequence, which takes a few minutes (relax; if
anything goes wrong, it will tell you). After a few minutes you should
see the screen shown in Figure 6.
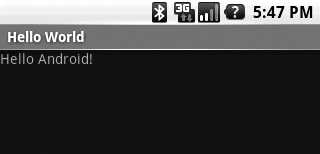
Notice anything different between that screen image and the one we
showed in Figure 2-1? The
application prints out “Hello Android!”, or whatever you wrote into the
android:text line earlier, but it
also displays the title of the application as “Hello World”. Let’s
change the title to match our creative change to the application
text.
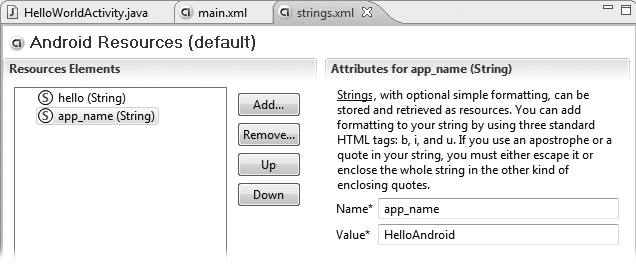
In the Package Explorer in the left panel of the Eclipse workbench, reopen the
strings.xml file (the one where we
found the String hello before). This
will open the file in the editing window. The intent of this file is to
give you a place to define strings that will be used by your
application, without actually embedding them in the Java source code.
The other string that’s defined here is app_name. To make things consistent, change
the definition of app_name to HelloAndroid, as shown in Figure 7.
Now when we run the application, we get a screen that looks just
like what we set out to do, as shown previously in Figure 1.
Congratulations! You’ve just created your first Android program by
doing nothing more than changing the text in one line of code. There are
much greater challenges ahead.