Linking to SQL Server Databases
In
a system where you store your data solely in Access tables, the Access
Database Engine supplies all data retrieval and management functions
and handles security, data validation, and enforcement of referential
integrity.
In a system where Access acts as a front end to
client/server data, the server handles the data management functions.
It’s responsible for retrieving, protecting, and updating data on the
back-end database server. In this scenario, the local copy of Access is
responsible only for sending requests and getting either data or
pointers to data back from the database server. If you’re creating an
application in which Access acts as a front end, capitalizing on the
strengths of both Access and the server can be a challenging endeavor.
You might ask why you would want to convert your database to a client/server application. The reasons include the following:
Greater control over data integrity
Increased control over data security
Increased fault tolerance
Reduced network traffic
Improved performance
Centralized control and management of data
Scenarios in which you may need to upsize include the following:
Large number of simultaneous users (more than 10–15)
Large volume of data (tables with more than approximately 100,000 rows)
Increased need for security (payroll data and such)
Link to SQL Server Data
If you store your data in SQL Server, you will need
to link to it from your Access database. The steps that follow show you
how to link from an Access database to a table stored on a SQL Server:
1. | Select
ODBC Database from the Import & Link group on the External Data tab
of the Ribbon. The Get External Data – ODBC Database dialog appears.
|
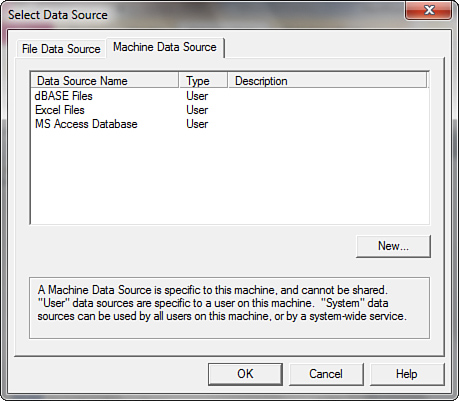
2. | Select Link to the data source by creating a linked table and click OK. The Select Data Source dialog appears. |
3. | Select the Machine Data Source tab. The dialog appears as in Figure 2.
|
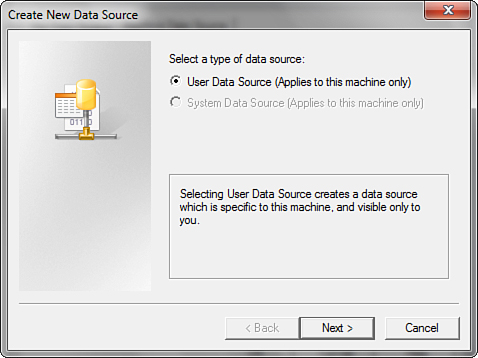
4. | Click
New. A warning may appear indicating that you are unable to create
System DSNs. If the warning appears, click OK to dismiss the dialog.
The Create New Data Source Wizard appears (see Figure 3).
|
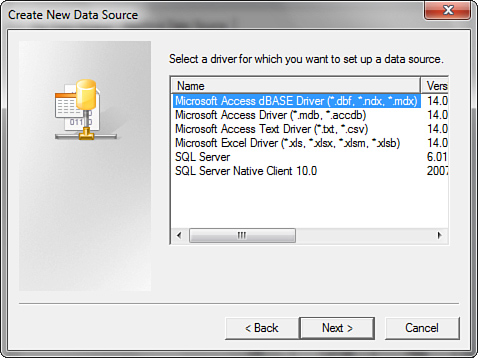
5. | Click Next. The wizard appears as in Figure 4.
|
6. | Select
SQL Server or SQL Server Native Client 10.0 (depending on which version
of SQL Server you are accessing), and then click Next.
|
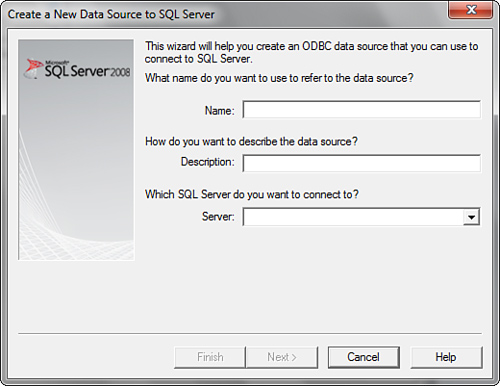
7. | Click Finish to launch the Create a New Data Source to SQL Server Wizard (see Figure 5).
|
8. | Supply a name and optional description for the data source.
|
9. | Designate
the name of the SQL Server you want to connect to. (You might need to
contact your system administrator to obtain this information.)
|
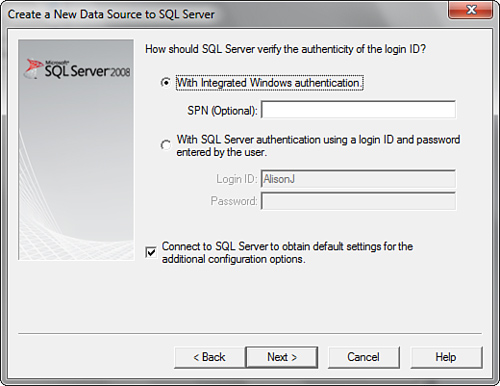
10. | Click Next. The wizard appears as in Figure 6.
|
11. | Indicate
the type of security you will use to log on to the server. (Again, you
might need to contact your system administrator for this information.)
|
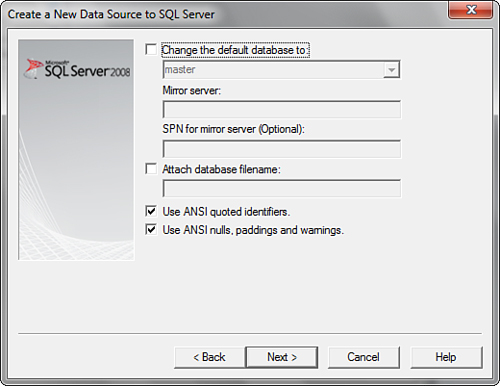
12. | Click Next. The wizard appears as in Figure 7.
|
13. | Change the default database to point at the SQL Server database that you want to link to.
|
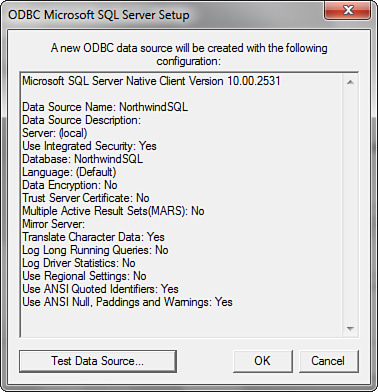
14. | Click Next. The final step of the wizard appears. You can generally leave all these settings at their default values. |
15. | Click Finish. A dialog appears showing you all of the settings you have selected (see Figure 8).
|
16. | Click
Test Data Source to test your connection to the SQL Server database. A
dialog appears confirming that the test was successful.
|
17. | Click OK to close the dialog, and OK again to close the wizard. Your data source appears in the list of available data sources.
|
18. | Click
OK to select the new data source and begin the process of linking to
the tables within it. The Link Tables dialog appears (see Figure 9).
|
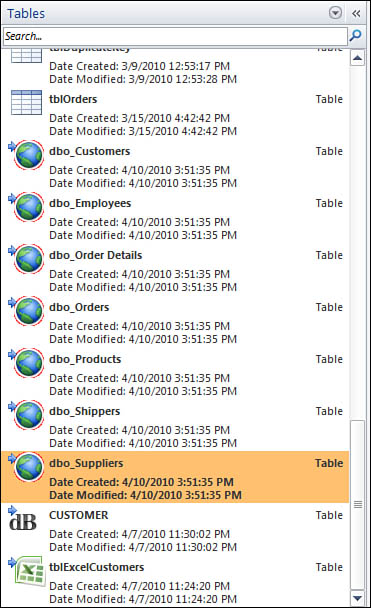
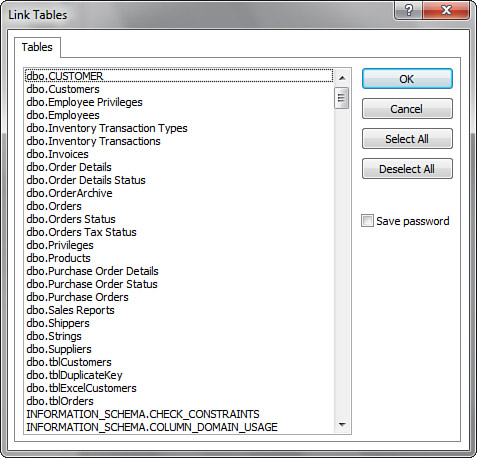
19. | Select
the tables you want to link to and click OK. The process completes and
the tables appear in the Navigation Pane with globes (see Figure 10), indicating that they are using ODBC to connect to the SQL Server. You can now treat the tables like any other linked tables.
|