If resources in your project already have been
assigned to tasks, it’s possible that, at some point, you may need to
make changes to those resource assignments. This isn’t terribly
complicated when work hasn’t started on a task. Simply go back to the Task Information
dialog box and make the necessary changes. This gets more complicated
when a resource has started work on a task and the actual work values
have been recorded in the project. You can take a few different
approaches in this situation, depending on what changed:
If all work assigned to all resources on the task needs to pause and resume at a later time,
you can split the work on the task. This creates a gap between the
first part of the task, in which the actual work has been recorded, and
the next part of the task, in which the remaining work is scheduled.
If work assigned to one resource on the task needs to pause and resume at a later time, you can use the Resource Usage view to fine-tune the work schedule for that resource.
If the remaining work assigned to one resource needs to be reassigned to another resource, you can use the Task Usage view to move the remaining work to that resource.
Splitting a Task to Create a Gap in Work
By splitting a task, you create a gap between one
part of the task and another. This keeps the actual work where it was
recorded but enables you to move the remaining work to a later time
within the project schedule. When you split a task, all resource
assignments for the task are split.
To split work on a task, follow these steps:
1. | In the Gantt Chart view, click the Task tab; in the Schedule group, click Split Task, as shown in Figure 1. The mouse cursor changes to a vertical line with an arrow pointing to the right.
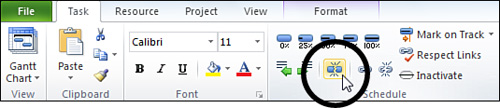
|
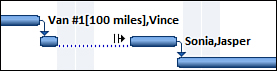
2. | On
the Gantt bar for the task that you want to split, click the date when
you want to end the work on the first part of the task and then drag
the second part of the task to the date when you want work to resume. Figure 2 shows a task that has been split.
|
Fine-Tuning a Resource’s Work Schedule for a Task
If a resource assigned to your task needs to put
work on the task on hold for some reason (maybe to work on a
last-minute, higher-priority task, for example), you can use the Resource Usage view to split that resource’s work, without splitting the entire task.
Follow these steps to adjust the task’s work schedule for a single resource:
1. | On the View tab, in the Resource Views group, click Resource Usage.
|
2. | On the Format tab, in the Details group, select the Work and Actual Work check boxes.
|
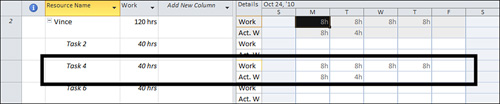
3. | On the left portion of the Resource Usage
view, scroll down to locate the resource that has an assignment you
want to adjust, and then look below that resource for the task
assignment. Scroll through the time-phased portion of the view, on the
right side, to find the dates where work on the task is scheduled. Figure 3 shows an assignment with work in the time-phased portion of the view.
|
4. | If the resource has recorded Actual Work on the task, the best practice is not to modify those hours. The Work row for the assignment contains the scheduled work. Any work that is scheduled for after the recorded Actual Work
is fair game for moving. To move the scheduled work, delete the hours
from each day when the resource will not be available and then retype
the hours in the Work row for the assignment on the days when the resource can resume working on the task.
|
Assigning Remaining Work on a Task to Another Resource
If a resource has been working on a task and
recording actual work, but then is taken off of the task for some
reason (poor performance or a job change, for example), you can move
the remaining work to another resource.
To reassign the remaining work on a task to another resource, follow these steps:
1. | In the Gantt Chart view, click the task that contains the resource you are replacing.
|
2. | On the Resource tab, in the Assignments group, click Assign Resources.
|
3. | On the Assign Resources dialog box, click the name of the resource you are replacing, and then click Replace (see Figure 4). Resources currently assigned to the selected task have a check mark displayed to the left of the Resource Name column.
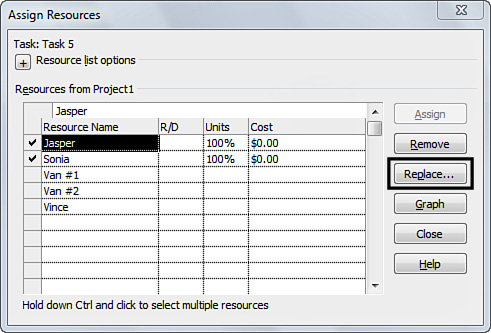
|
4. | On the Replace Resource dialog box, click the name of the resource you want to reassign work to, and then click OK.
|
5. | Click Close on the Assign Resources dialog box.
|