SmartLists are full of cool features and these are
great for throwing together a report quickly. However, sometimes the
column names don't mean much to an average user, or the way that a
company uses a field is different from its original intent.
It's not only possible, but
easy to change the column description that shows up on a SmartList. In
this recipe we'll look at how to do that.
How to do it...
To change the name of a SmartList column:
1. Click on the SmartList button on the menu bar at the top or select Microsoft Dynamics GP from the top and click on SmartList.
2. Select Financial, then Account Transactions from the pane on the left.
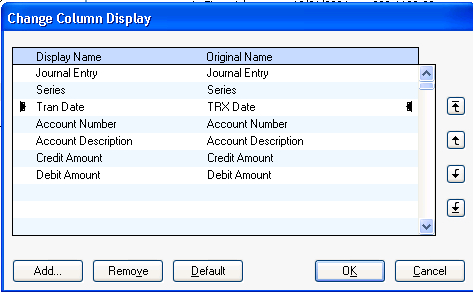
4. Click on TRX Date under the Display Name column heading. Type Tran Date right over the old name and click on OK:

How it works...
Changing the column names in a
SmartList doesn't change the name in the database; it uses the new name
as an alias to overlay the database name for reporting. Notice that the
title in the Original Name
column doesn't change. This means that there is no way to save the new
column name to the default SmartList. However, the new column names can
be saved as part of a Favorite.
Additionally, when
exporting a SmartList to Excel, the new column name is passed to Excel.
This means that this recipe can be a great timesaver for users who
regularly export SmartLists to Excel and then rename columns.
There's more...
Column names can be changed for default SmartLists.
Default SmartList column names
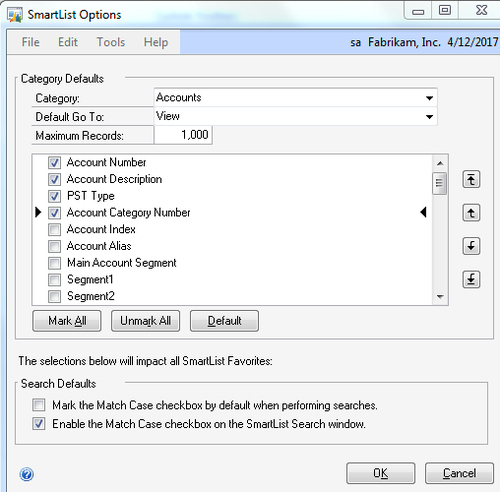
The column names can be changed for the default SmartLists as well. To demonstrate how to do this:
1. Click on Administration on the Navigation Pane on the left.
2. In the Administration Area Page select SmartList Options from the Setup | System area.
3. Select Accounts for the Category.
4. Select Posting Type and key PST Type in its place:

5. Click on OK to save the new default description.