SmartLists are designed for individual users to
tailor reporting to their needs. This is important because users have
the ability to save their unique SmartLists and make these available to
be reused over and over again.
Default SmartLists are
represented by an asterisk and can be customized by moving fields
around, adding or removing fields, filtering the data to be returned,
and sorting data in interesting ways. However, the time and effort
required to do all of that is lost if a user can't save and reuse these
unique settings. Saved SmartLists are called Favorites and they are the
focus of this recipe.
How to do it...
In this recipe we'll set up a SmartList and save it as a Favorite:
1. Click on the SmartList button on the menu bar at the top or select Microsoft Dynamics GP from the top and click on SmartList.
2. Select Financial, then Accounts from the list on the left.
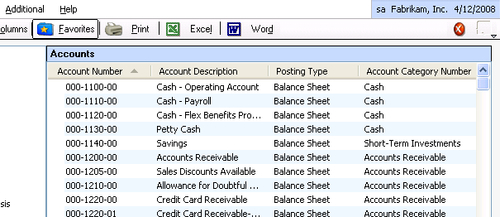
3. Click on the Account Number column heading to sort by Account Numbers:

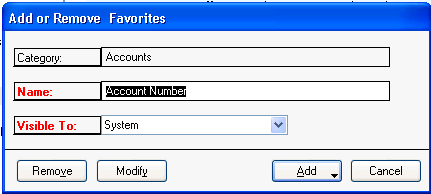
4. Click on Favorites. In the Name field, name the Favorite Account Number.
5. Leave Visible To equal to System.
6. Click on Add and then Add Favorite to save the SmartList:

How it works...
SmartList Favorites provide a
way to save a group of SmartList settings much like options do for
built-in reports. This provides a simple way to return to the same
SmartList settings over and over. Favorites are saved under the category
these are created in on the left. Consequently, our Account Number
Favorite is saved under Financial | Accounts.
There's more...
SmartList Favorites can be
also be modified, and there are even more SmartList recipes to come.
Favorites provide fast access to preset SmartLists and GoTos provide a
path back to the source data.
Modifying SmartList Favorites
It is possible to change a SmartList Favorite by selecting that Favorite, making changes, and clicking on Modify instead of Add.
Go To
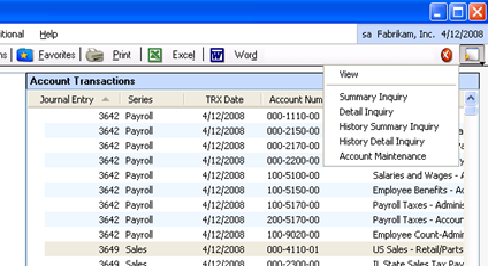
Double-clicking on a row in
a SmartList drills back to the source data. Sometimes, there is more
than one possible source. For example, should a sales row drill back to
the Sales Transaction or to the Customer Master Record? Well, the GoTo
button in the upper right displays more drill back options beyond the
default double-click selection. An example is shown in the following
screenshot:

Additionally, the default GoTo can be changed in the SmartList Options window. This window is reached by clicking on the Administration button on the Navigation Pane and then clicking on SmartList Options in the Administration Area Page.