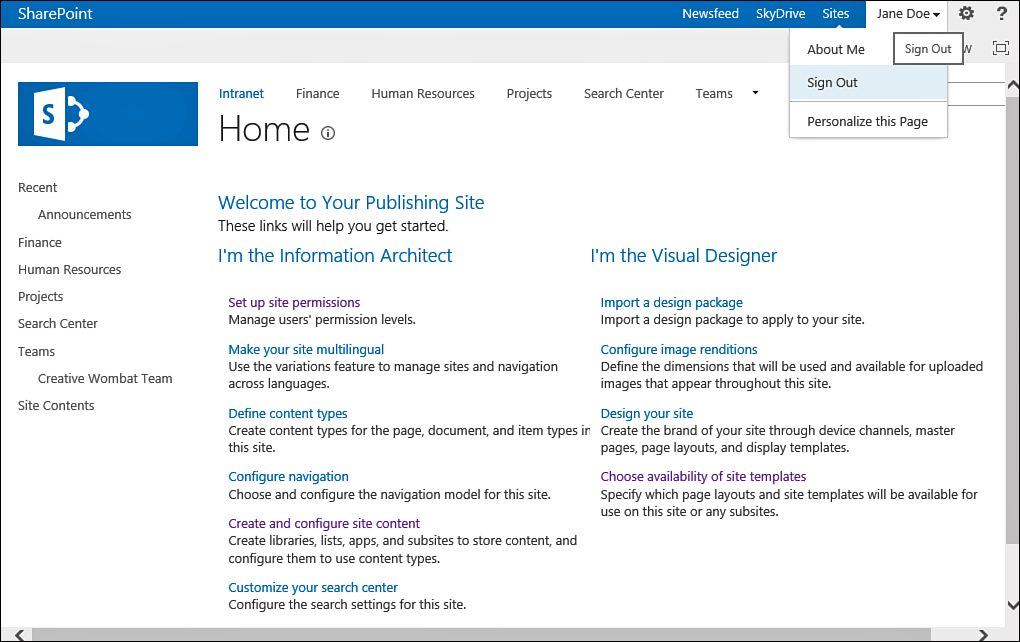
FIGURE 1 How to sign out of a site.
Use the Ribbon
Scenario/Problem:
Any page in SharePoint might have several ribbons with different
command buttons and actions. Often you will want to either show the
ribbon to expose editing options on a page, or manually switch to
different ribbons to find the actions or the information that those
other ribbons offer.
Solution:
By default, when you browse through a SharePoint site, the ribbon
switching controls are hidden and you are shown the default ribbon that
displays the site’s name, logo, and navigation. As you navigate through
the site, SharePoint attempts to detect what ribbon you need to see
based on what you select in a page.
To show the ribbon controls if they are not
visible, you must click on the Settings icon that looks like a cogwheel
at the top-right corner of the page, and then select the Show Ribbon
command from the drop-down menu that opens, as shown in Figure 2.
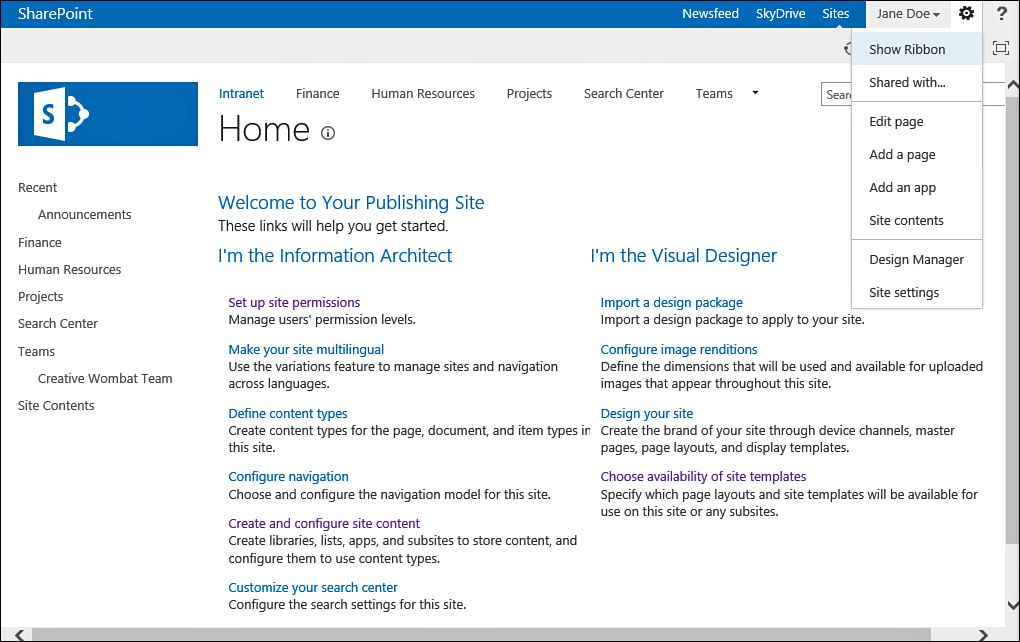
FIGURE 2 The Show Ribbon command in the Settings drop-down menu.
If the ribbon is already shown, the command
displays Hide Ribbon instead. After ribbons are made visible, you can
use the ribbon controls to switch between the different ribbons.
Note
Site administrators might choose to disable
the Show Ribbon option in some sites. If they did, you will only see
the ribbon options if you are in a page that SharePoint requires a
ribbon to be displayed in.
The control that allows
you to switch between ribbons is usually shown at the top of the page,
listing the names of the available ribbons as tabs. For example, in
most pages, you see the tab for Browse (see Figure 3).
(This tab shows the navigation ribbon that contains the site title,
breadcrumbs, and top-level navigation.This is the default ribbon in most scenarios.
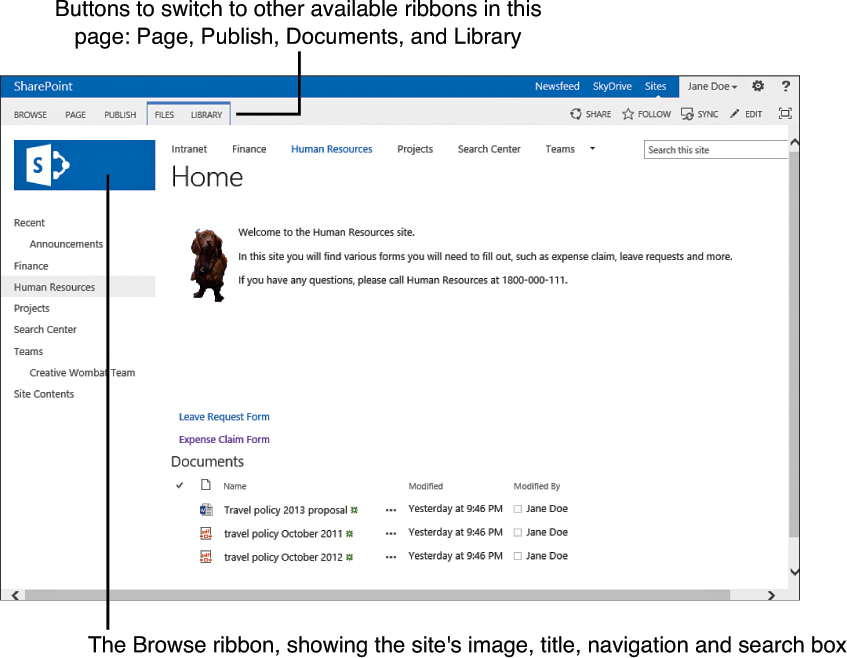
FIGURE 3 The ribbon interface, showing the Browse ribbon and buttons to switch to other available ribbons.
To switch between
ribbons, you click on the name of the ribbon you want to switch to. For
example, when viewing a site’s home page, you can usually switch to the
Page ribbon to see buttons that allow you to e-mail a link to the page
or make the page your browser’s home page.
Depending on where you are in a site, or what you click in a page, different ribbons will appear and disappear. Figure 4,
for example, shows the ribbons that will be shown when you view a
Calendar list—with special buttons to change how you view the calendar.
The Calendar ribbon has buttons under the Scope sections that allow you
to switch from the monthly view to the weekly and daily views. This is
specific to calendar lists.
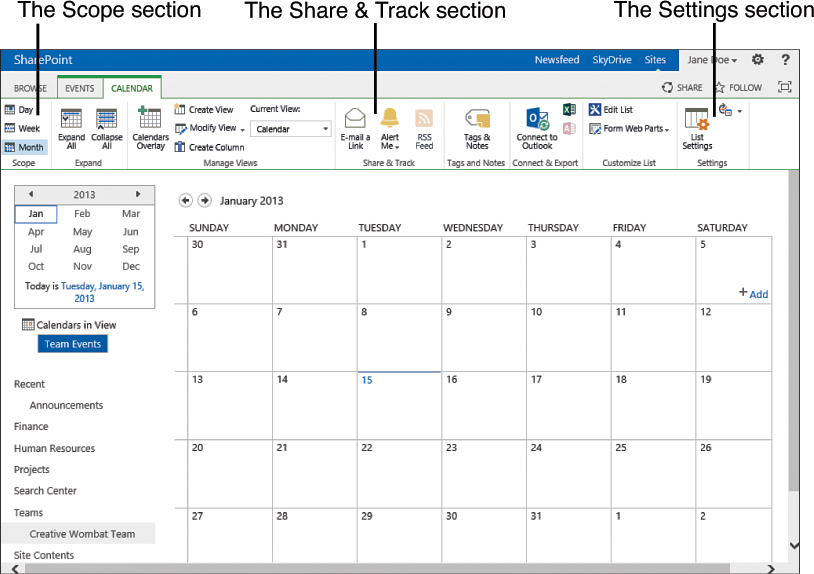
FIGURE 4 The Events and Calendar ribbons are available when viewing a calendar.
The ribbons provide links and buttons to
different functionality. However, sometimes your screen is not big
enough to display all the buttons that appear on a ribbon. This is why
the ribbon is split into sections, as shown in Figure 4.
The sections group various buttons and controls together. If the screen
is not big enough to display all buttons in all sections, SharePoint
automatically shrinks as many sections as needed so that the sections
are still visible, and the buttons are accessible through a section
button. Figure 5 shows an example of this, with the same page as shown in Figure 4
displayed in a much smaller screen. As you can see, the Scope section
is compressed to display the buttons without their text next to them,
and the Expand section is shown collapsed, as a button. Clicking on the
Expand button reveals the two buttons that exist in that section, as
shown in Figure 6.
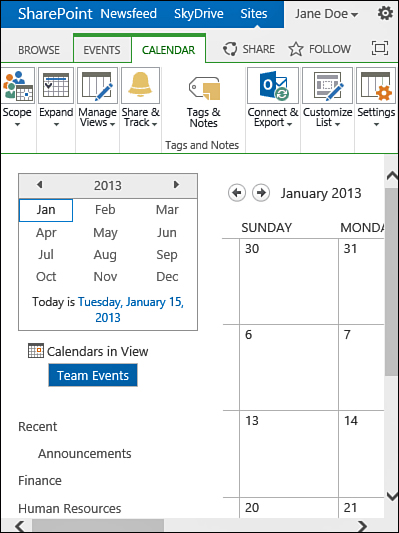
FIGURE 5. The Calendar ribbon, in a smaller screen, showing the Scope and Expand sections compressed to save screen space.
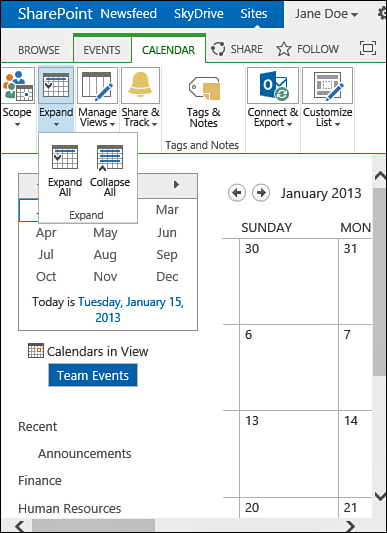
FIGURE 6. The Expand section as a drop-down button, showing the buttons under it when clicked.
Note
The images in this book were taken on a small
screen to make them easier to read. If you have a bigger screen, the
ribbons shown on your screen will probably show more buttons, and they
will be bigger.
When you want to return to the
default ribbon to see the navigation toolbars, you click on the Browse
tab, and the Navigation ribbon appears again.