2. Creating Subnets
Once you have created the sites that map to your
network topology, it's time to define the subnets that define the site
boundaries.
Subnets are based on TCP/IPv4 or TCP/IPv6 address
information. For example, the IPv4 address may be 10.10.0.0, and the
subnet mask may be 255.255.0.0. This information specifies that all of
the TCP/IP addresses that begin with the first two octets are part of
the same TCP/IP subnet. All of the following TCP/IP addresses would be
within this subnets:
10.10.1.5
10.10.100.17
10.10.110.120
The Active Directory Sites And Services tool
expresses these subnets in a somewhat different notation. It uses the
provided subnet address and appends a slash followed by the number of
bits in the subnet mask. In the example in the previous paragraph, the
subnet would be defined as 10.1.0.0/16.
Remember that sites typically represent distinct
physical locations and almost always have their own subnets. The only
way for a domain controller (DC) in one site to reach a DC in another
site is to add subnet information about the remote site. Generally,
information regarding the definition of subnets for a specific network
environment will be available from a network designer. Exercise 2
walks you through the steps you need to take to create subnets and
assign subnets to sites. In order to complete the steps in this
exercise, you must have first completed Exercise 1.
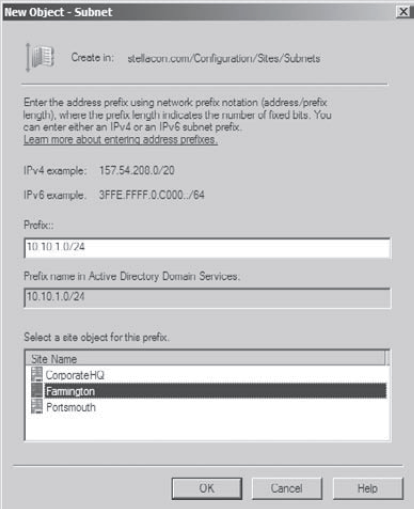
Open the Active Directory Sites And Services tool from the Administrative Tools program group. Expand the Sites folder. Right-click the Subnets folder, and select New Subnet. In
the New Object–Subnet dialog box, you are prompted for information
about the IPv4 or IPv6 details for the new subnet. For the prefix, type
10.1.1.0/24 (we are staying with the
more commonly used IPv4). This actually calculates out to 10.10.0.0/16
with the mask of 255.255.255.0. Click the Farmington site, and then
click OK to create the subnet.
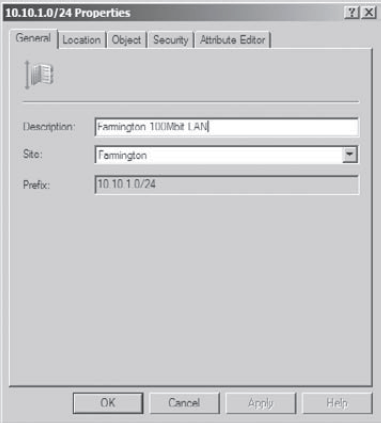
In the Active Directory Sites And Services tool, right-click the newly created 10.1.1.0/24 subnet object, and select Properties. On the subnet's Properties dialog box, type Farmington 100Mbit LAN for the description. Click OK to continue.
Create a new subnet using the following information: Address: 160.25.0.0/16 Site: Portsmouth Description: Portsmouth 100Mbit LAN
Finally, create another subnet using the following information: Address: 176.33.0.0/16 Site: CorporateHQ Description: Corporate 100Mbit switched LAN
The Active Directory Sites And Services tool should now look like this:

When finished, close the Active Directory Sites And Services tool.
|
So far, you have created the basic
components that govern Active Directory sites: sites and subnets. You
also linked these two components together by defining which subnets
belong in which sites. These two steps—creating sites and subnets—form
the basis of mapping the physical network infrastructure of an
organization to Active Directory. Now, look at the various settings
that you can make for sites.