When you first install SMS 2003, you should select
only those components or features that you know you’ll be using right
way. For example, you might decide to install the Remote Tools but not
the Package Automation Scripts. Later, your needs or your organization’s
needs might change, and you might find that you need to add a
component.
Adding a component that
has not yet been installed to your site installation is a relatively
easy process. You simply rerun setup from the source file CD or folder
and select that product from the Installation Options page. However,
once a component has been installed, it can’t be easily removed. For
example, if you chose to install Remote Tools during the initial
installation of your site and then later decided that you really don’t
want that component any longer, you can’t just rerun setup and clear
that option. To remove an option, you must uninstall the SMS site, and
then reinstall it without selecting that option during installation.
To modify your installation, follow these steps:
1. | Either
insert the SMS 2003 CD or run Setup.exe from the SMSSetup\Bin\I386
source file directory. The SMS Setup Wizard Welcome page is displayed as
it was during the actual installation. Click Next.
|
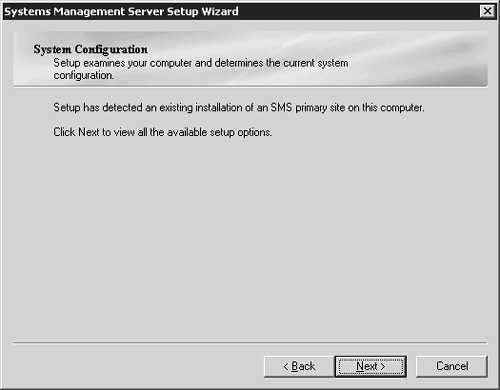
2. | Because
the Setup Wizard detects that you have already installed an SMS 2003
site server on this computer, it displays that information in the System
Configuration page, as shown in Figure 1.
|
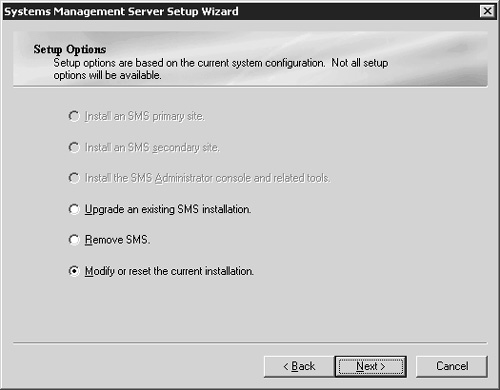
3. | Click Next to display the Setup Options page, as shown in Figure 2, and choose Modify Or Reset The Current Installation.
|
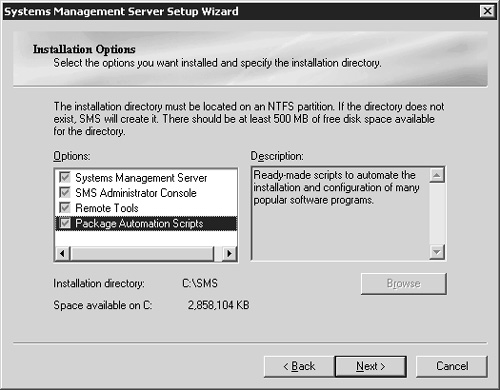
4. | Click Next to display the Installation Options page, as shown in Figure 3,
and select the additional SMS 2003 components or features you want to
install. Note that you can’t actually remove an option once it has been
installed without removing SMS 2003 and reinstalling it. The
instructions here merely remind you that you can both select and clear available options while on this page.
|
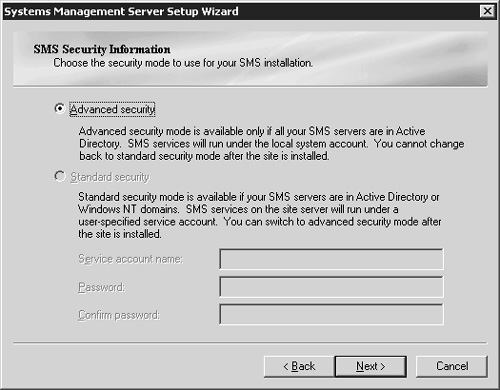
5. | Click Next to display the SMS Security Information page, as shown in Figure 4,
where you can identify to SMS any changes you have made to the SMS
Service account name or password if you installed using standard
security, or switch to advanced security at this time if you desire.
Caution Recall
that the SMS Service account’s information was originally provided by
you. A site reset merely informs SMS of any changes you might have made
to the SMS service account. It doesn’t make the changes in Windows for
you. If you need to modify the SMS service account name or password, you
must do so using Active Directory Users And Computers prior to running
setup. |
|
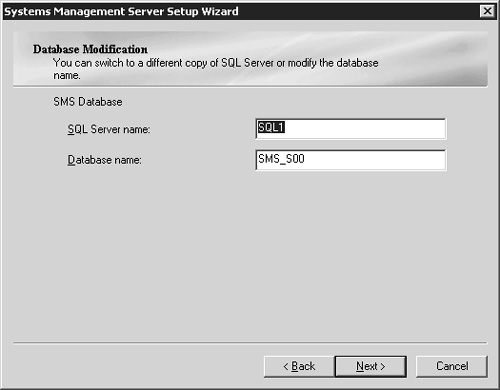
6. | Click Next to display the Database Modification page, as shown in Figure 5.
Make any SMS database modifications here. For example, if you moved the
database to a different server running SQL, enter that server’s name in
the SQL Server Name text box.
|
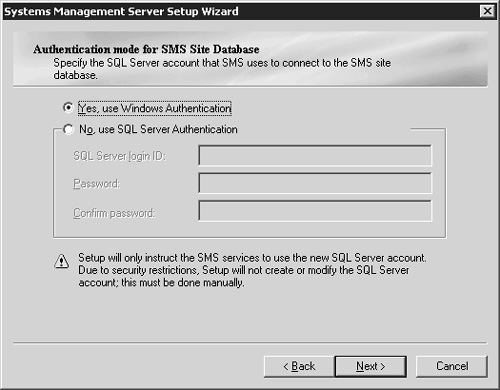
7. | Click Next to display the Authentication Mode For SMS Site Database page, as shown in Figure 6.
This page gives you the opportunity to switch between Windows
Authentication (recommended) and SQL Server Authentication for accessing
the SMS database. As with other database changes, this page assumes
that you have already made the appropriate security and account changes
in SQL Server.
|
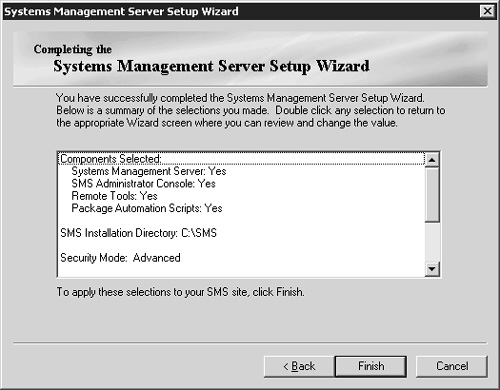
8. | Click Next to display the Completing The Systems Management Server Setup Wizard page, as shown in Figure 7.
Remember that you can click the Back button from any of these wizard
pages to return to a previous page and modify your entries. Confirm your
choices and then click Finish.
|
The
Setup Wizard will proceed to add components and modify parameters as
you specified. If it encounters any problems—for example, if you forgot
to modify SQL Server security before running Setup, SMS will display a
warning message giving you the opportunity to exit the Setup Wizard and
correct the problem.