Next, you’ll animate the appearance of the
director’s name in the composition using a text animation tracking
preset. By animating tracking, you can make words appear to expand
outward as they appear onscreen from a central point.
Customizing placeholder text
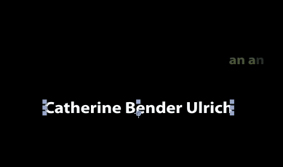
Currently, the director’s name is simply a layer with placeholder text—Your Name Here. Before you animate it, change it to your own name.
1. | Switch to the Credits timeline in the Timeline panel, and select the Your Name Here layer.
|
2. | Select the Horizontal Type tool ( ), and then replace Your Name Here
in the Composition panel with your own name. Use a first, middle, and
last name so that you have a nice long string of text to animate. Click
the layer name when you’re done. ), and then replace Your Name Here
in the Composition panel with your own name. Use a first, middle, and
last name so that you have a nice long string of text to animate. Click
the layer name when you’re done.

|
Note
It doesn’t matter where the current-time indicator is
located when you edit the text of this layer. Currently, the text is
onscreen for the duration of the composition. That will change once you
animate it.
Note
Again, the layer name doesn’t change, because it was named in Photoshop.
Applying a tracking preset
Now you will animate the director’s name with a tracking preset so that it starts to appear onscreen shortly after the words directed by reach the center of the composition.
1. | Go to 7:10.
|
2. | Select the Your Name Here layer in the Timeline panel.
Tip
If you’re tired of jumping to Adobe Bridge and don’t care to preview the preset, simply type Increase Tracking
in the search box of the Effects & Presets panel. Then double-click
the effect to apply it to the selected layer in the Timeline panel.
|
3. | Jump
to Adobe Bridge, and go to the Presets/Text/Tracking folder.
Double-click the Increase Tracking preset to apply it to the Your Name
Here layer in After Effects.
|
4. | Drag the current-time indicator across the time ruler between 7:10 and 9:10 to manually preview the tracking animation.
 |
Customizing the tracking animation preset
The
text expands, but you want the letters to be so close initially that
they’re on top of each other, and then to expand to a reasonable,
readable distance apart. The animation should also occur faster. You’ll
adjust the Tracking Amount to achieve both goals.
1. | Select the Your Name Here layer in the Timeline panel, and press UU to reveal the properties that were modified.
|
2. | Go to 7:10.
|
3. | Under Animator 1, change the Tracking Amount to -5 so that the letters are squeezed together.
 |
4. | Click the Go To Next Keyframe arrow ( ) for the Tracking Amount property, and then change the value to 0. ) for the Tracking Amount property, and then change the value to 0.
 |
5. | Drag
the current-time indicator across the time ruler between 7:10 and 8:10.
The letters expand as they appear onscreen, and stop animating at the
last keyframe. |