Creating Pixel Aligned Objects
Pixel aligned vector objects (New!)
allow you to create precisely drawn images that look crisp and sharp
for use on different outputs, such as the Web and mobile devices. The
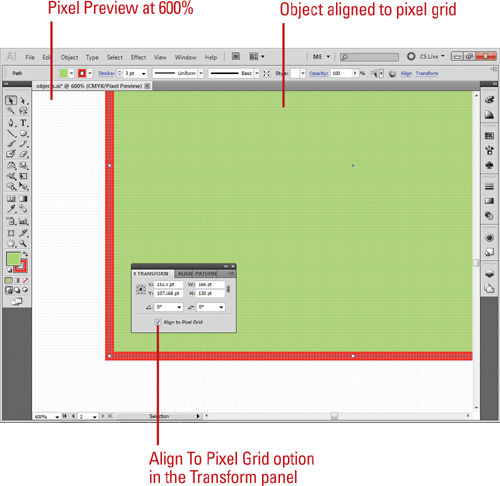
Align to Pixel Grid option enables the vertical and horizontal segments
of the paths of an object to be nudged and aligned to the pixel grid.
The stroke width become full integer values to create crisp paths. To
view the pixel grid, zoom to 600% or higher in Pixel Preview mode. The
Align to Pixel Grid option remains enabled with the object until it’s
disabled. You can set the option in the Advanced section of the New
Document dialog box or the Options menu on the Transform panel. The
option in the New Document dialog box, applies it any new objects in the
document. You cannot pixel-align objects without paths, such as
rasters, raster effects, and text objects.
Work with Pixel Aligned Objects
Align All Objects in a New Document. Click the File menu, click New, specify new document settings, select the Align New Objects To Pixel Grid check box in the Advanced section, and then click OK.
Align Existing Objects. Select the object, open the Transform panel, and then select the Align To Pixel Grid check box.

Not Align Objects. Select the objects you want to change, click the Select menu, point to Object, and then click Not Aligned To Pixel Grid.
View The Pixel Grid. Click the View menu, click Pixel Preview, and then zoom to 600% or higher (New!).
To set preferences for viewing pixel grid, click the Illustrator (Mac) or Edit (Win) menu, point to Preferences, click Guides & Grid, select the Show Pixel Grid (Above 600% Zoom) check box, and then click OK (New!).
Creating Rectangles and Ellipses
The
Illustrator Tools panel includes several tools for quickly creating
simple geometric vector shapes. They are easy to use; you just click and
drag on the Stage to create the shapes. The Rectangle tool creates
rectangles with square or rounded corners. The Ellipse tool creates
circular shapes such as ovals and circles. These shapes can be comprised
either of Strokes, which are lines that surround and define the shape,
or Fills, which can be a color or texture inside the shape, or both.
Draw an Ellipse or Circle
 Select the Ellipse tool on the Tools panel.
Timesaver
Press L to select the Ellipse tool.
 Select a Stroke and Fill Color from the Colors area of the Tools panel.

 Click and drag on the artboard, and then release the mouse.
Timesaver
Press and hold Shift while you drag to create a circle.

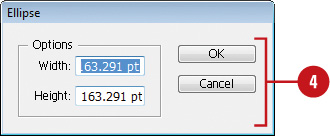
 To create an oval or circle with a specific width and height, click on
the artboard where you want the top left corner, enter width and height
values, and then click OK.

Did You Know?
You can enter values ranging from 0 to 100 points in the Rounded Rectangle Settings dialog box. A value of zero gives you a straight-sided-square. Higher numbers produce squares with more rounded sides.
You can draw shapes without a stroke or a fill. Set either of these properties to No Fill in the Colors section of the Tools panel or in the Color panel.
Draw a Rectangle or Rounded Rectangle
 Click the Rectangle or Rounded Rectangle tool on the Tools panel.
Timesaver
Press M to select the Rectangle tool.
 Select a Stroke and Fill color from the Colors area of the Tools panel.

 Click and drag on the artboard, and then release the mouse.
Timesaver
Press and hold Shift while you drag to create a square.

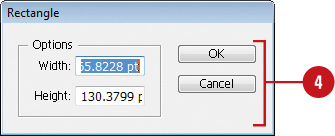
 To create a square, rectangle, or rounded rectangle with a specific
width and height, click on the artboard where you want the top left
corner, enter width and height values, and then click OK.

Did You Know?
You can change the corner radius for a rounded rectangle.
While you drag a rounded rectangle, press the Up Arrow or Down Arrow
key. To create square corners, press the Left Arrow key. To create
corners with maximum roundness, press the Right Arrow key.
You can draw shapes with no stroke or fill.
If you want to draw an oval or a rectangle without a stroke or fill,
you can set either of these options to No Fill in the Colors area of the
Tools panel or in the Color Mixer.
You can create a flare shape using the Flare tool. Select the Flare tool on the Tools panel, click and drag on the artboard, and then release the mouse.