Illustrator is a robust application that supports a
wide range of file formats. Although Illustrator does a great job
opening just about any graphic file format, it can also export files in
different file formats for a plethora of uses. To export a file from
Illustrator, choose File > Export, and then choose from one of the
many formats listed in the pop-up list in the Export dialog box. Each of
these formats is listed in the following sections, with descriptions of
their settings as well as when you might want to use them.
Remember that when exporting, it
is expected that some level of formatting or editability will be lost,
so always save a native Illustrator version of your file before you
export to another format.
|
Just as you can create single files with multiple artboards, so can you save and export files with them as well.
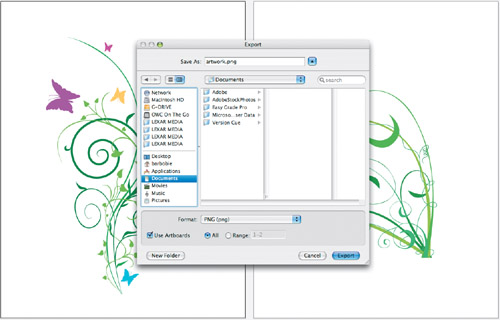
Choose File > Export, and choose your desired file format. In the Export dialog box, select Use Artboards (Figure 1),
and specify All or a range of artboards to export. When Range is
selected, Illustrator will export separate files for each artboard
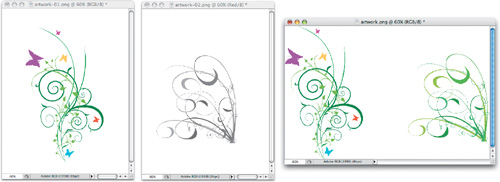
specified. File names will be appended with a 01, 02, 03, and so on. If
the Use Artboards option is not selected and your file contains multiple
artboards, a single file will be exported with the artboards converted
to a single, “conjoined” artboard (Figure 2).
|
The Bitmap (.bmp) Format
Bitmaps
are raster-based files that are often used in older applications.
Bitmaps are is also used by some applications for displaying logos or
bar codes.
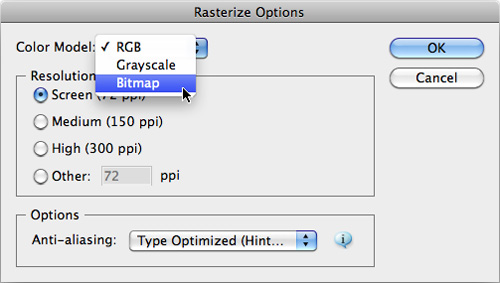
When exporting a bitmap, you
can choose one of three different color models: RGB, Grayscale, or
Bitmap. Bitmap creates a file that contains only black-and-white pixels (Figure 3). Additionally, you can specify the resolution for your image and choose whether to antialias the art.
The Targa (.tga) Format
The Targa file format is a
raster-based image format used mainly in video applications. For
example, you might use the Targa file format to add Illustrator artwork
as masks in Adobe Premiere Pro.
When exporting a Targa file,
you can choose one of two color models: RGB or Grayscale. Additionally,
you can specify the resolution for your image and choose whether to
antialias the art.
The Portable Network Graphic (.png) Format
The PNG file format (pronounced
“ping”) was originally formed as an open standard format to replace the
need for the GIF image file format, because of legal complications with
those who developed the compression technology used in the GIF format.
You can create PNG files from Illustrator using the Save for Web &
Devices feature. However, the PNG format also appears as an export
format because the Save for Web & Devices feature is hardwired at 72
ppi. To export a PNG file at any other resolution, you need to use the
PNG export function.
PNG is a raster-based image
format and is used for web design, icon and interface design, and
general image exchange. In fact, recent Apple operating systems (Mac OS X
versions 10.4, 10.5, and 10.6) create a PNG file when you take a screen
capture. PNG files can support 24-bit color, but more importantly, the
format also supports 256-level alpha channels for transparency, meaning
you can give images soft edges that fade to transparent (unlike the GIF
format, which supports one-color transparency only).
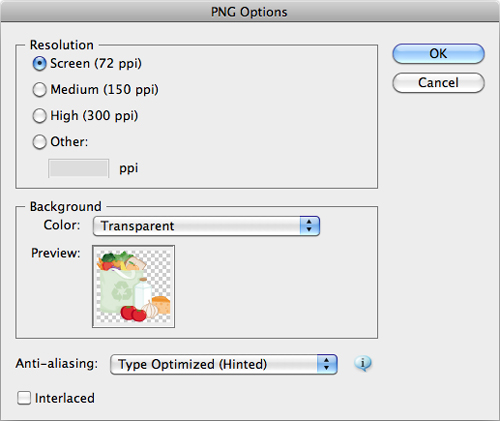
When exporting a PNG
file, you can specify your image resolution as well as the background
color. You can choose a transparent background, or you can choose Other
to select a color from the Color Picker (Figure 4). Additionally, you can specify antialiasing and interlacing.
One
of the most difficult things to do is create artwork in a professional
design application (such as Illustrator) and have that same artwork
display and print reliably in a business application such as Microsoft
PowerPoint. Finding the right file format for this workflow is difficult
because JPEG images don’t support transparent backgrounds and EPS files
don’t display well onscreen. In addition, EPS files require the use of a
PostScript printer, which most business professionals do not have.
After much research,
the folks on the Illustrator development team discovered that the PNG
format was perfect for placing art from Illustrator into Microsoft
Office documents. Because the format supports transparent backgrounds
and displays beautifully on computer screens, a PNG file set to a
resolution high enough to also print well results in great-looking art
in Office documents.
To save time and make it easier
to quickly export a file from Illustrator to use in Microsoft Office,
choose File > Save for Microsoft Office. Illustrator saves your file
as a PNG file set to 150 ppi with antialiasing turned on. Once you’ve
created the PNG file, you can place it into any Microsoft Office
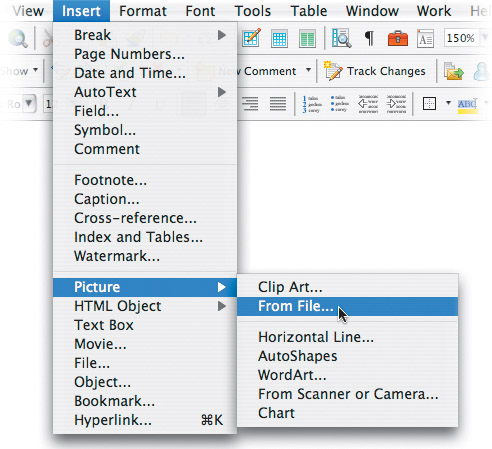
application by choosing the Insert Picture function in Word, Excel, or
PowerPoint (Figure 5).
Because of a bug in the Mac OSX
version of Microsoft Office, transparency in a PNG file does not appear
correctly at the default view setting (it does appear correctly when
viewed in full-screen mode and when printed). For this reason, the Save
for Microsoft Office command sets the background color to white instead
of transparent. If you are placing your art into Microsoft Office for
Windows, you can create a PNG with a transparent background by using the
PNG Export function.