Every Office program and workbook opens inside a window,
which contains a title bar, Ribbon, and work area, which is where you
create and edit your data. Most often, you’ll probably fill the entire
screen with one window. But when you want to move or copy information
between programs or documents, it’s easier to display several windows at
once. You can arrange two or more windows from one program or from
different programs on the screen at the same time. However, you must
make the window active to work in it. You can also click the document
buttons on the taskbar to switch between open documents.
Resize and Move a Window
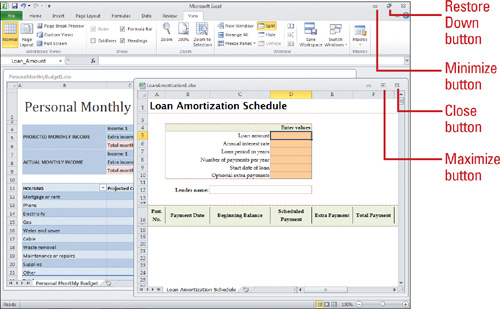
- Maximize button. Click to make a window fill the entire screen.
- Restore Down button. Click to reduce a maximized window to a reduced size.
- Minimize button. Click to shrink a window to a taskbar button. To restore the window to its previous size, click the taskbar button.
- Close button. Click to shut a window.
Resize and Move a Window Using a Mouse
 If the window is maximized, click the Restore Down button. If the window is maximized, click the Restore Down button.
 Use the following methods: Use the following methods:
- Move. Move the mouse over the title bar.
- Resize.
Move the mouse over one of the borders of the window until the mouse
pointer changes into a two-headed arrow. The directions of the
arrowheads show you the directions in which you can resize the window.
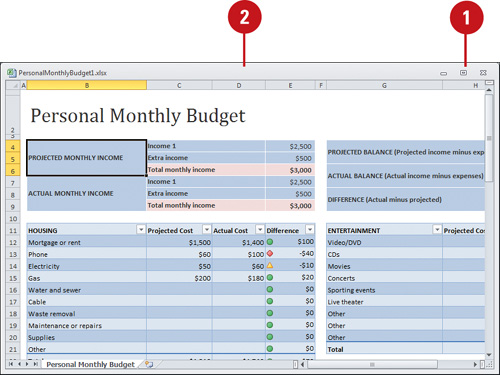
 Drag to move or resize the window. Drag to move or resize the window.
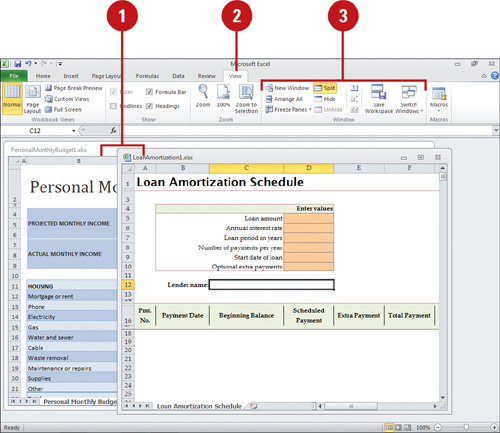
Arrange or Switch Between Windows
- Open the workbooks you want to arrange or switch between.
- Click the View tab.
- In the Window group, perform any of the following:
- Click Switch Windows, and then click the workbook name you want.
- Click Arrange, click an arrange window option (Tiled, Horizontal, Vertical, or Cascade), and then click OK.
- Click New Window to open a new window containing a view of the current workbook.
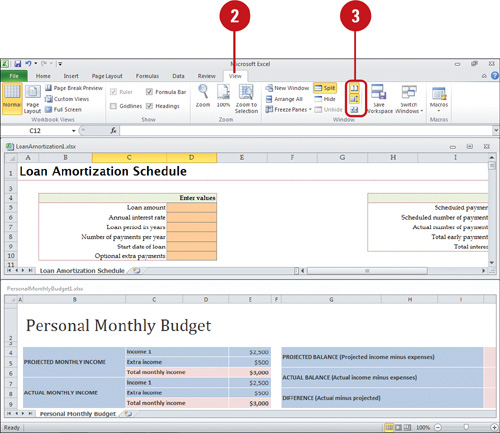
Compare Windows Side By Side
- Open the workbooks you want to arrange or switch between.
- Click the View tab.
- In the Window group, perform any of the following:
- Click the View Side By Side button to compare two worksheets vertically.
- Click the Synchronous Scrolling
button to synchronize the scrolling of two documents so that they
scroll together. To enable this feature turn on View Side By Side.
- Click the Reset Window Position
button to reset the window position of the documents being compared
side-by-side so that they share the screen equally. To enable this
feature turn on View Side By Side.
|